

An itch.io project of mine has been getting a little attention recently, and I wanted to get alerts for new purchases, instead of obsessively checking the website. I saw this kickstarter alert desk bell project a few years ago, and thought it would work great.
Here’s my finished project:
It runs a web server waiting for a JSON payload, and then rings the bell the appropriate number of times.
Build
Parts list:
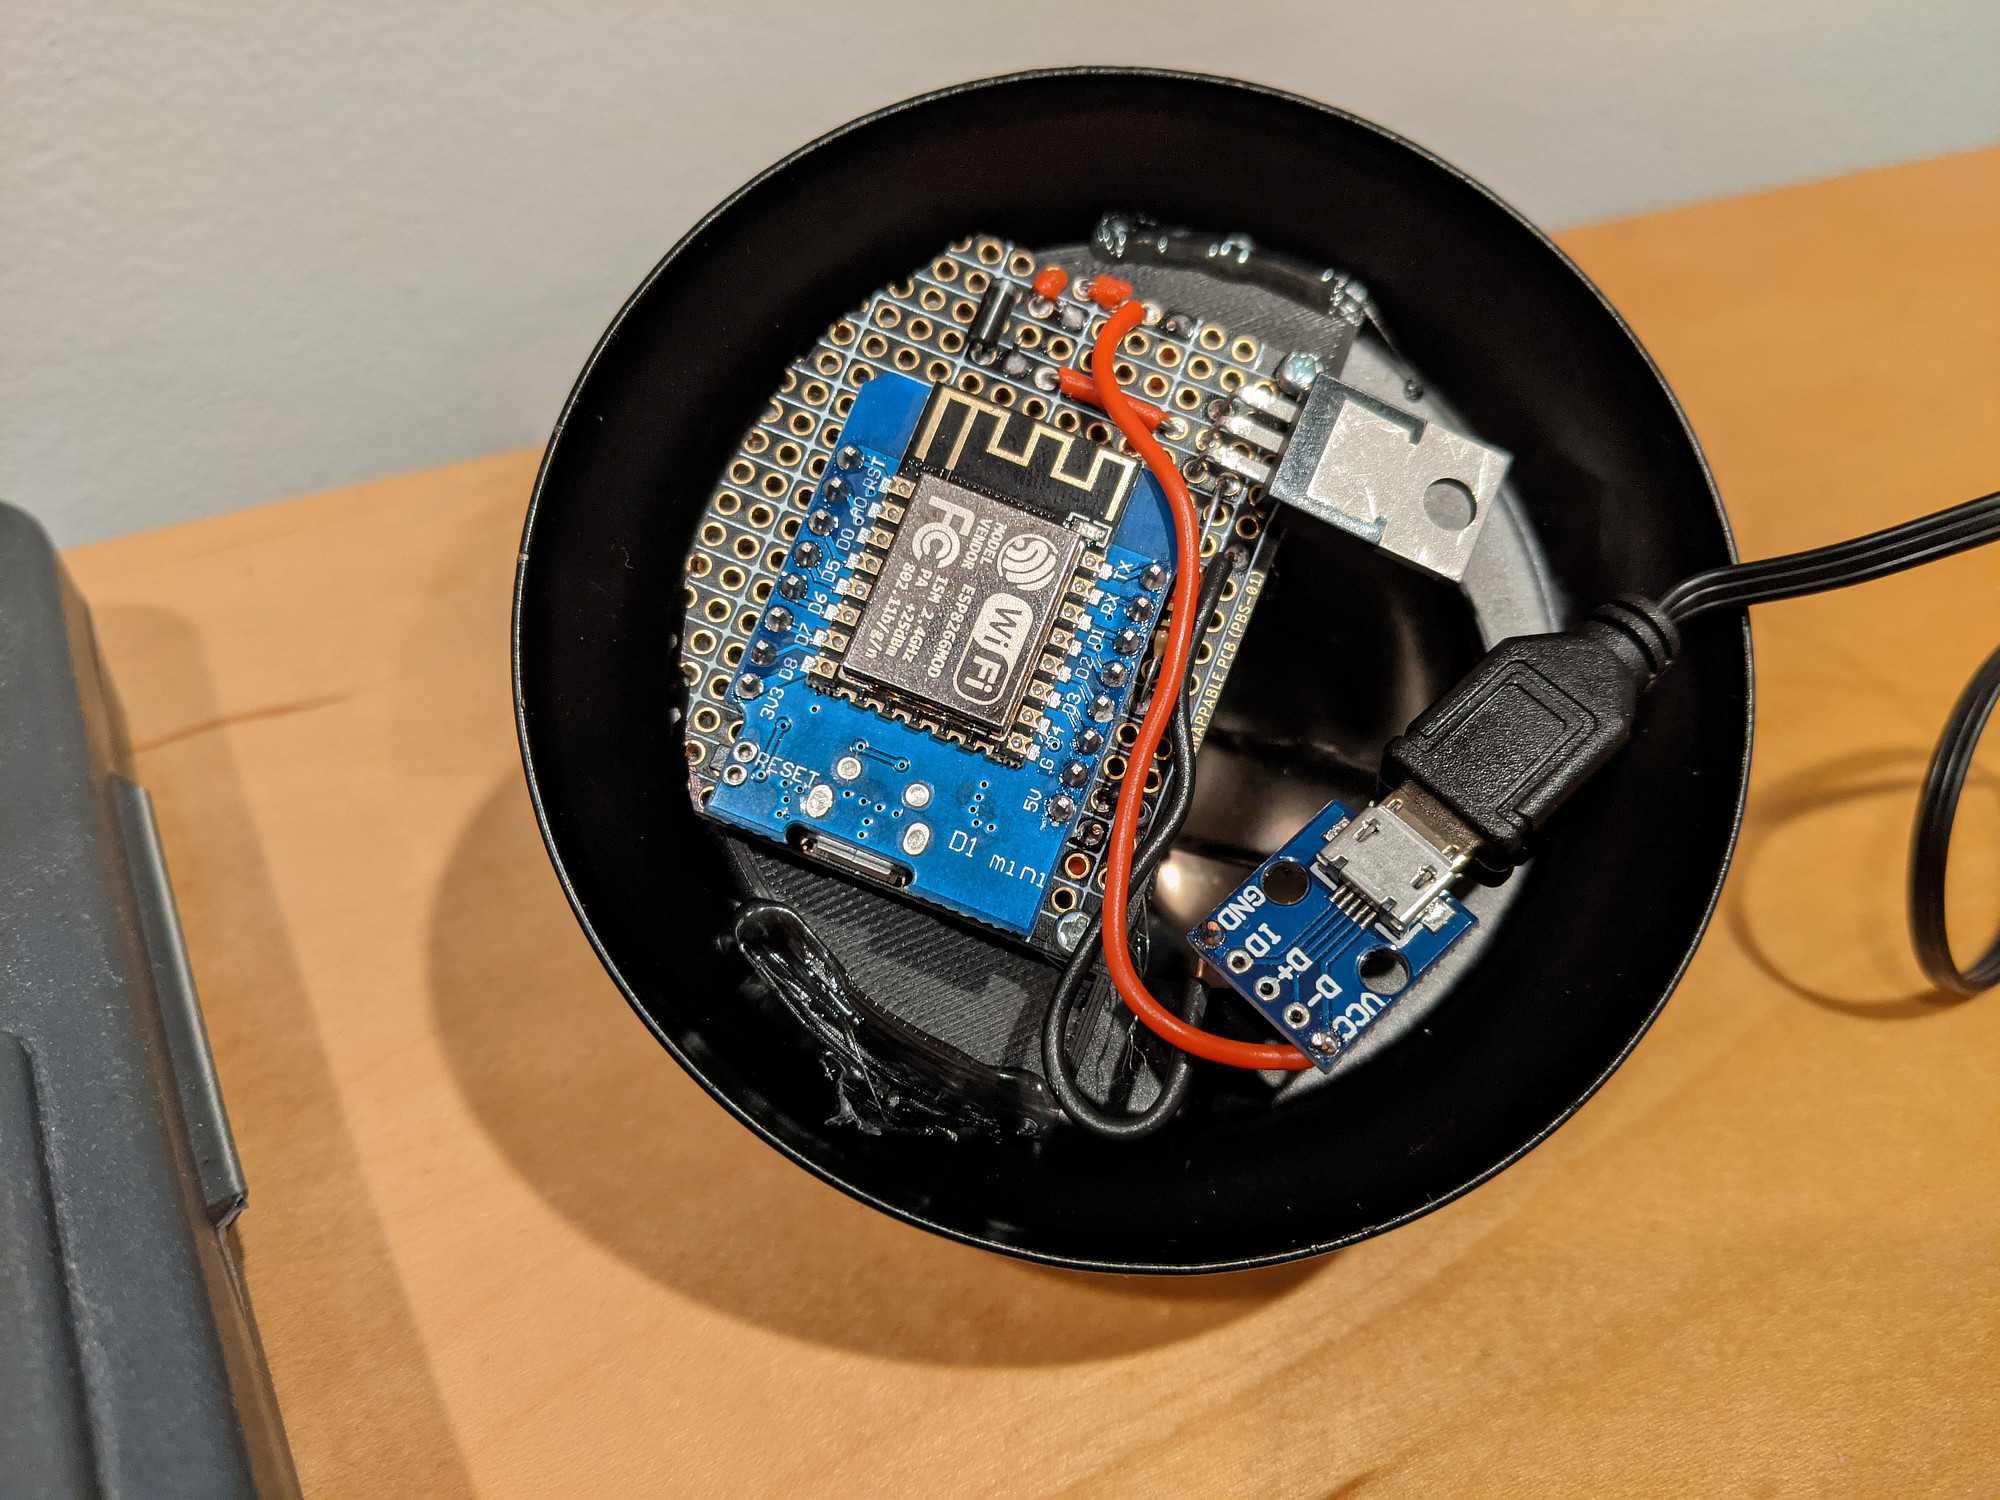
- $3 Wemos D1 clone arduino board
- $5 5v mini solenoid. This is perfect for this use case
- 1k resistor
- TIP120 transistor
- 1n4004 diode
- Electrocookie solderable perfboard (really nice)
- USB breakout board from another project.
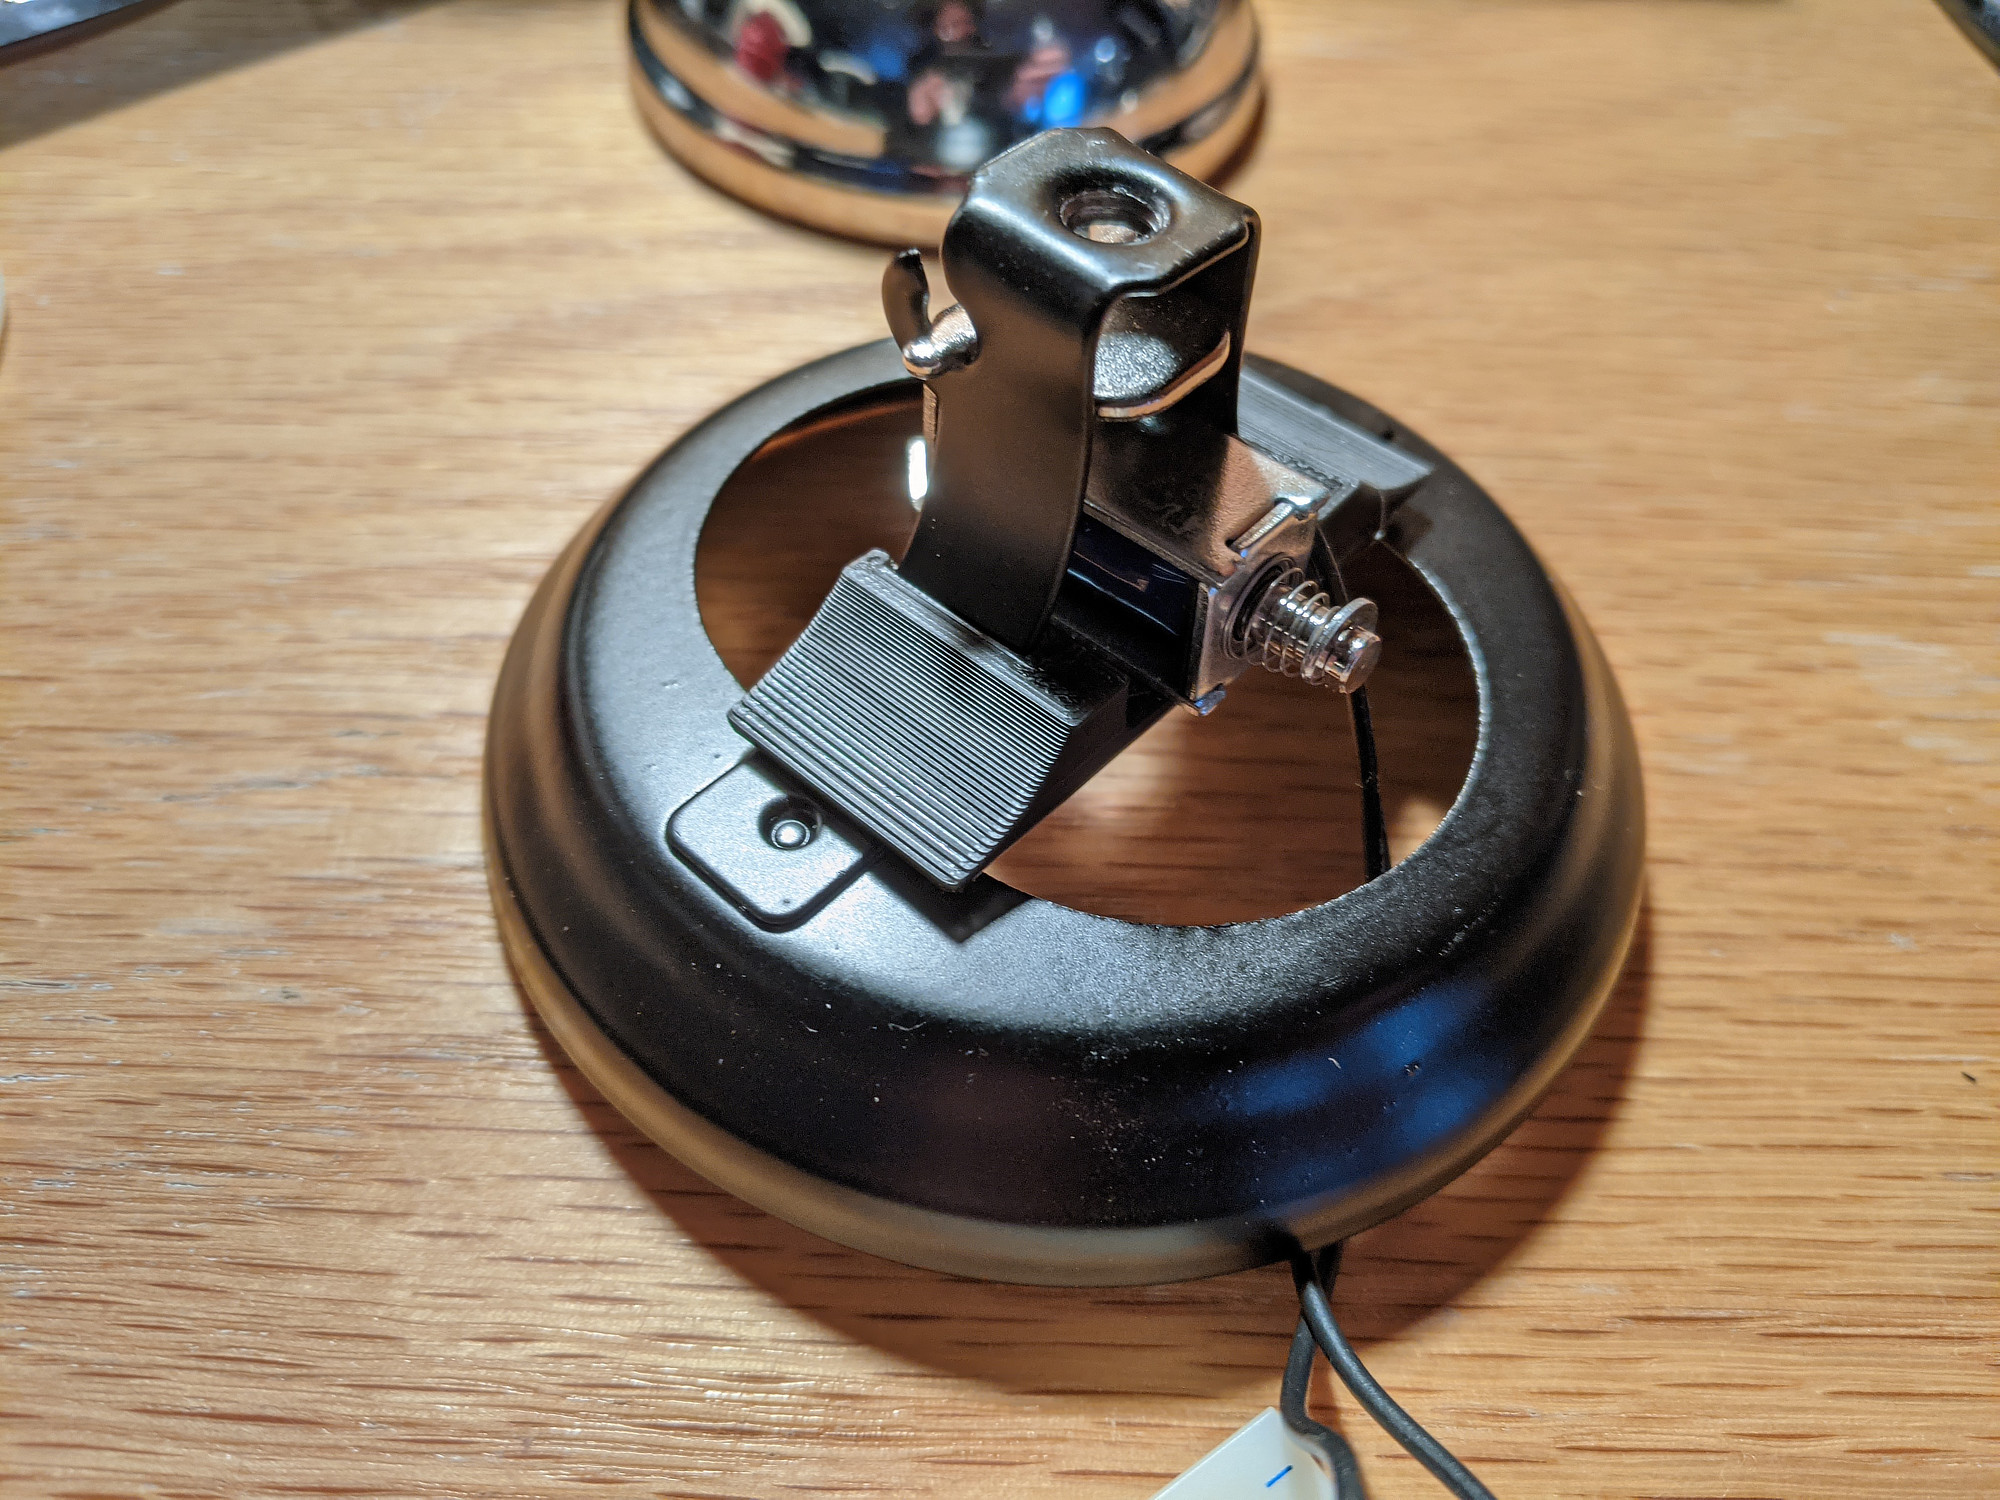
To mount the solenoid to the bell frame I 3D printed a small mount. The solenoid frame had two M2 threaded hole that made mounting easier. The mount clips onto the frame, but ought to sit a few mm lower. The nice thing about this design is that the bell can still be used normally if needed… Not sure when I’d need that.
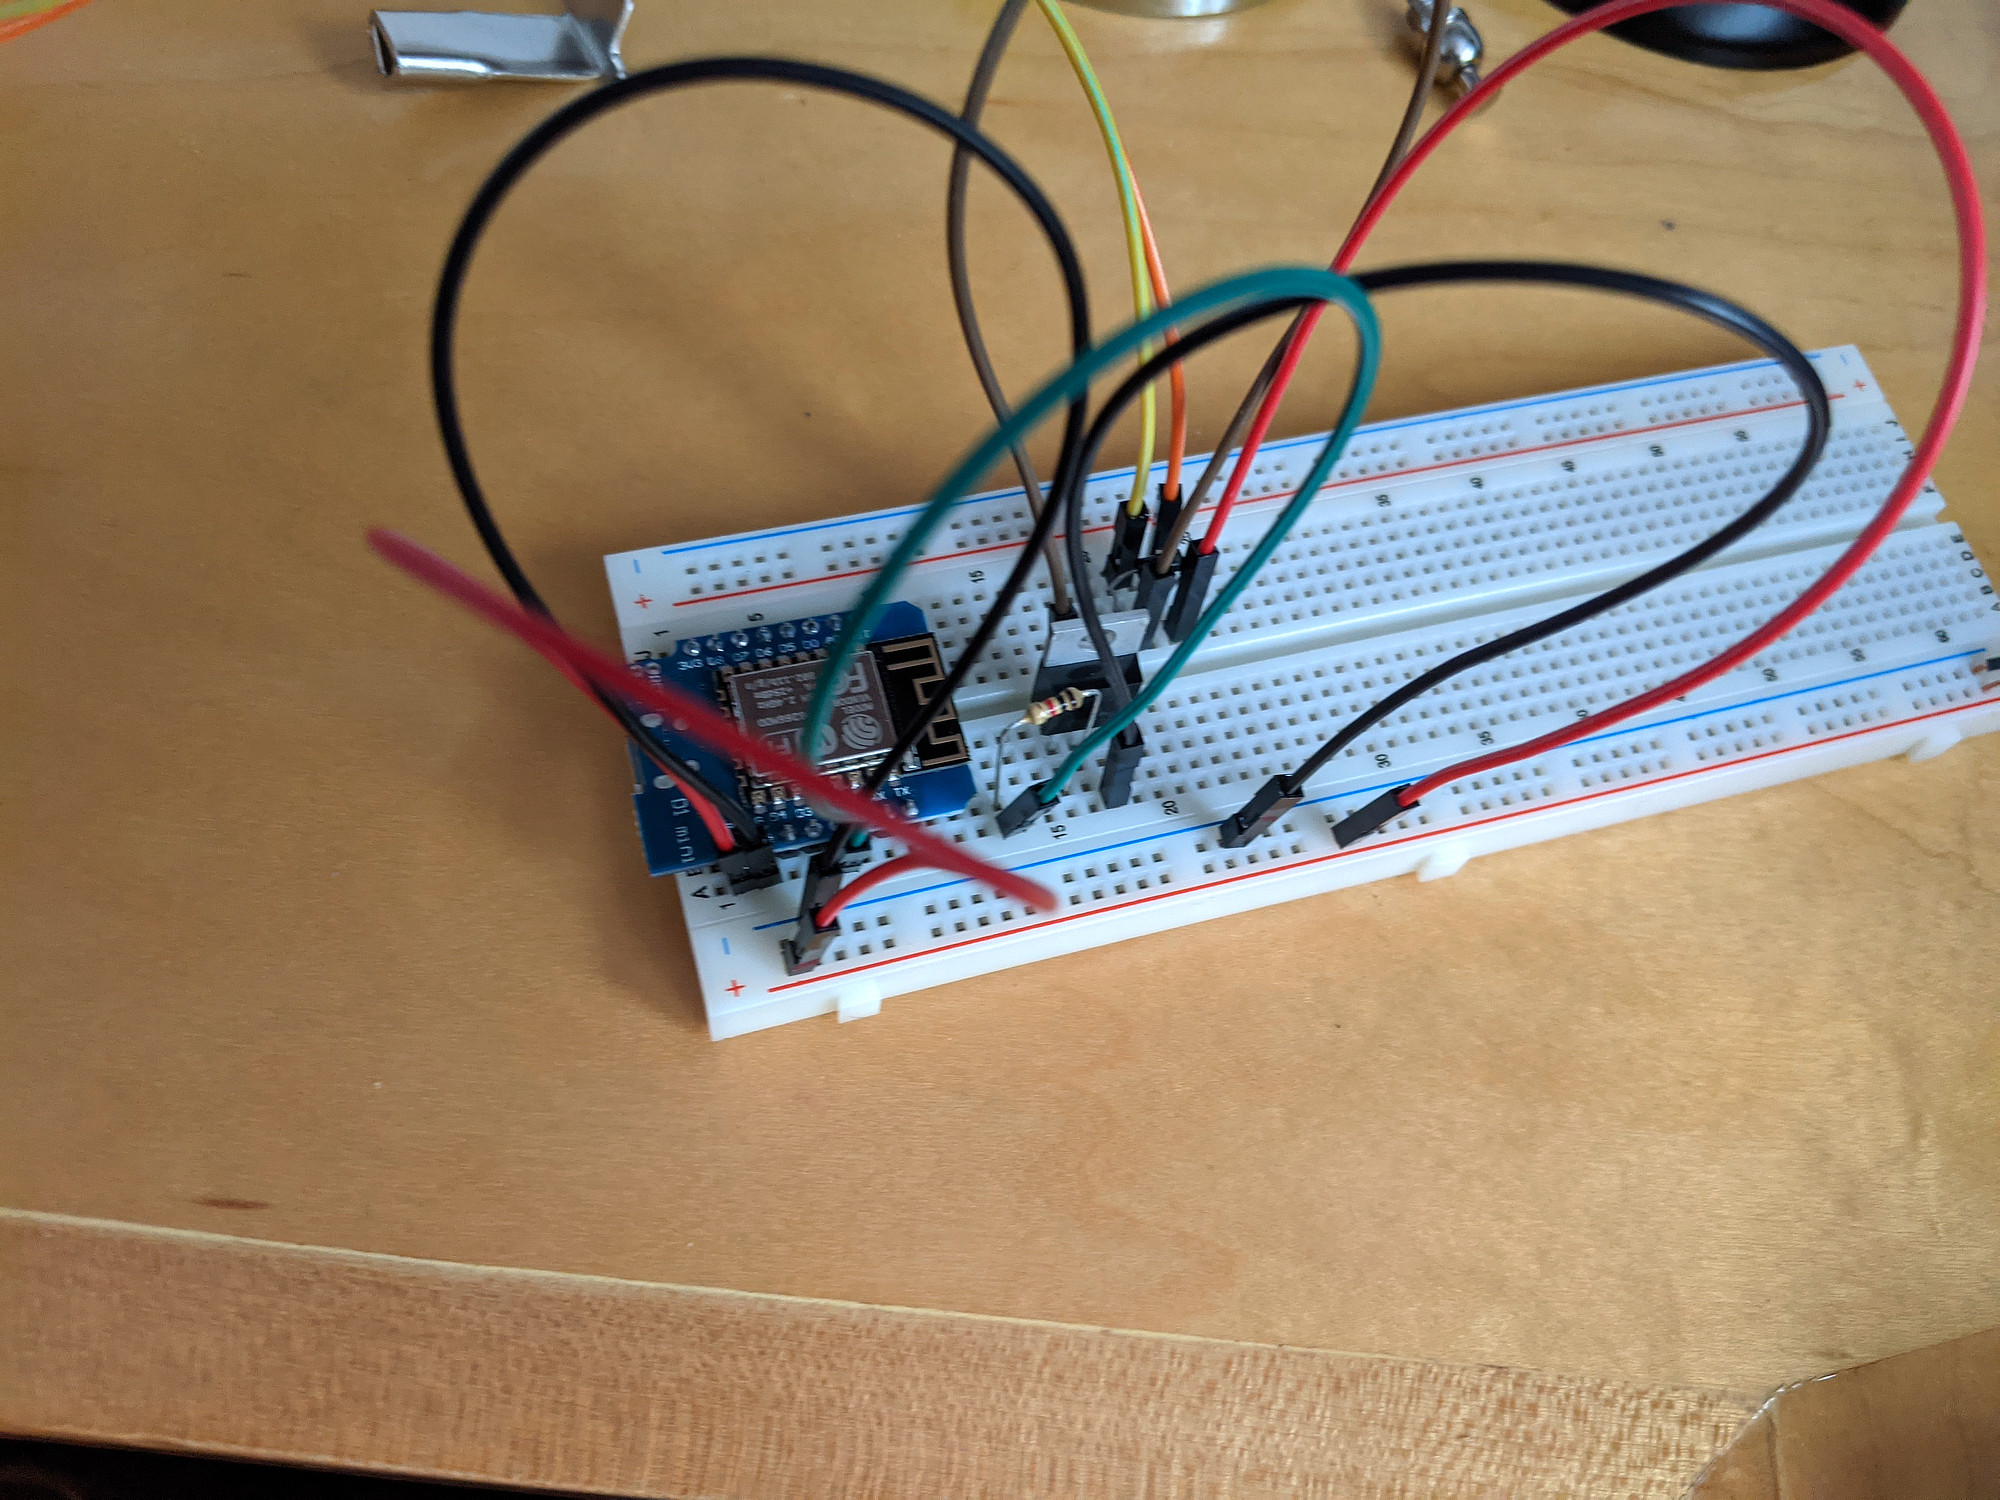
I did a bunch of tests on a breadboard since I’m still new to electronics projects, first with just the solenoid to make sure it would ring clearly and later with the arduino. I did most of the design with a NodeMCU but switched to the smaller Wemos D1 when I ran out of space.
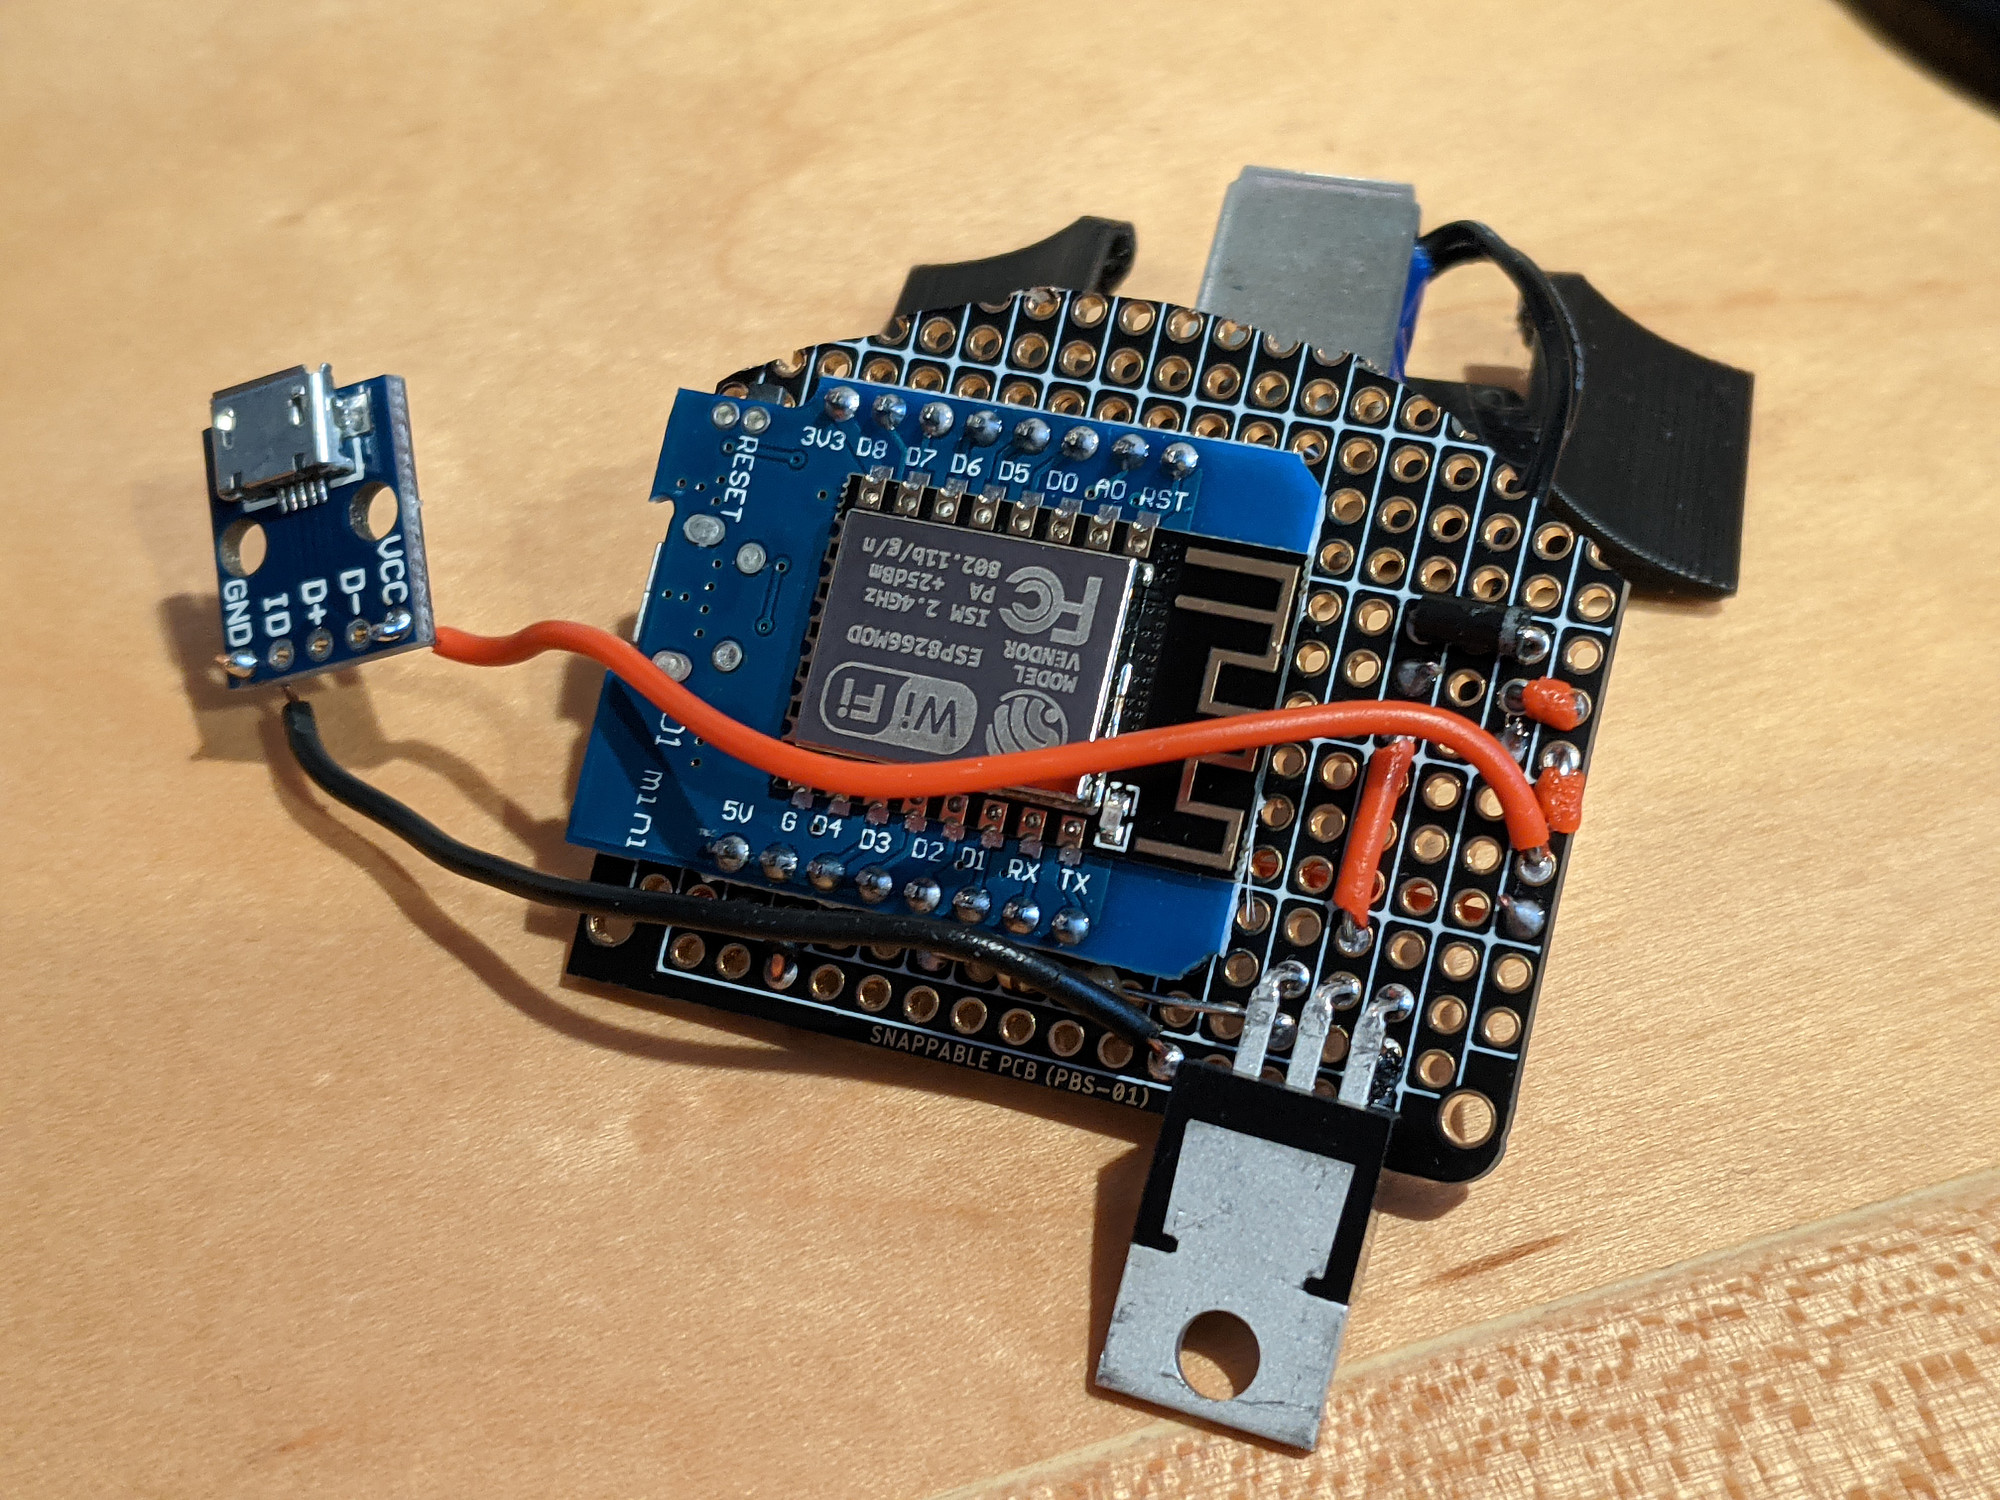
One thing I didn’t anticipate when I started is that the clapper (the part of the bell that swings) sits low into the the bottom base in its resting position. This reduced the available space underneath by about half, so I made a paper template and then cut an arc into one side of the (previously square) perfboard with a jewelers saw.
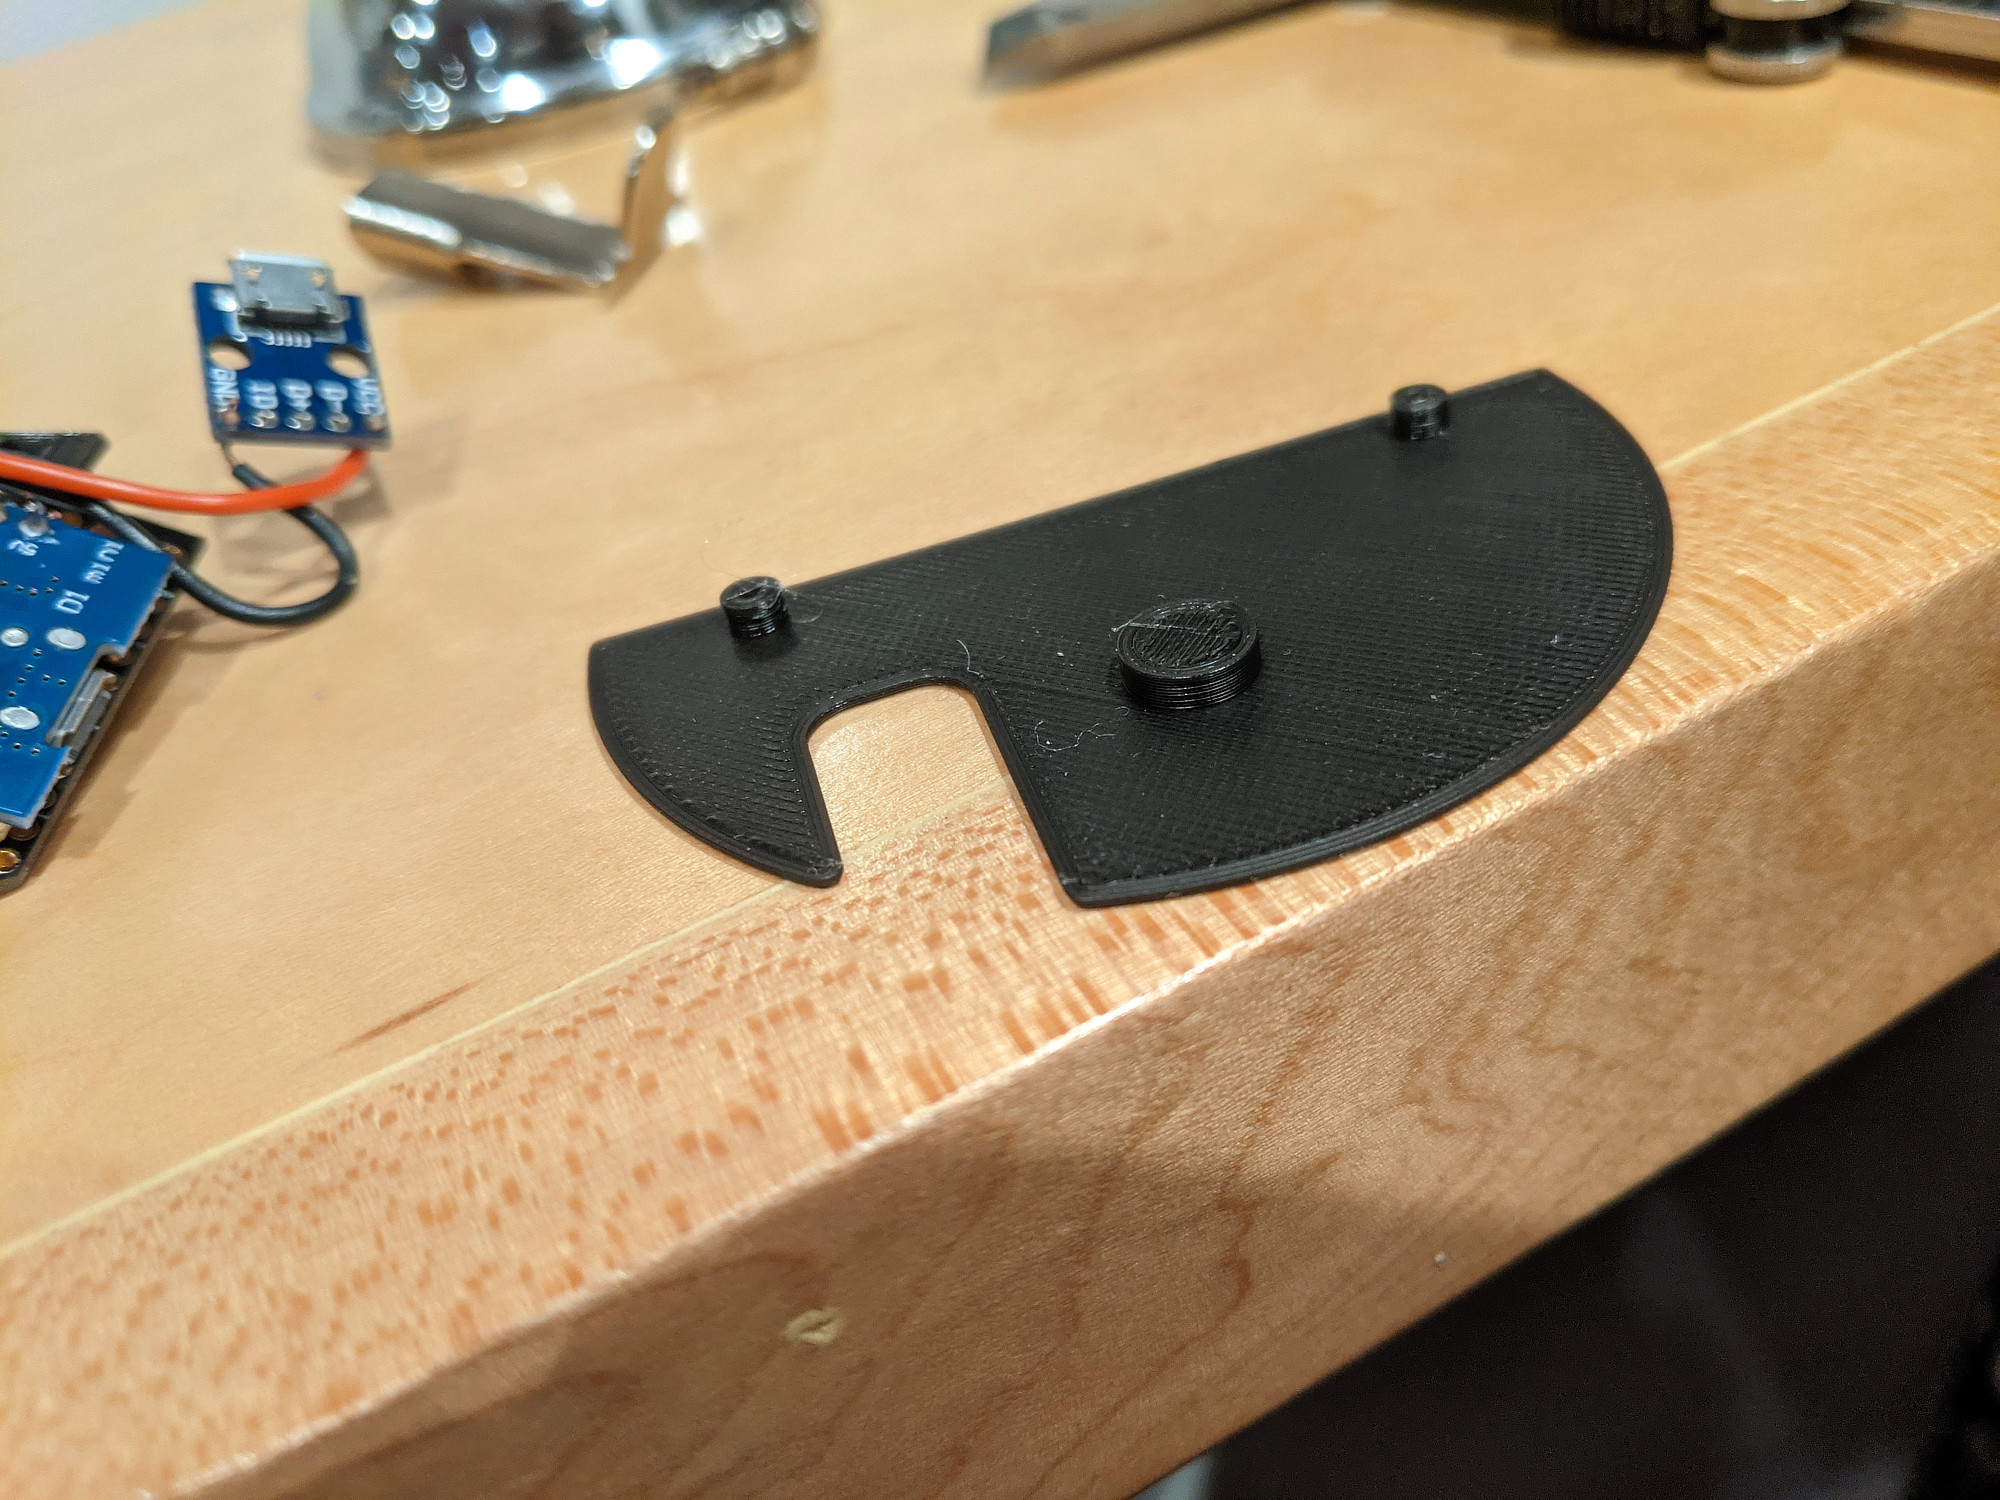
I also 3D printed this simple mount, mostly to keep any of the circuit from contacting the metal frame. The board holds to it nicely, but I haven’t designed a good mount for it, so I just hotglued it in place for now.
There’s more stuff I’d like to do:
- 3D print the whole base for better mounting points and more space
- LEDs (I have an LED ring that fits really nicely in the diameter of the bell, but there isn’t really enough room for it right now)
- Proper outlet mounting instead of just sneaking a thin cable underneath the base
Software
For the firmware, I’m using arduino fsm to handle state changes and delays, since I want the solenoid to activate for about 150ms and then wait a couple of seconds before it can activate again. I need this to be non-blocking, so that I can also respond to web requests and later do some LED animation. The webserver and wifi code is mostly taken from the default ESP8266 examples.
For some reason, the D1 etc. pin constants did not work for me when using the Wemos D1 board profiles, using the correct GPIO pin instead did, so I didn’t investigate further.
It waits for a request with valid basic auth credentials, and a JSON body with a count value, ex:
curl -s -i -u username:password \
  --header "Content-Type: application/json" \
  --request POST \
  --data '{"count": 2}'