
I do a lot of multicolor 3d printing, where more than one color is printed on the same layer using manual filament swapping, and I wanted to share some tips that I haven’t seen collected everywhere.
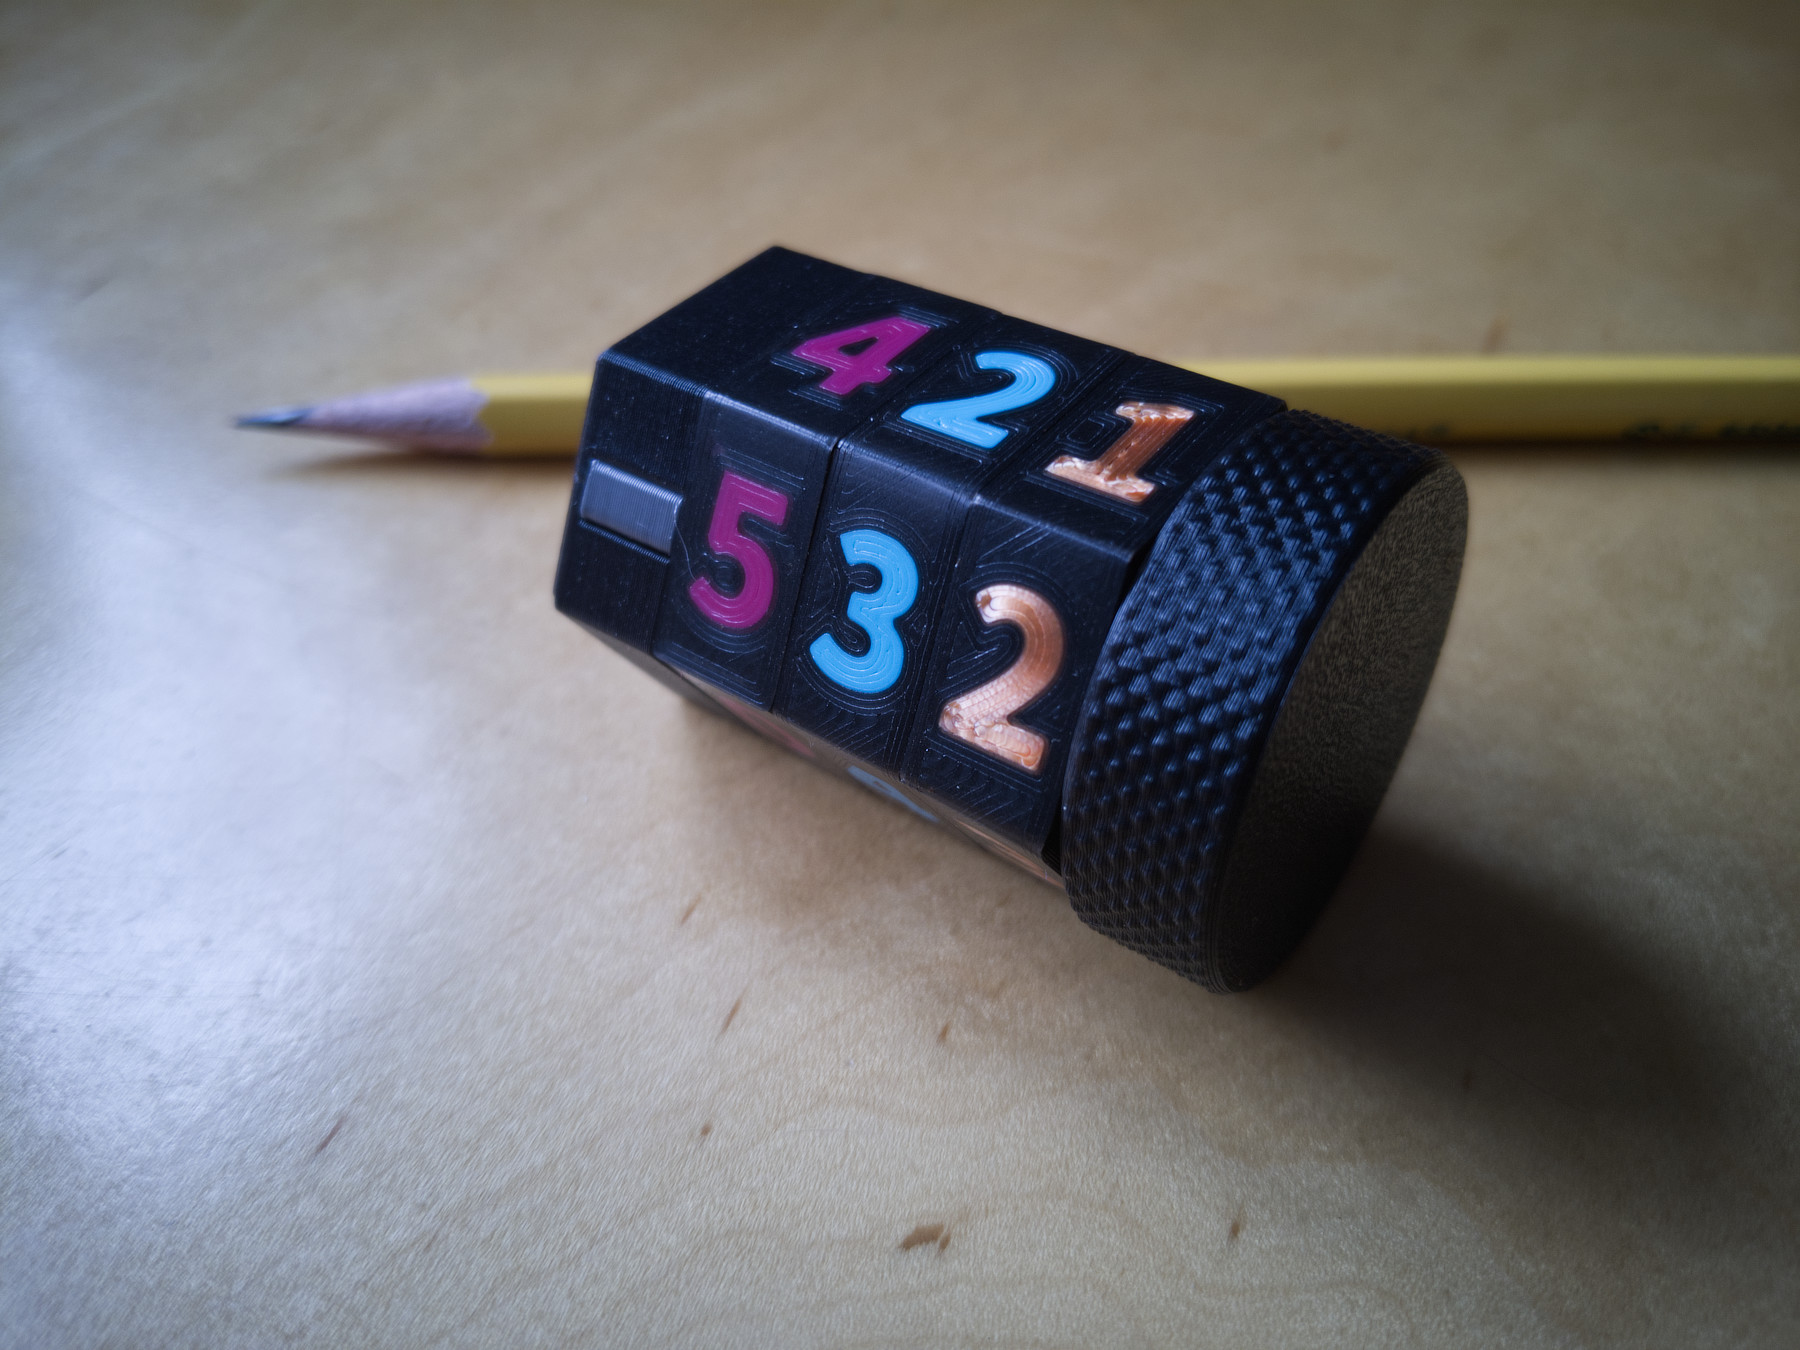
Some of this applies to layer/height-based color swapping, but this is directed specifically at the above, AKA the poor-man’s MMU.
This is pretty easy to set up in PrusaSlicer, and probably other slicers as well, but I don’t have as much experience with them.
Setup
First, create a new printer with two (or more) configured extruders, one extruder for each color you’d like to use in your print.
In the Custom G-code tab, set the Tool change G-code value to m600.
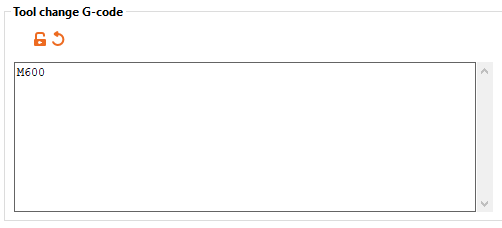
This triggers a manual filament change when changing extruders.
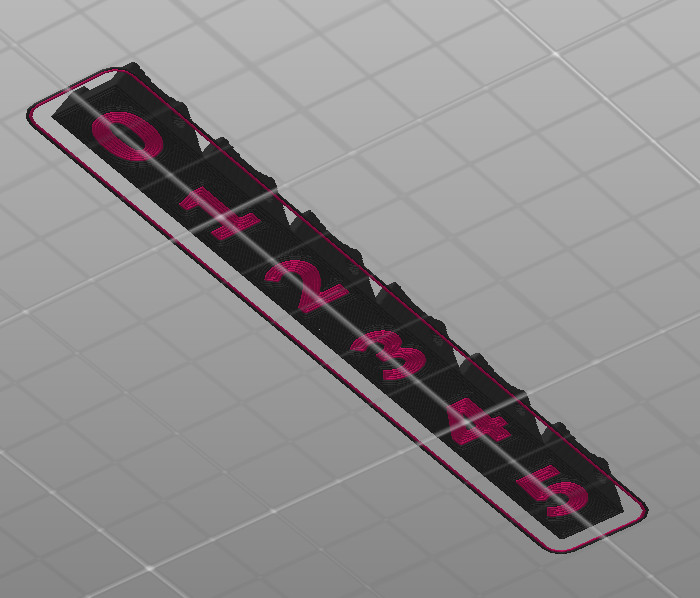
Lastly, import your multipart object, select it and press the “Split To Parts” button in the toolbar.
Next, assign the appropriate extruder to each part in the part list.
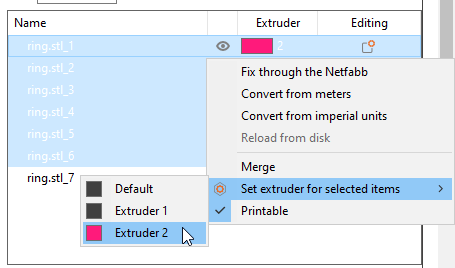
Extruder 1 will be used first, so use that one for the background color, and use extruder 2 for your inlay. Otherwise you’ll end up doing an extra color swap.
Tip 1: Minimizing filament swaps
Without an automatic filament changer, you’ll may want to minimize the number of manual filament swaps.
For top or bottom-layer inlays, I usually stick to a total of two colors, two layers thick. This allows two-color prints with a total of two filament changes.
Additional colors add one more swap per color per layer.
number_of_swaps = layer_count * (colors - 1)
Tip 2: Filament opacity
For text inlays and similar small details, you’ll want to use a filament that is as opaque as possible. Transparent colors, especially over dark “background” colors, will appear dim and muddy.
When using a less opaque filament, a white or light colored filament for the background will be more forgiving.
A small test print is recommended to make sure your colors will look OK at the layer thicknesses you’re using, especially if your prints are large or complex.
Tip 3: Use a wipe tower
This actually serves two purposes. Obviously, it allows a reliable color change with configurable purge volumes without as much baby sitting while changing filament, but it also has another side effect.
Without a wipe tower, the m600 filament change event will take place when the extruder has completed the last object of that color for a layer, and when that’s complete, the extruder will return to the last location, before moving on to the next object location.
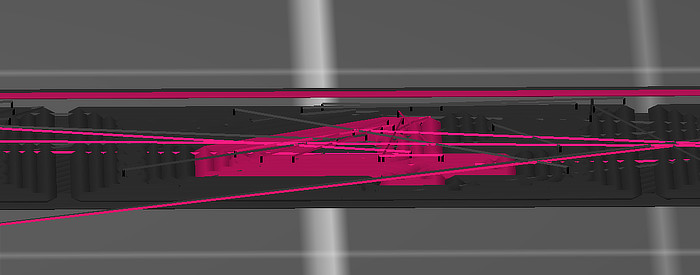
This can cause a small, circular dot of the new filament color in the last object location, which can be pretty noticeable with certain colors, or when printing on the top layer.
With a wipe tower, the extruder will first be moved to the wipe tower area, then initiate swap filament, and then will return to the wipe tower for purging, which prevents the wrong-color-spot.
The tower is still very efficient for prints where the bottom layer(s) have a color change, since the wipe “tower” will only be two layers thick.

Tip 4: Z-hop
On layers where there will be filament swapping, add a small Z-hop. This prevents any small blobs from getting dragged across the printed surface. This is not usually noticeable with single color prints, but can stand out more with contrasting colors. The z-hop setting prevents this by raising the extruder up a little bit for travel moves.
In PrusaSlicer, this is configured per extruder (so you’ll need to set it more than once) under Printer Settings -> Extruder x, under “Lift Z”. You’ll need to enable retraction if you don’t already, or the setting will be disabled. You can limit the range where Lift Z is enabled in the setting below it.