While there’s certainly no shortage of markdown editors available, I wanted something more specific. Namely,
a better way to organize markdown files.
Markdown files can be grouped together by category, directory, or tag, and that metadata is stored in an standard and
portable way: as YAML at the beginning of the file, for example:
---title:My Document Titlecategory:Schooltags:-notes-todo---## My Heading
Lots of notes go here
I use JotDown for organizing and planning projects, campaign notes and ideas for tabletop games, and journaling for
longer term projects.
Maybe it’ll be useful for somebody else as well.
It also supports all or most of the usual markdown editor features, but also includes:
Rendering of flow charts and sequence diagrams
Markdown preview including synced checkbox lists
Typewriter and distraction free modes
Vlambeer-inspired powermode. Makes writing streaks more exciting
However, I haven’t spent any money on it yet, and that means that neither the Windows build, nor the (untested) Mac
build have been code-signed. That means that your operating system is likely to either show you a warning when running
this application, or may prevent you from running it entirely.
If there’s enough interest to warrant the cost, I’ll get one or both of those signed in the future.
Like the G13, I wanted an analog thumb joystick, but also wanted to incorporate some ergonomic improvements from other keyboard designs, such as the Dactyl keyboard, Dactyl Manuform, Kinesis Advantage, and the Ergodox. Namely, column-staggered keys, height offsets, column curvature, and a more comfortable overall tilt.
I chose low-profile keyboard switches (linear Kailh Choc switches from NovelKeys) to reduce the overall required height, in part because my desk sits higher than a comfortable typing height, with a large tray below. I have about four inches of available space between the tray and the underside of the desk top for both the keyboard and my hand. If that space isn’t an issue, I’d strongly recommend a more compatible switch, as the keycap variety available for these ones are extremely limited.
I’d also recommend starting with the Dactyl or Dactyl-Manuform above, since designing this took way more time and effort than I could have guessed.
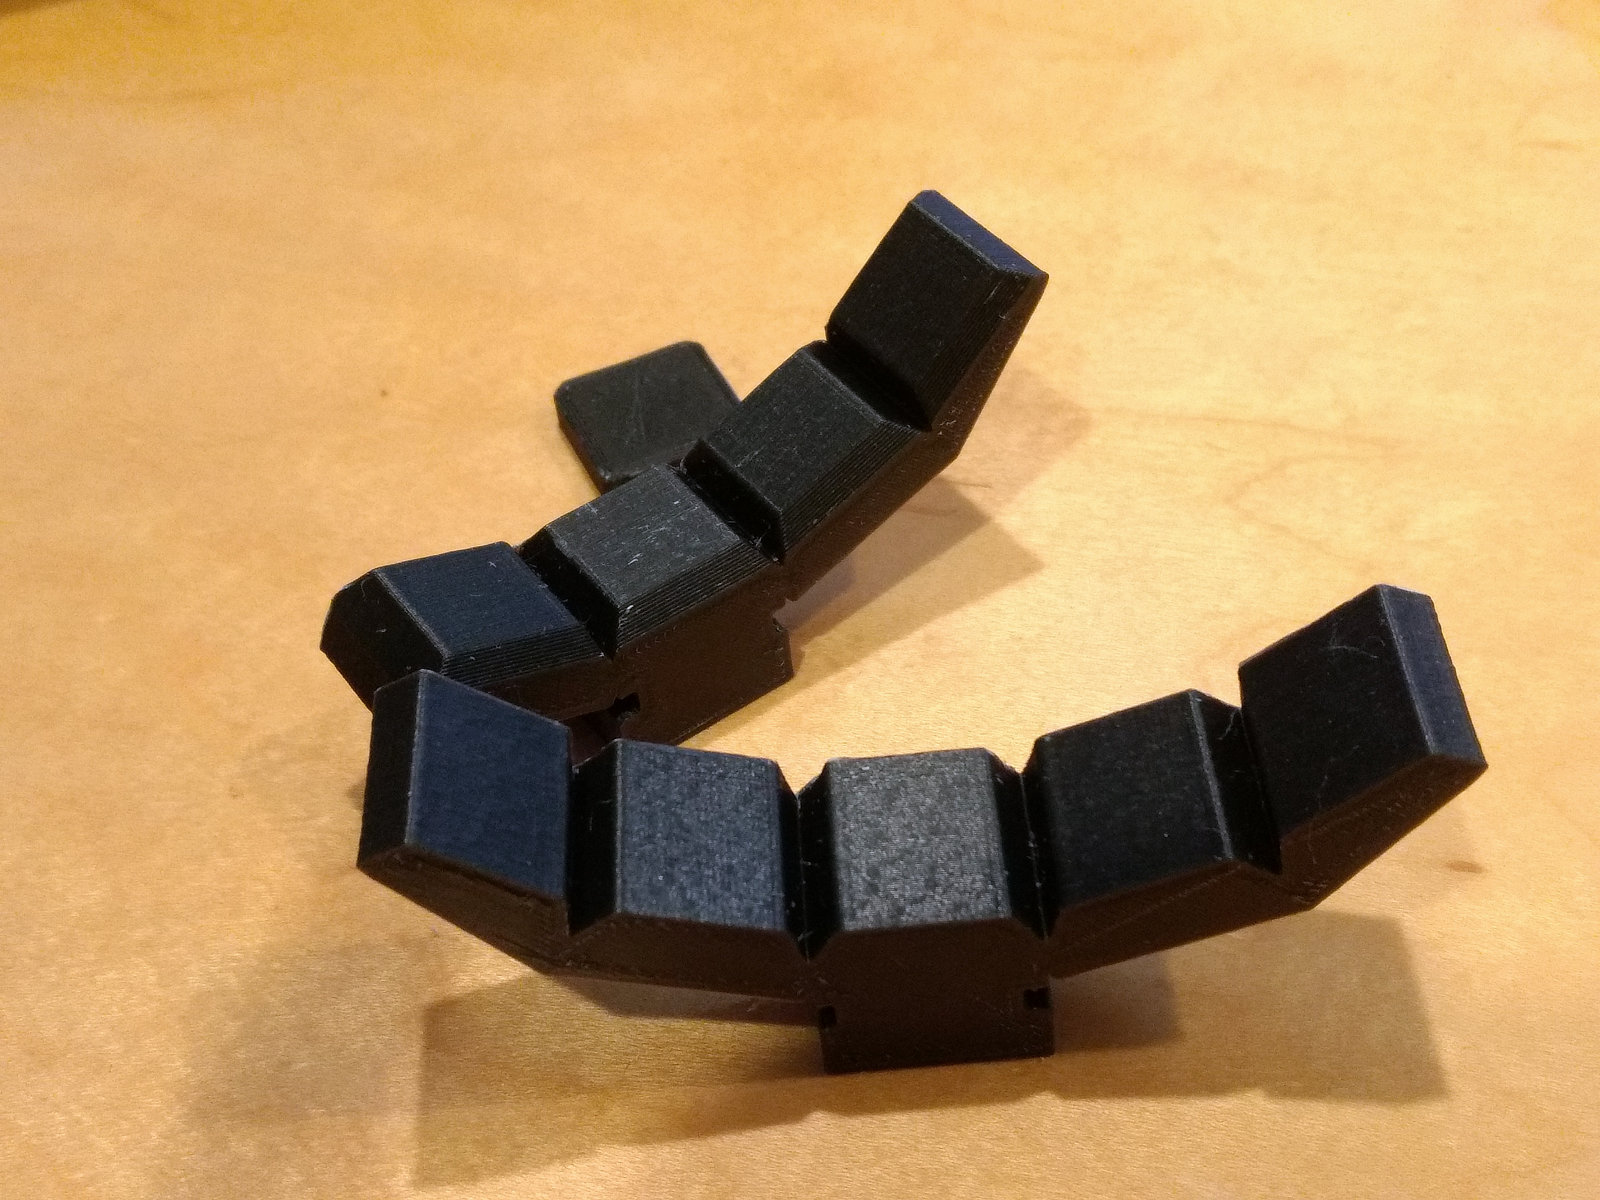
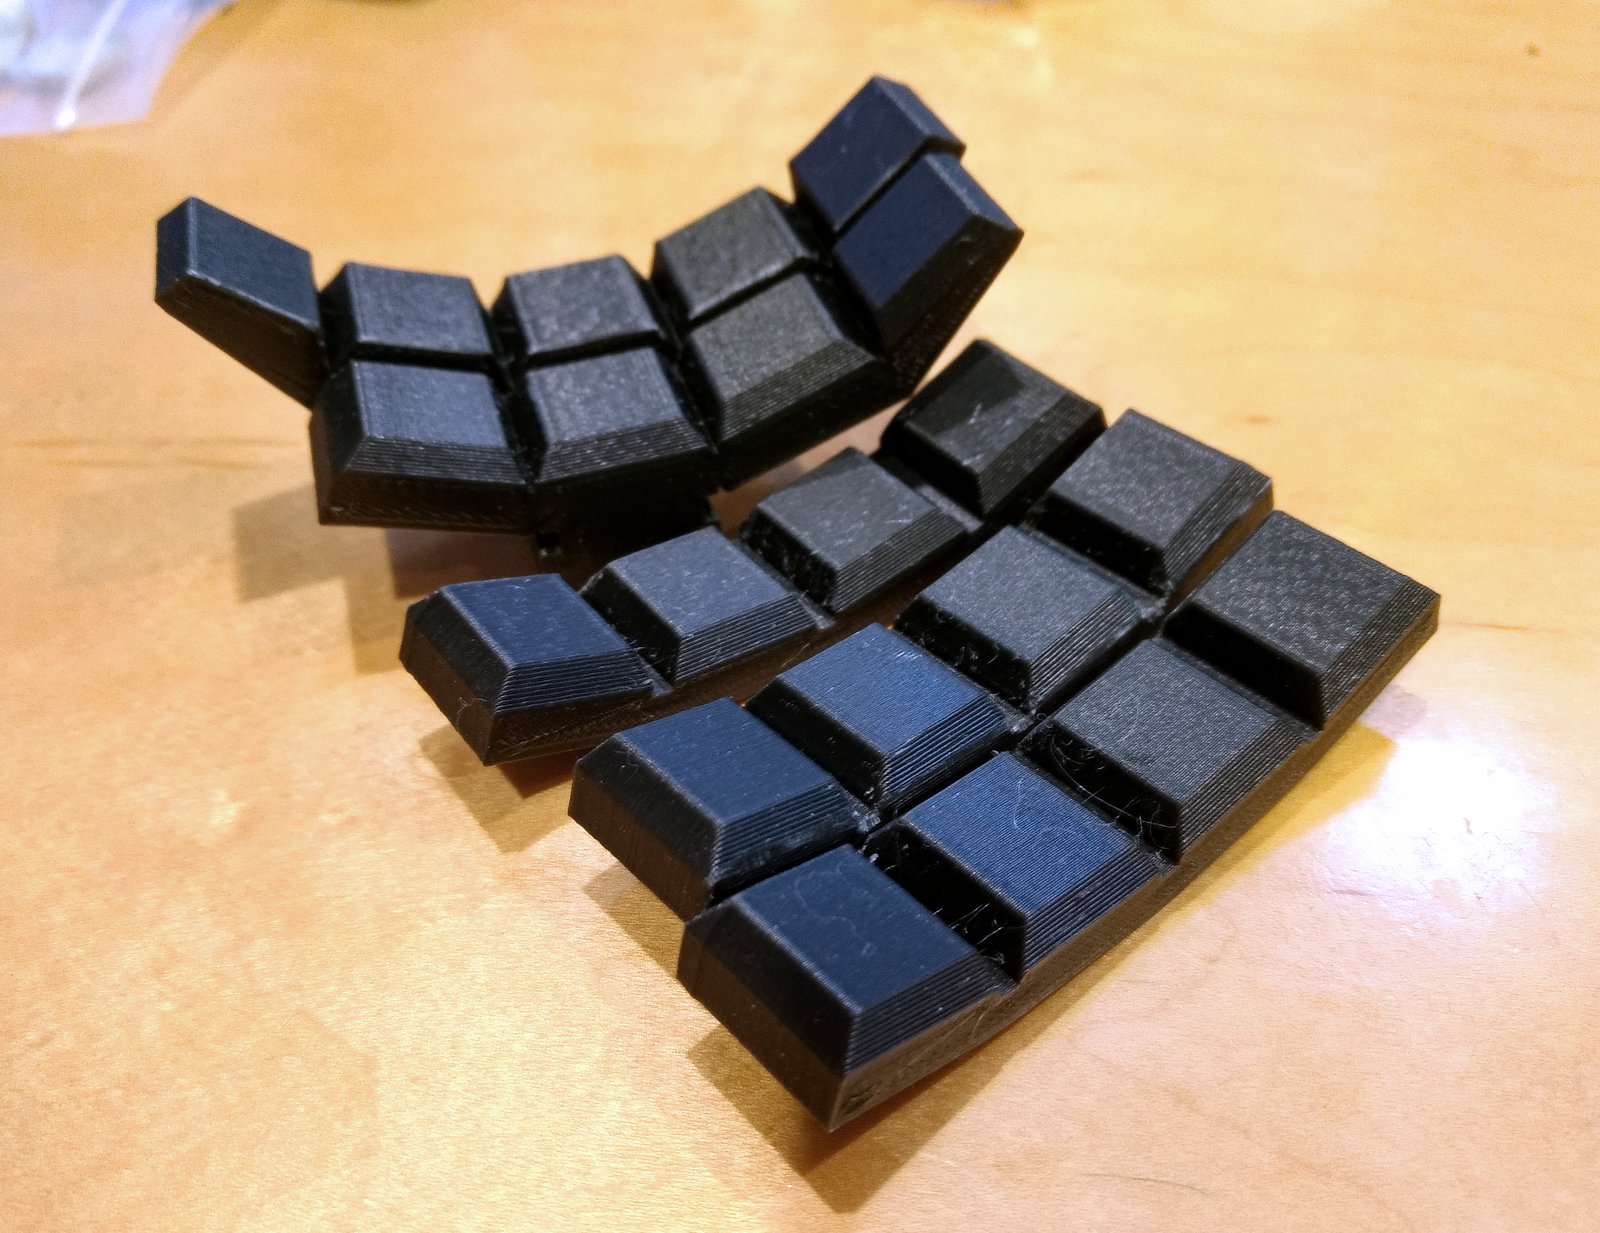
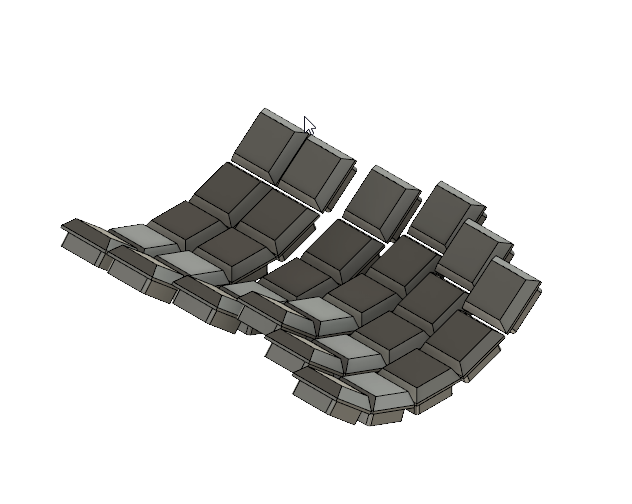
I started by modeling the keys themselves based on Kailh’s specs for the switches before I’d received them, then tried to find a comfortable column curve, and printed some tests, then printed a few more to test column offsets. Here’s what I ended up with.
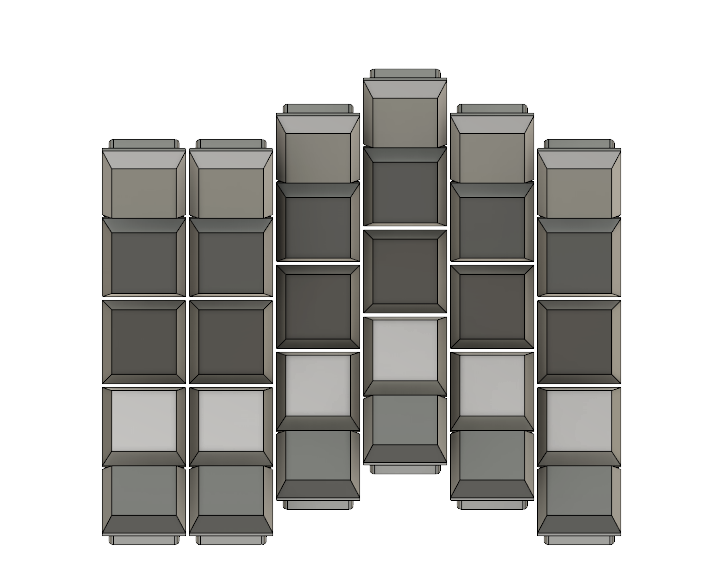
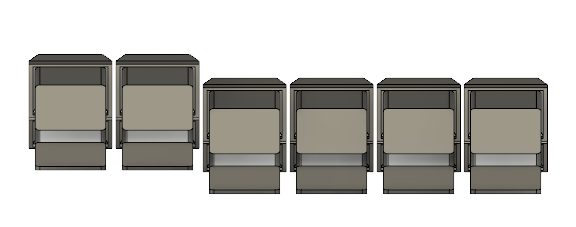
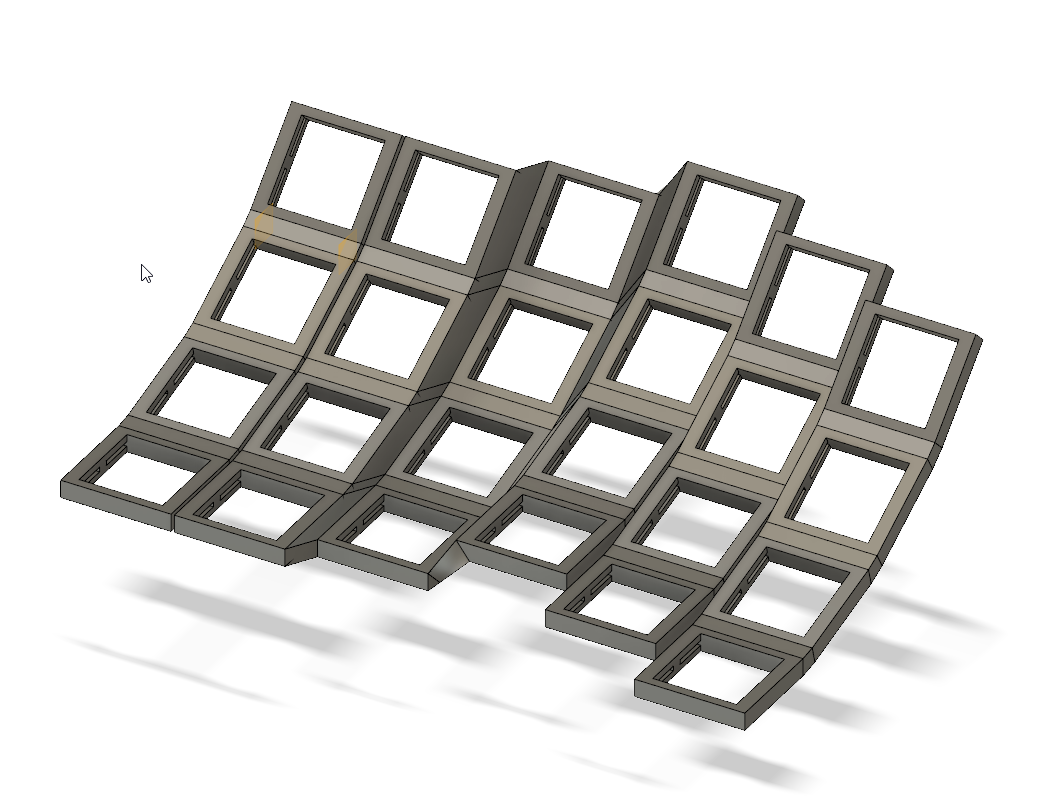
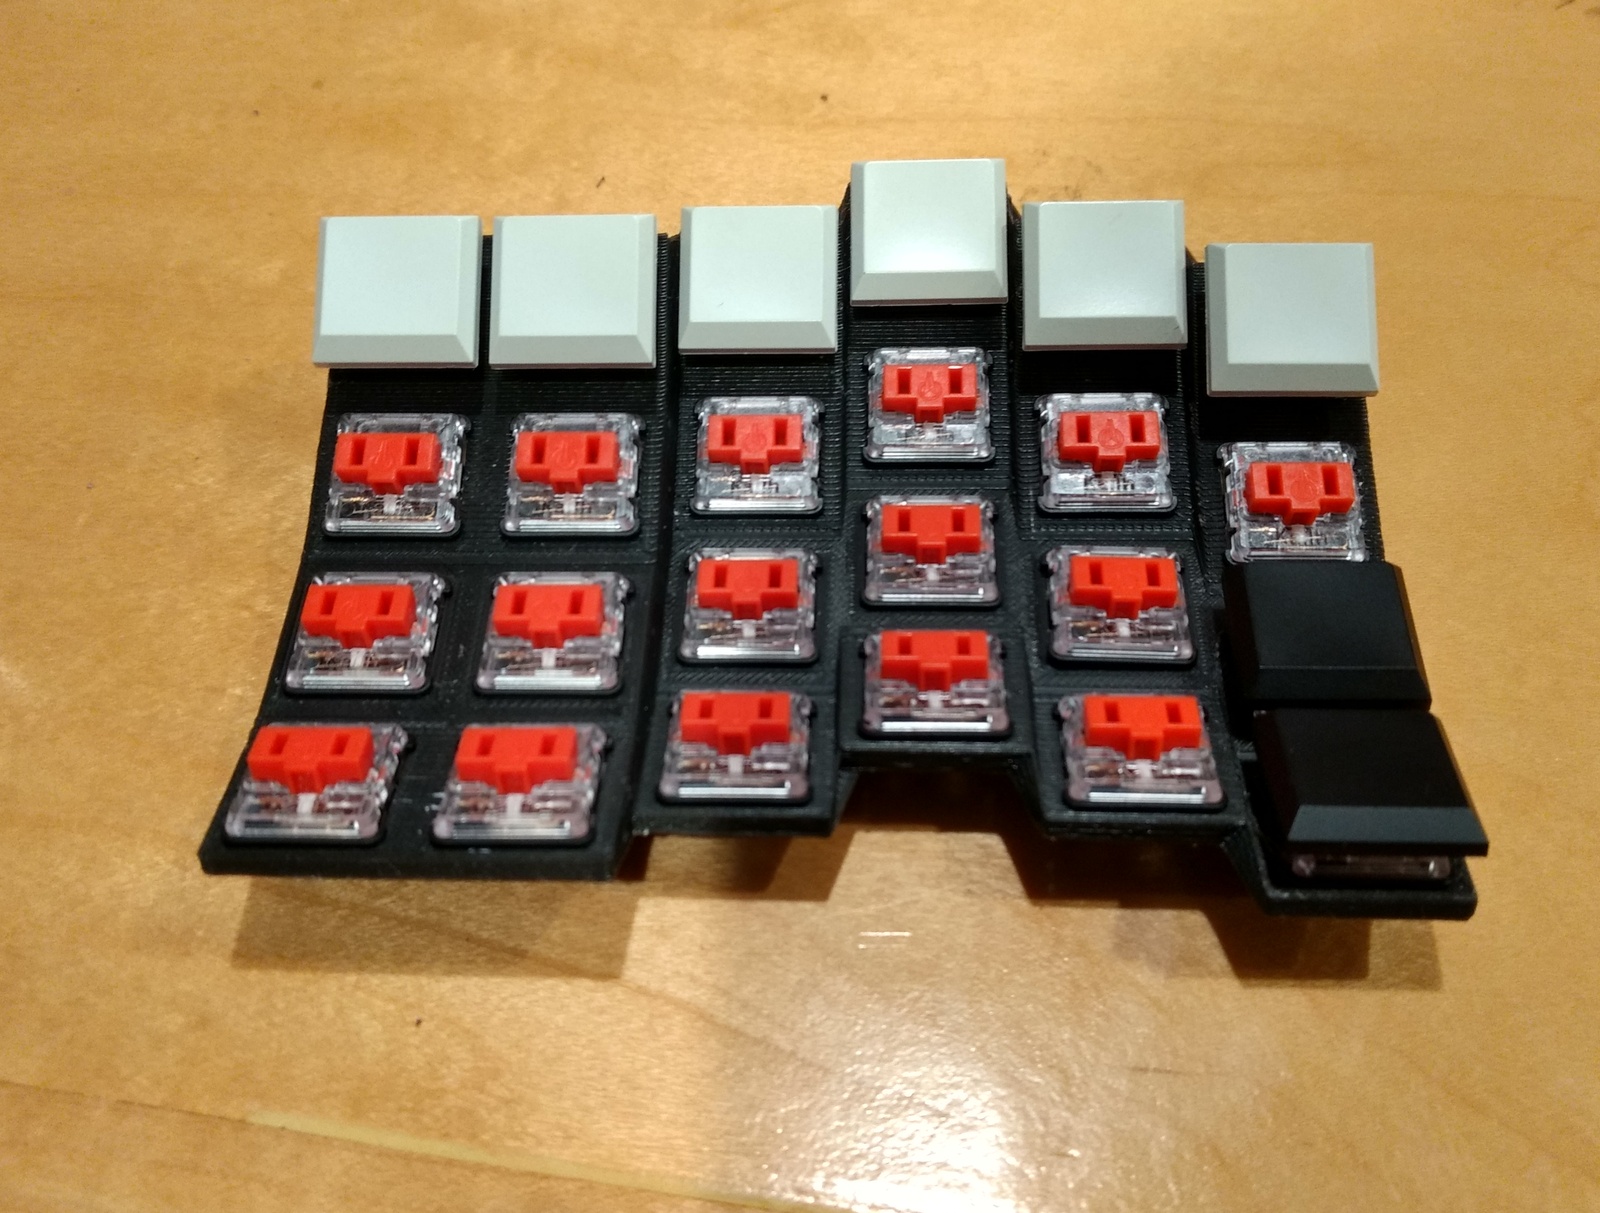
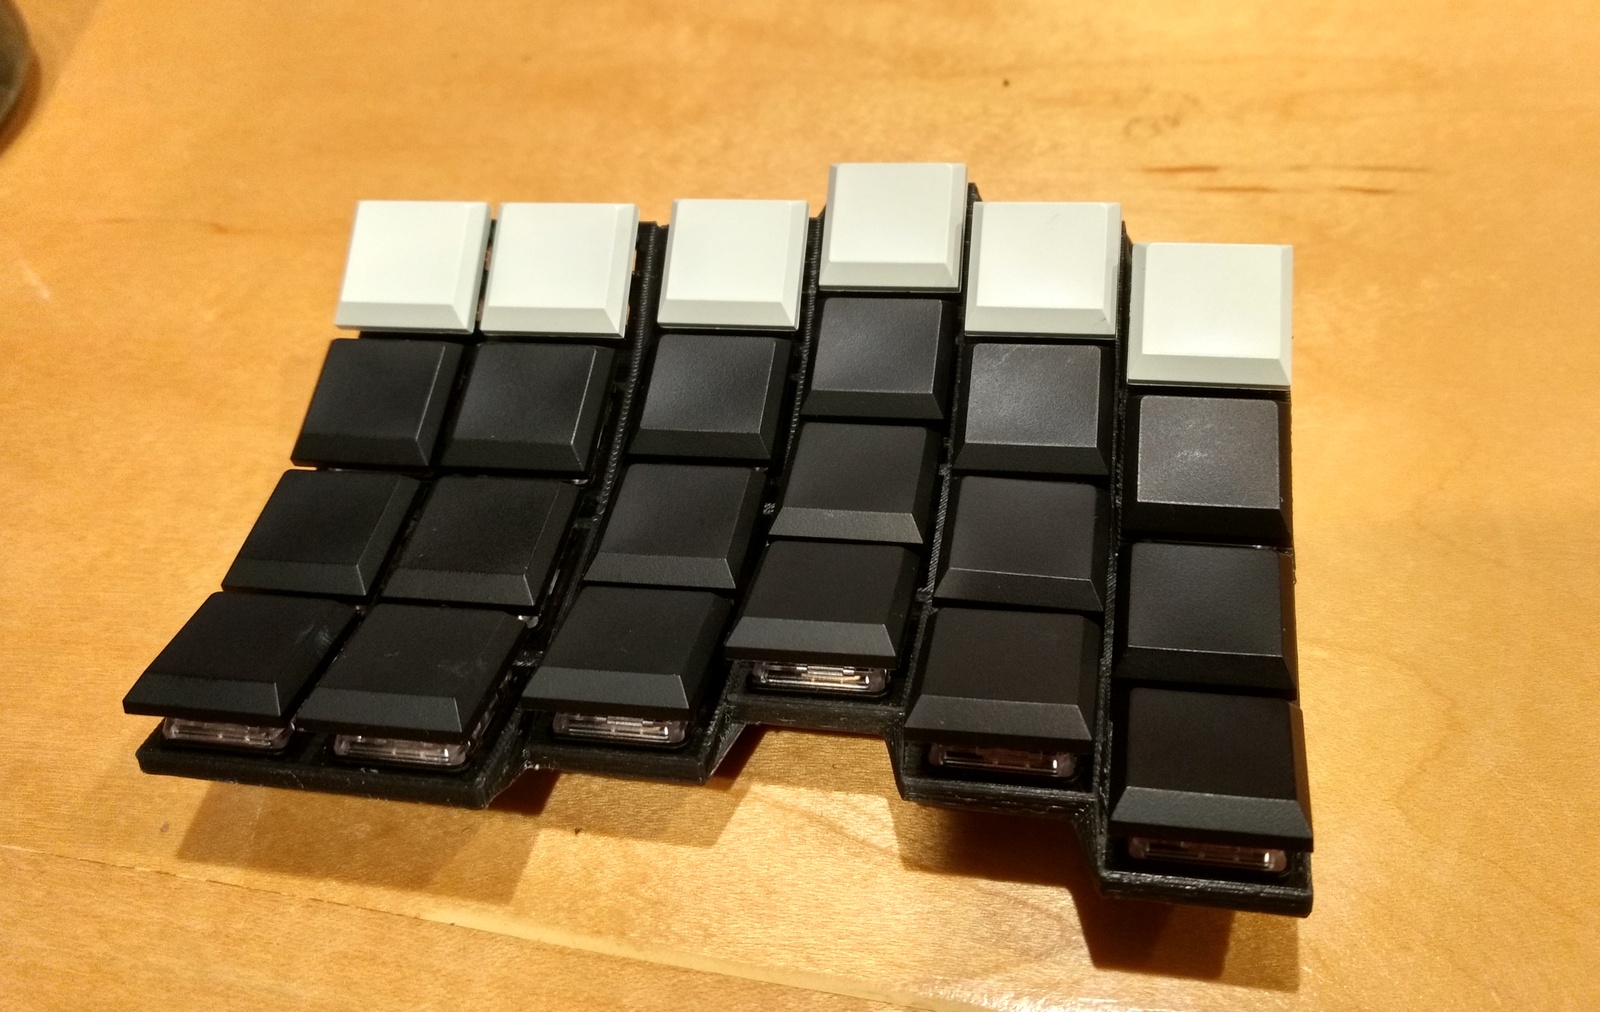
After deciding on a layout, I started by designing out the switch sockets that will make up the main support plate.
Model of key plateFirst 3D print, after removing and cleaning up the supportsPrint showing switchesAfter adding key caps
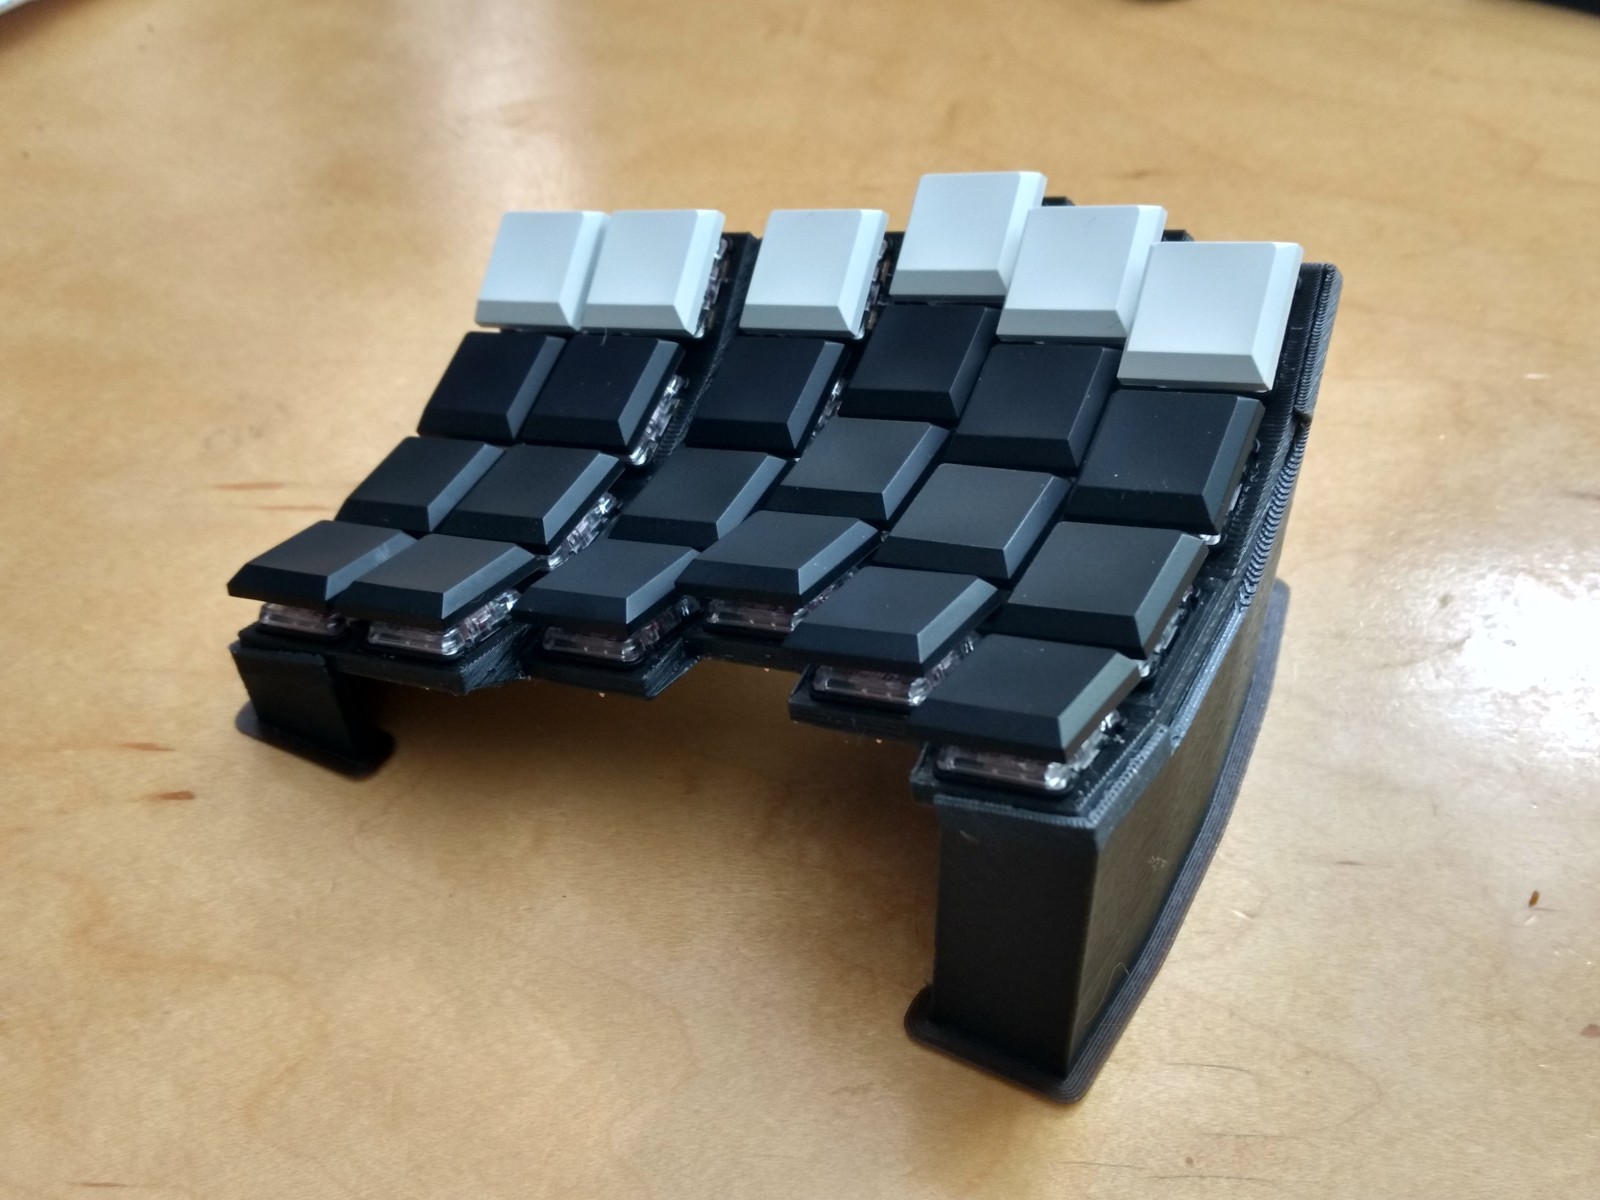
I tried a few different tenting angles, and settled on about 20 degrees. Again, this is partially to allow for clearance above the keyboard. I would have liked a steeper angle for comfort, but this is still an improvement over the (flat) G13, and my current ergonomic keyboard. The tent angle was originally parameter-driven in Fusion 360, allowing it to be changed while the rest of the design adjusted correctly around it. As the design became more complex, this parameter stopped really being configurable without breaking other features.
Previous plate with printed base to test tenting angles
Wrist Rest
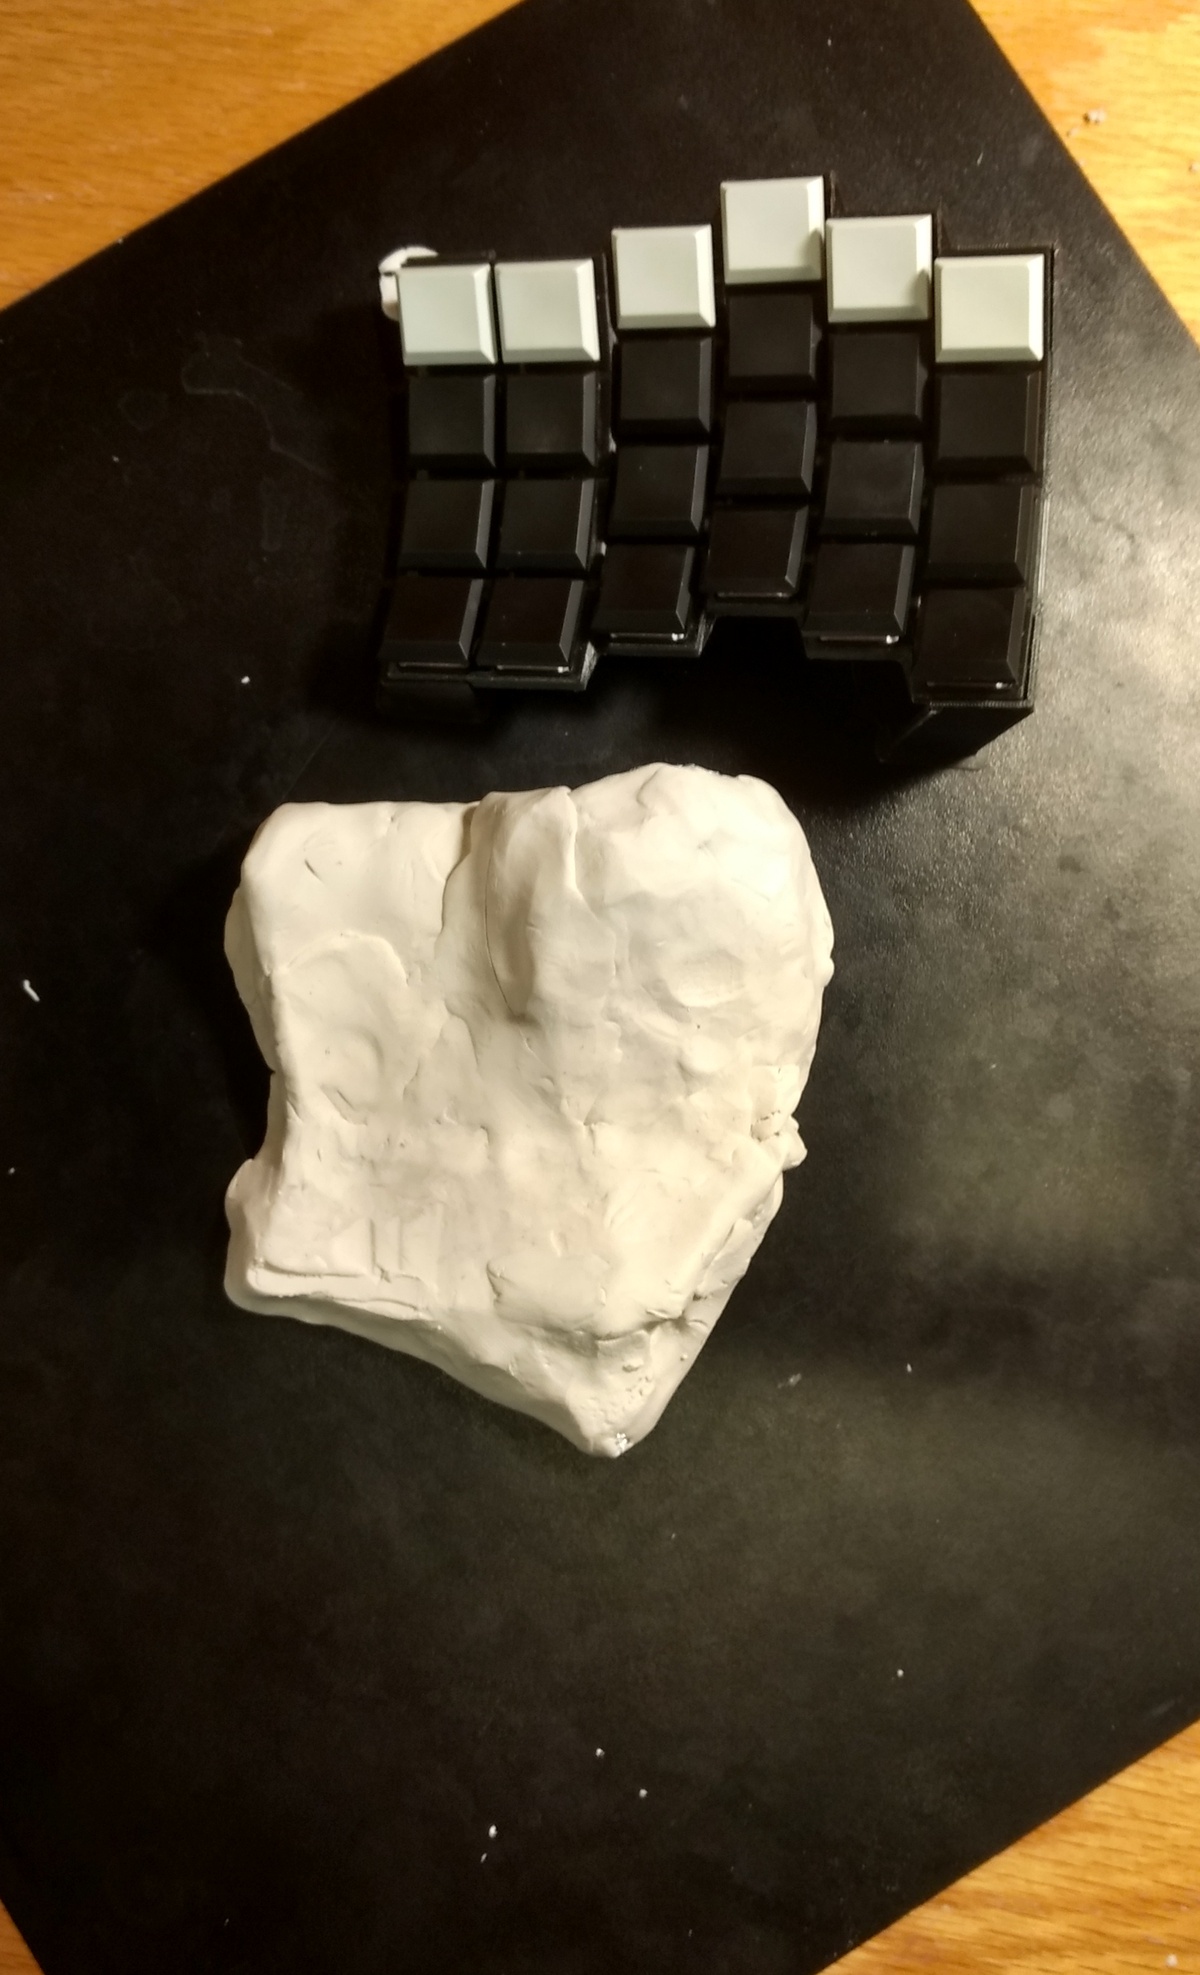
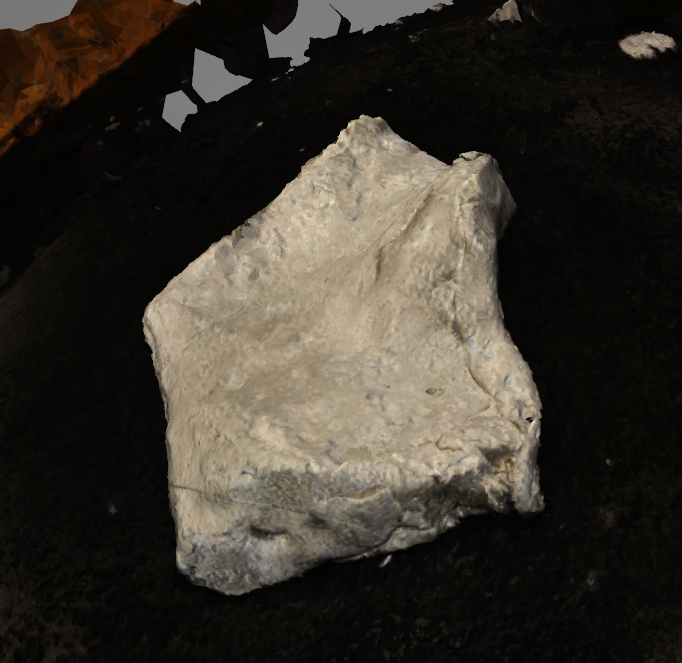
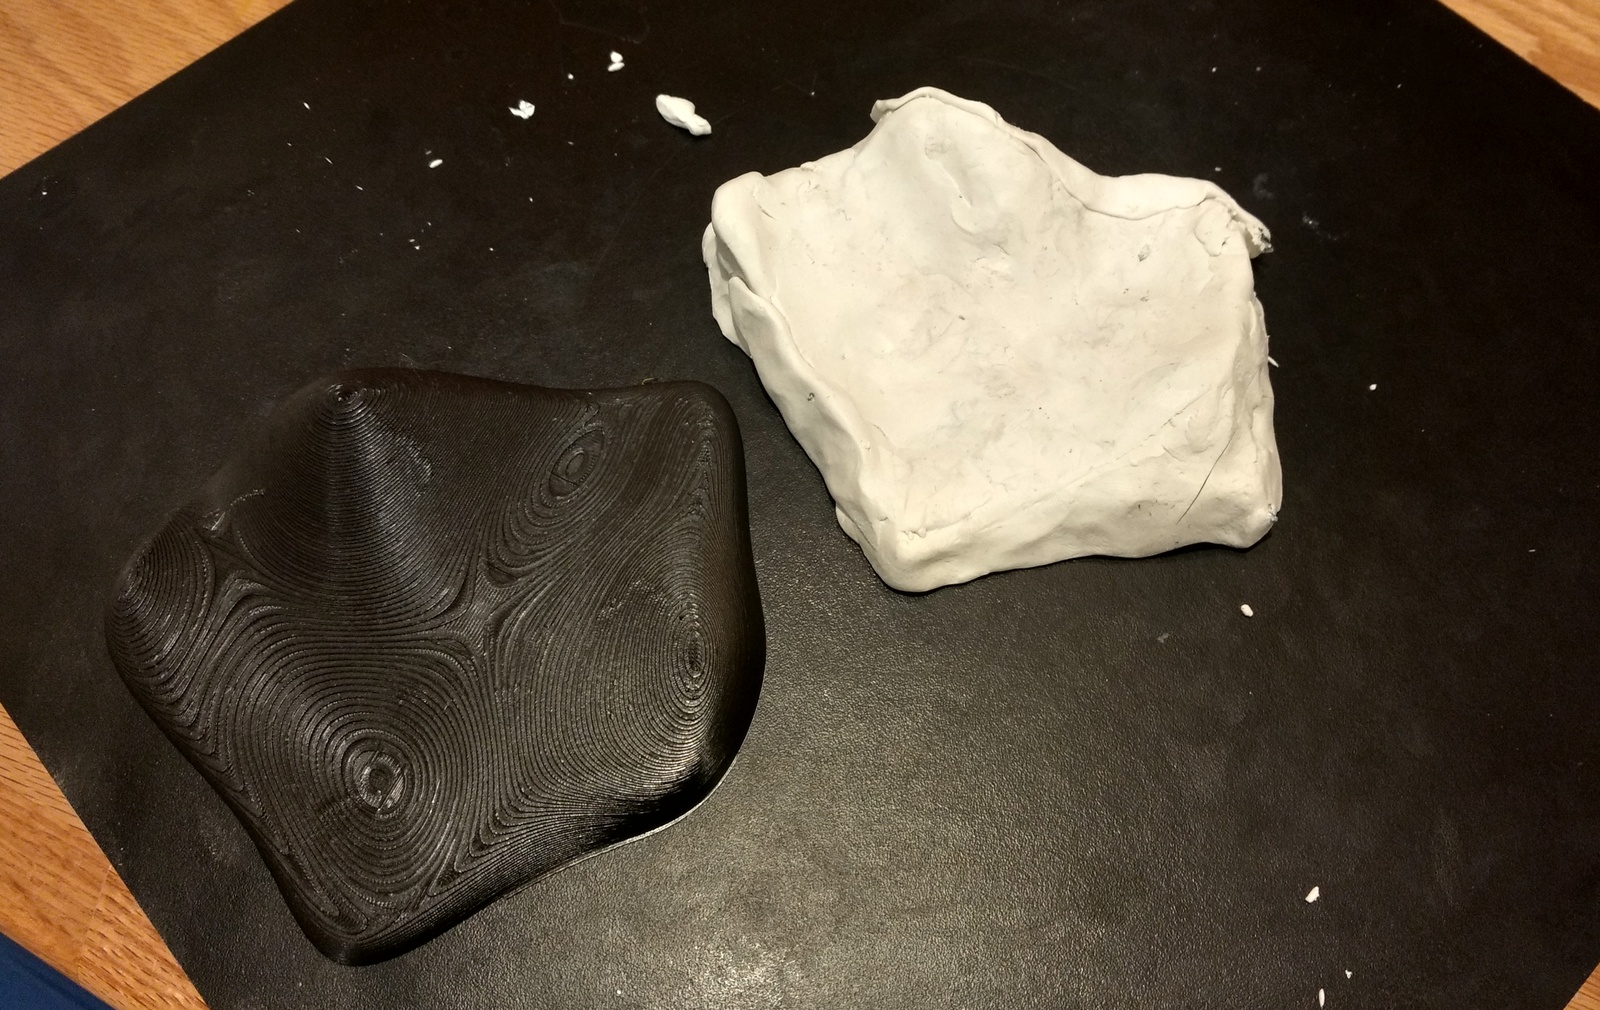
Next, I started on what would be the wrist rest. I wanted a comfortable rest well suited to my hand, and planned to make it molded and contoured. I built this in Sculpey very loosely, then used a photogrammetry package called Meshroom (and a bunch of photographs) to generate a 3d model, and scaled it up to match the original.
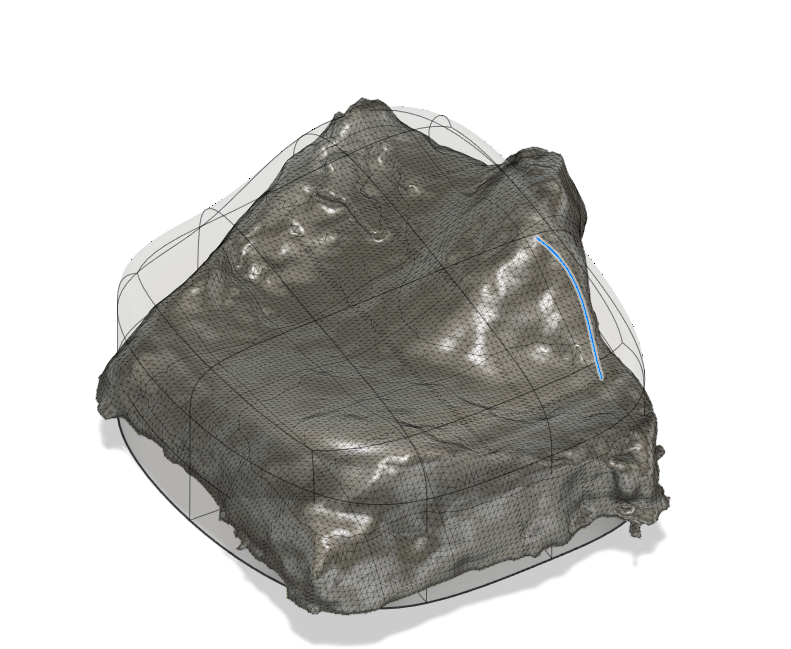
Very rough wrist rest made out of SculpeyTake lots of photosWrist rest model with texture map from MeshroomWrist rest model imported into Fusion 360
Next, I basically traced the main contours of the model to smooth it out and define the footprint I wanted
Scanned model with surface model overlayedSculpey model next to simplified, printed version
While this process was fun, and the result was comfortable, I found that the contours got in the way when my hand moved around while typing, so later designs are all plain and flat. Oh well.
Case
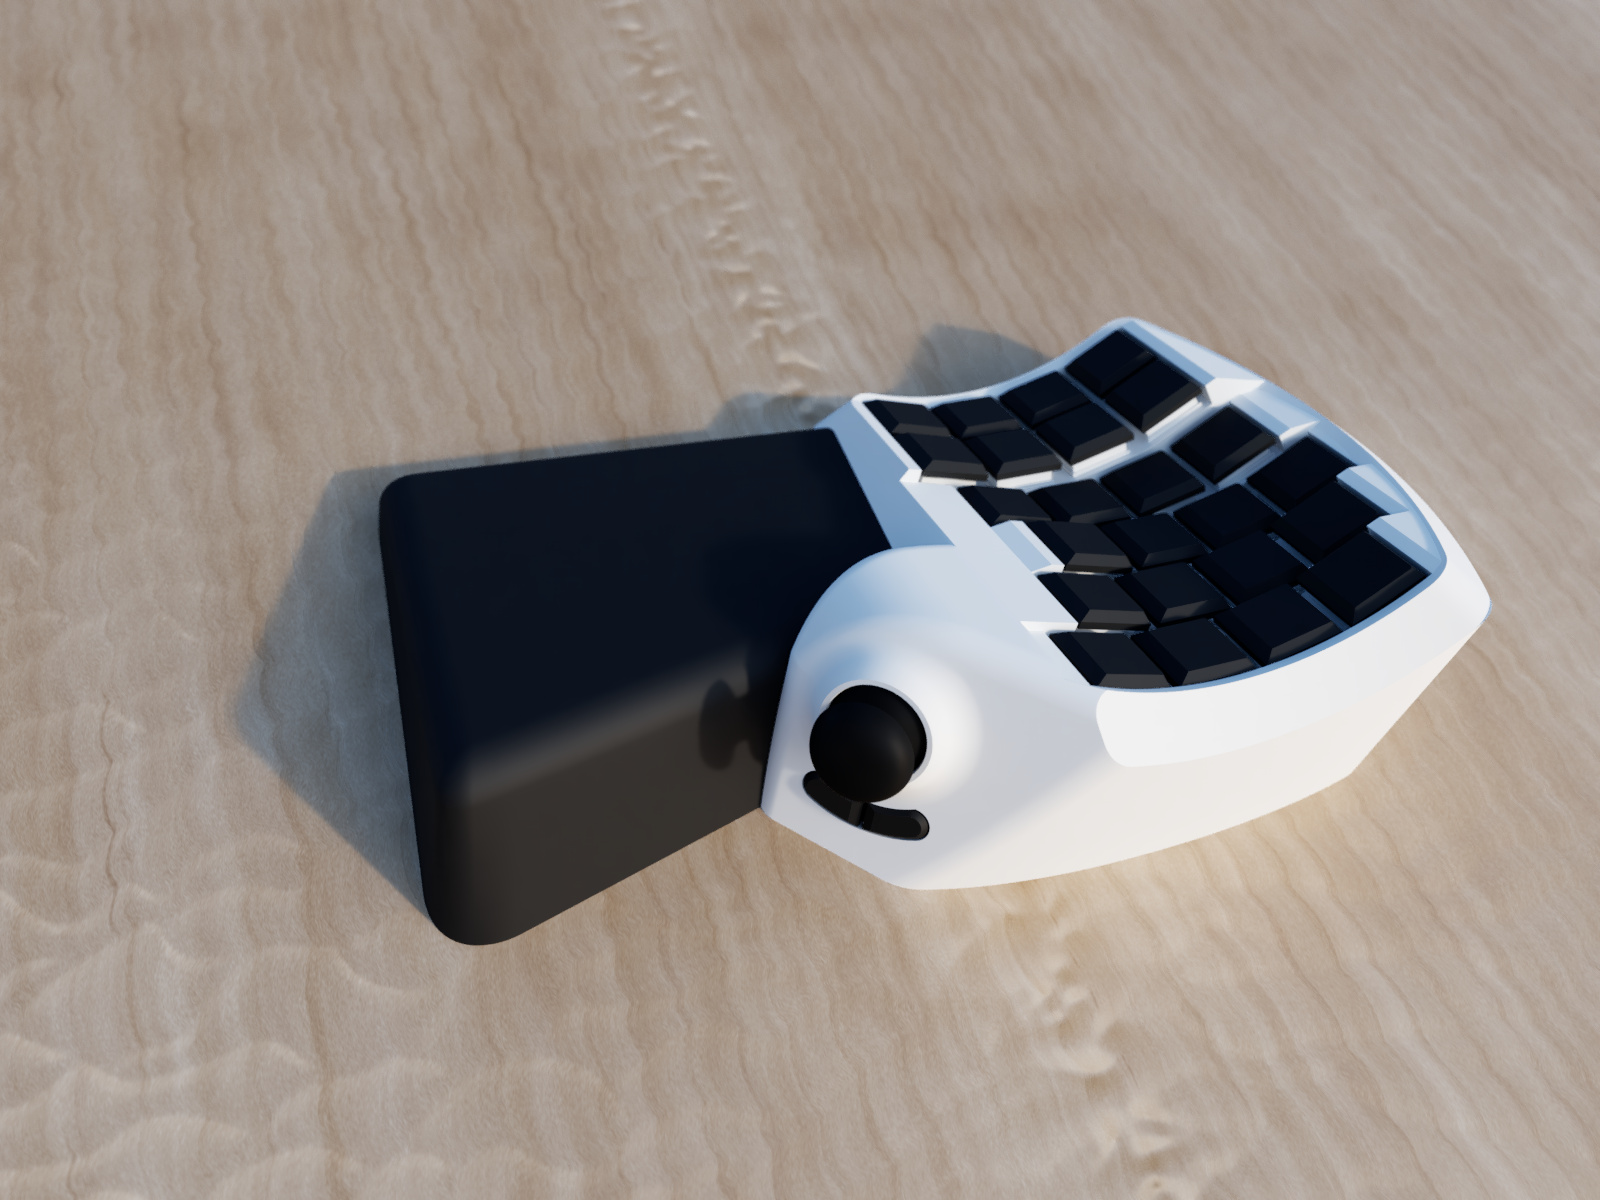
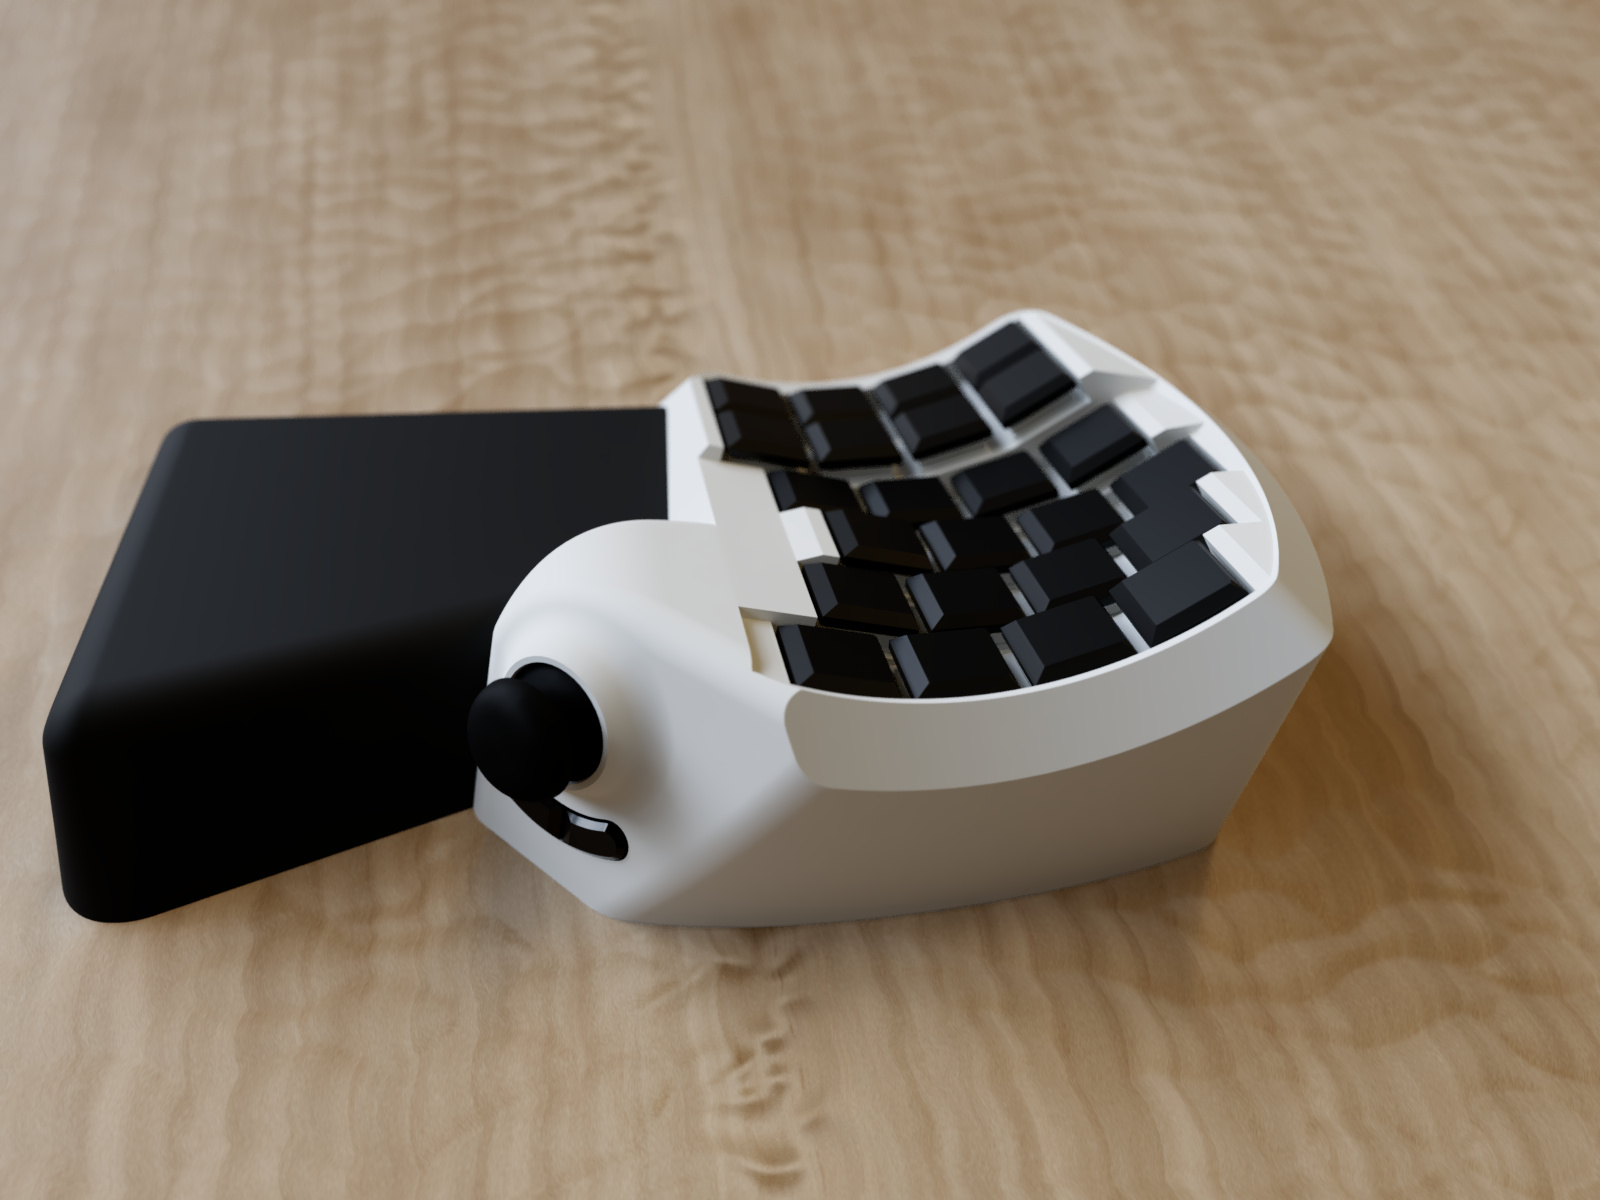
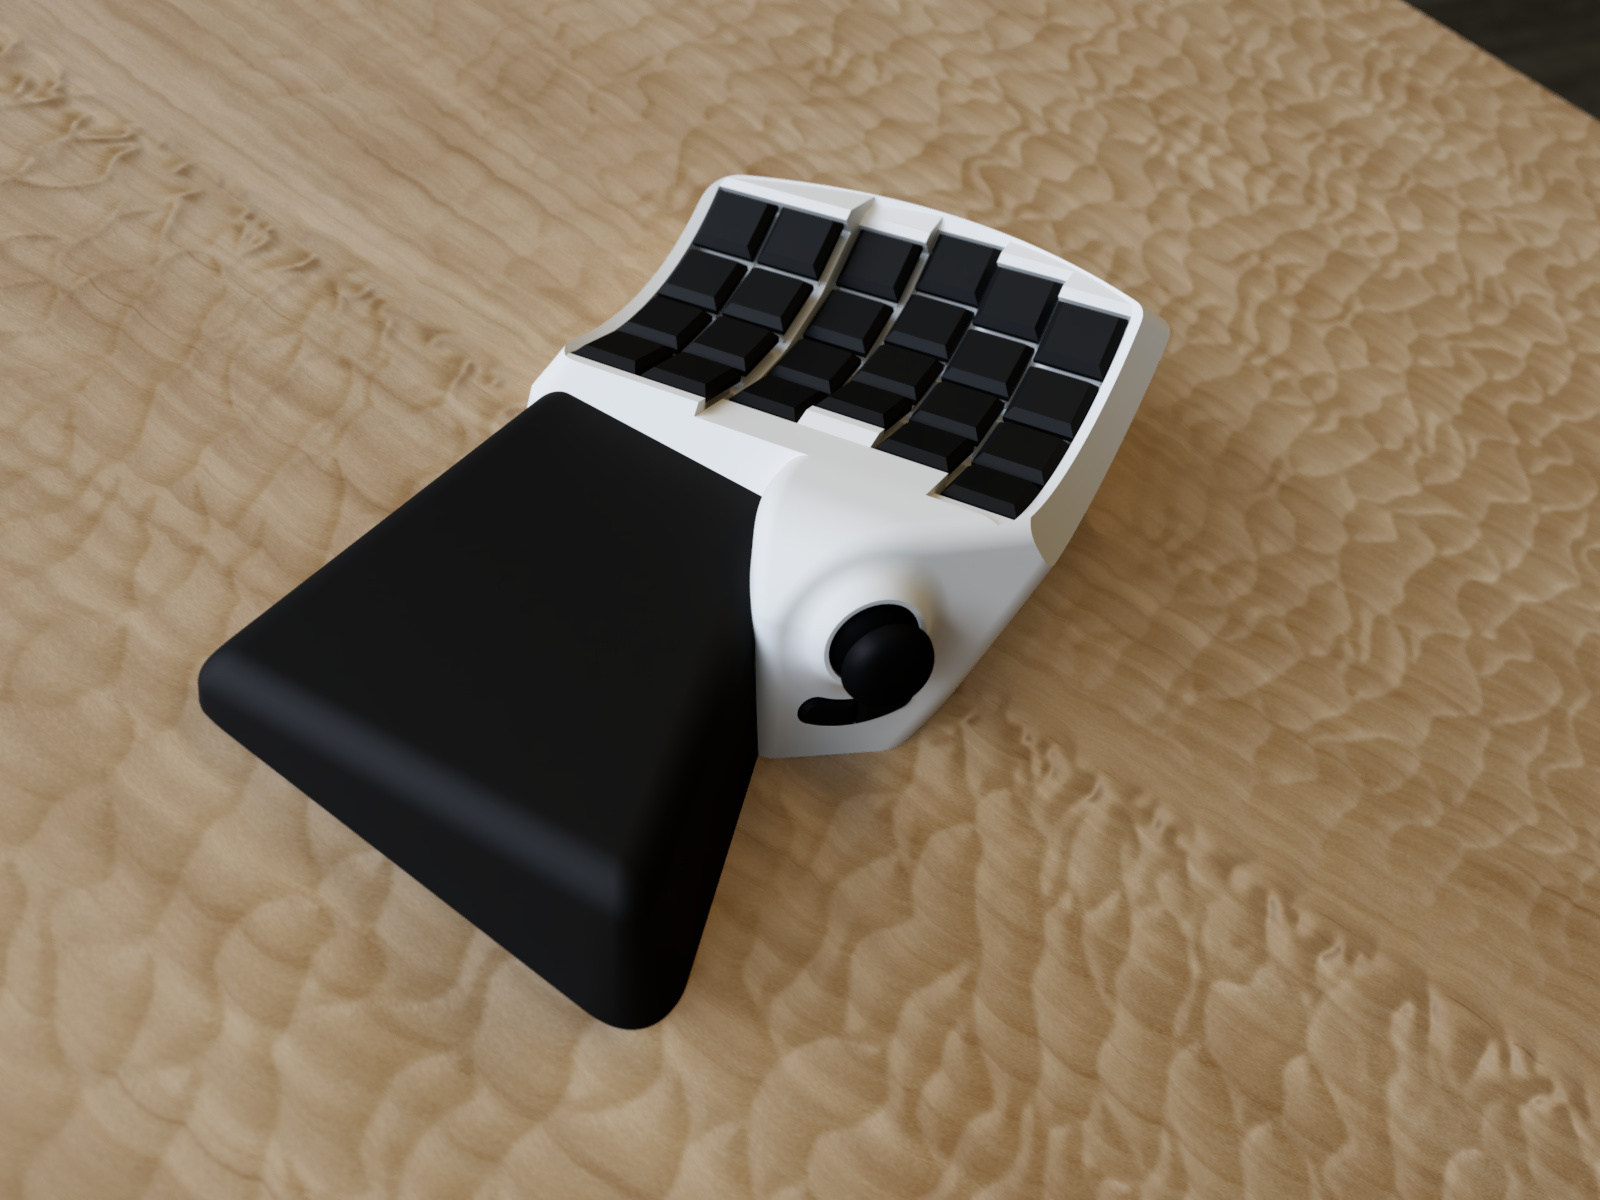
I started working on the overall case next, which proved to be the most challenging part. I’ve still pretty new to CAD, and haven’t done anything this complex before. Trying to find ways to describe compound curves, and the way that two surfaces should meet was really challenging, and took the longest of any part of this project (so far).
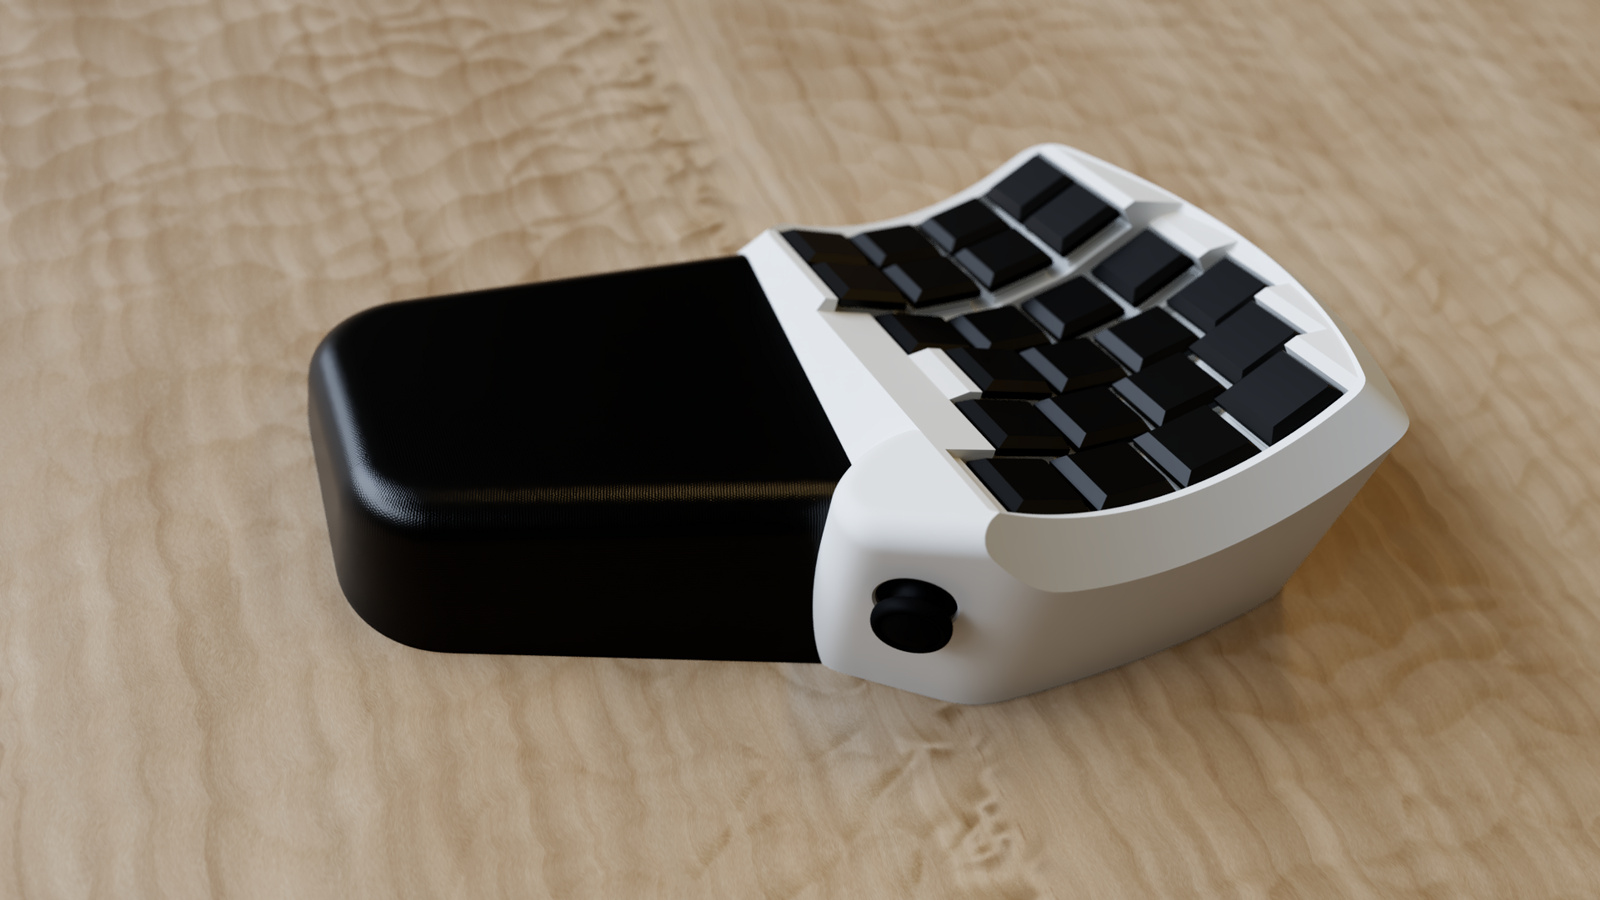
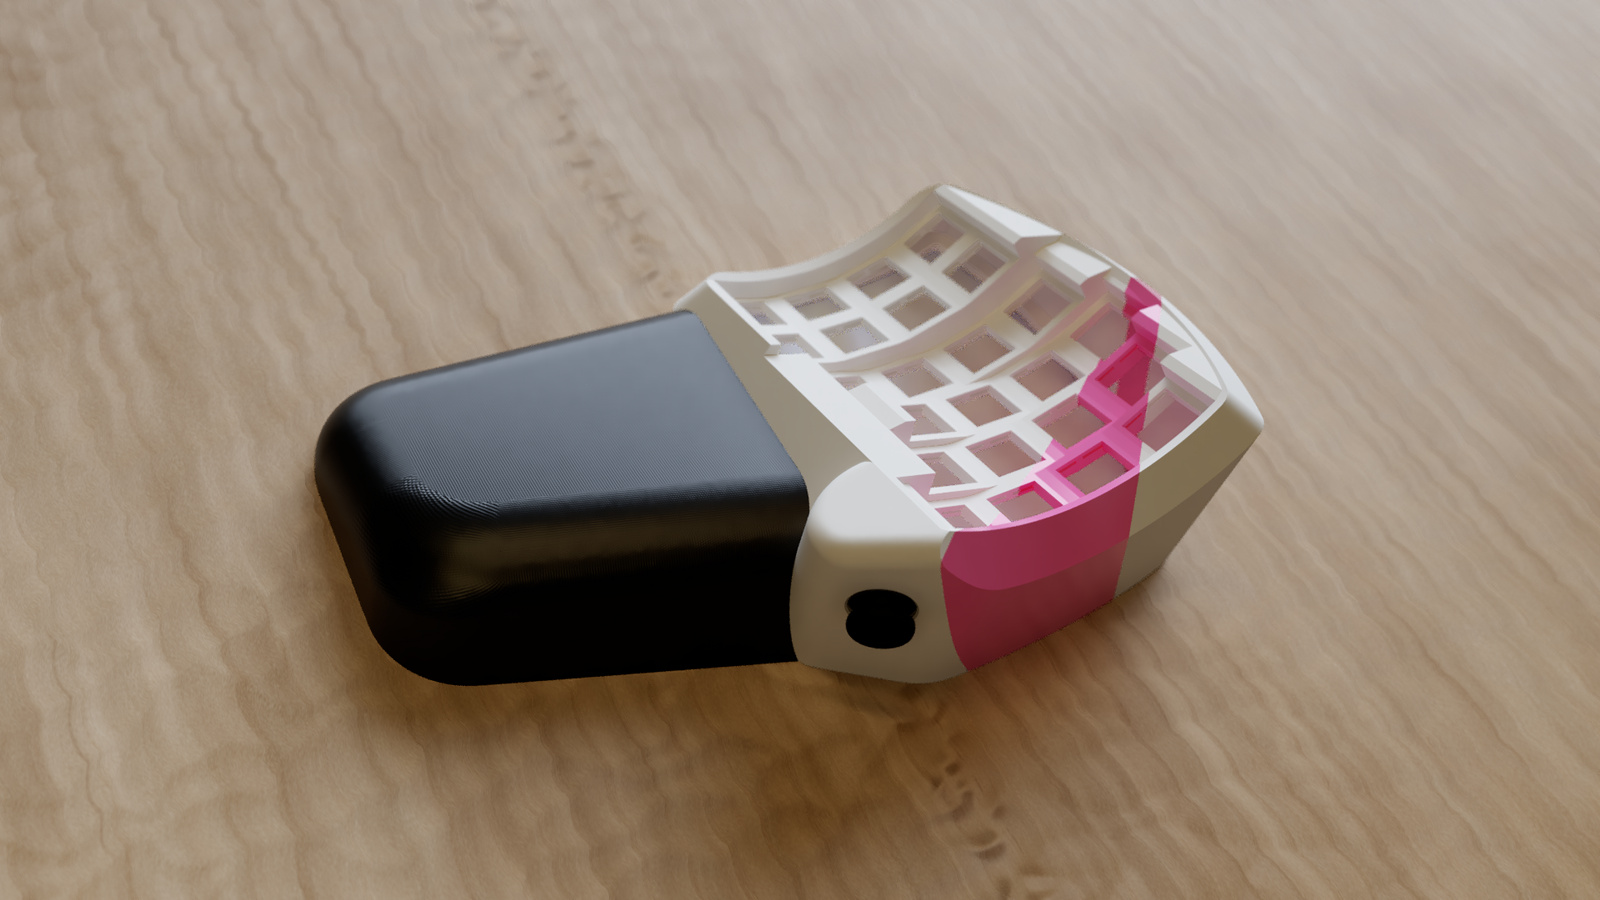
Render of case, including arduino joystick and some thumb buttons
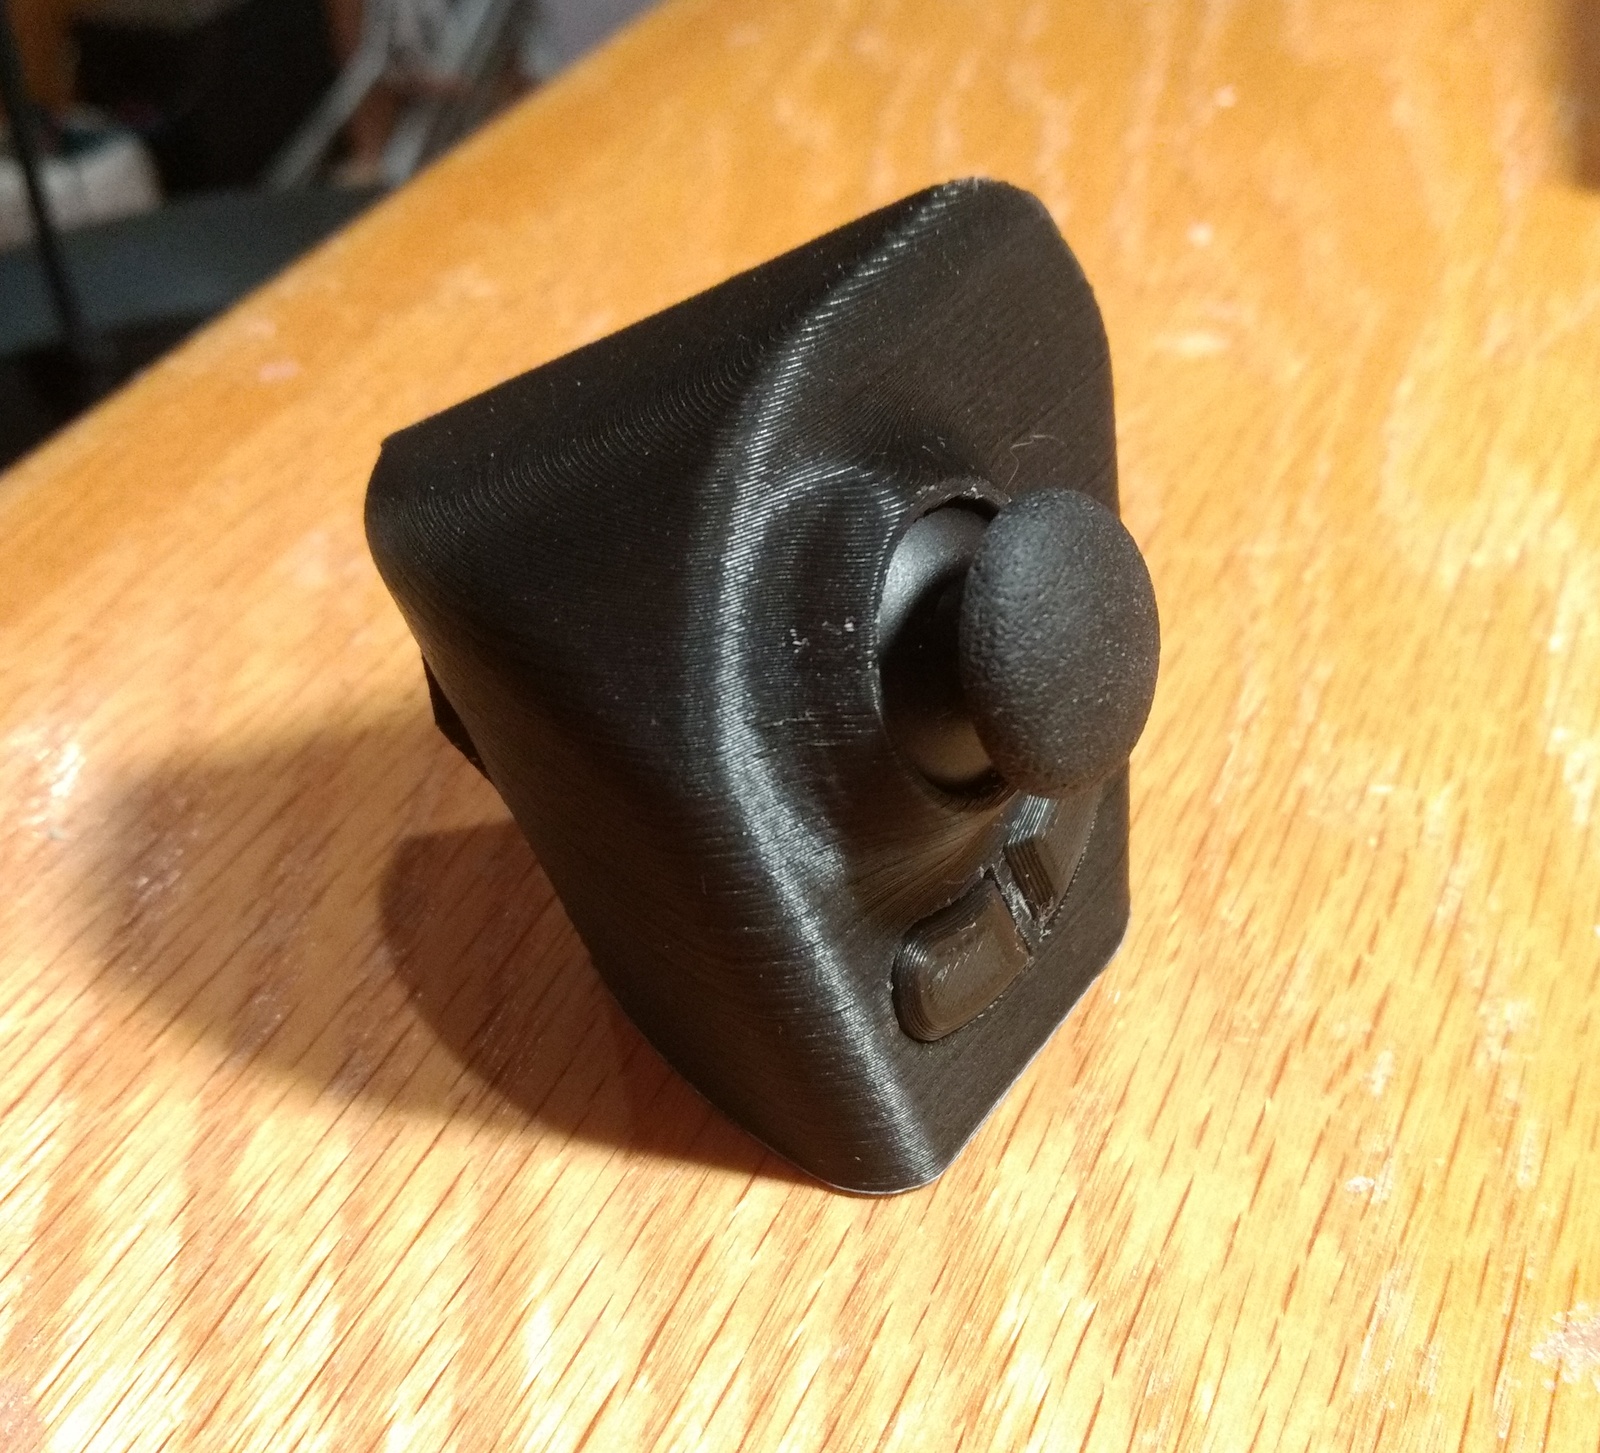
I printed out just the thumb area to test comfort and positioning. It’s fine as-is, but the joystick module is just too bulky to be able to position where it really needs to be ergonomically.
Printed thumb joystick and buttons
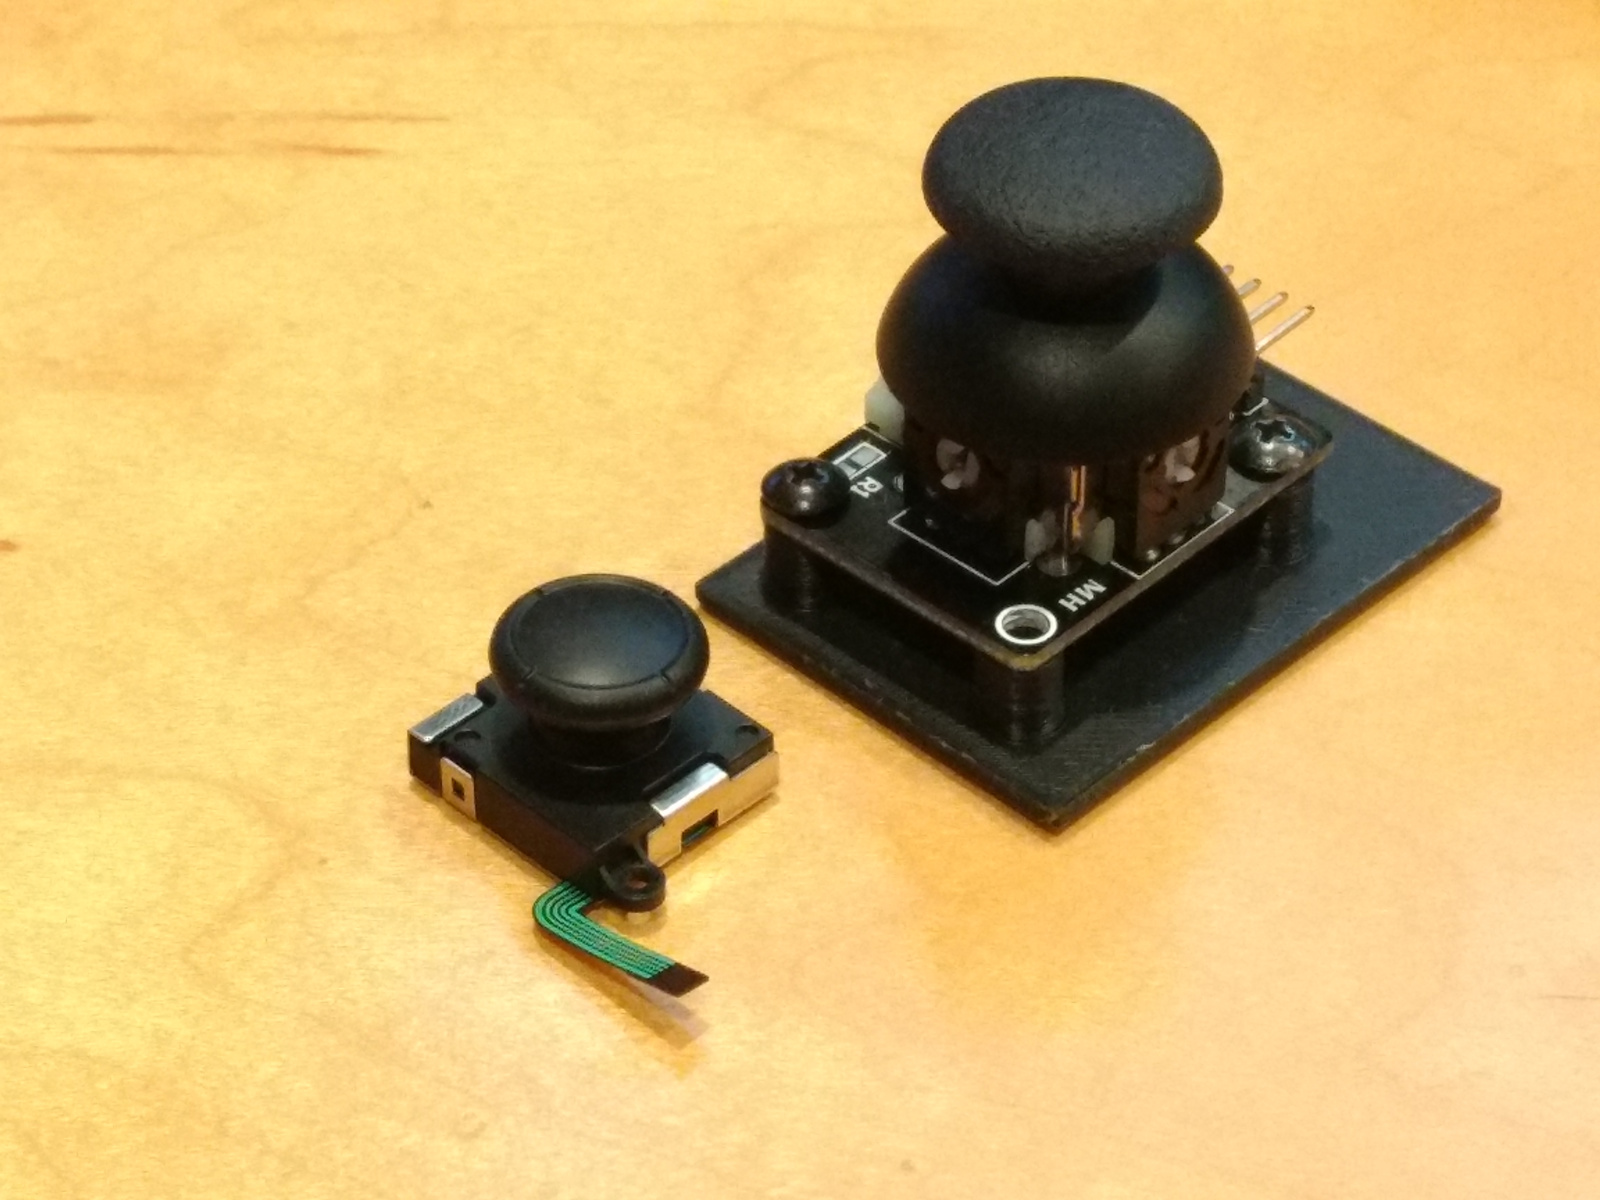
I picked up a (much smaller) third-party Switch joycon controller instead, which can sit much closer to the keys with room for wiring. This connects with a (much less convenient) 5-wire 0.5mm pitch flexible flat cable. I picked up a 6 pin ffc breakout board from Amazon, but they can be found much cheaper on eBay or AliExpress.
Comparison of joystick sizesJoycon joystick with switchesRedesigned case to use smaller joystick
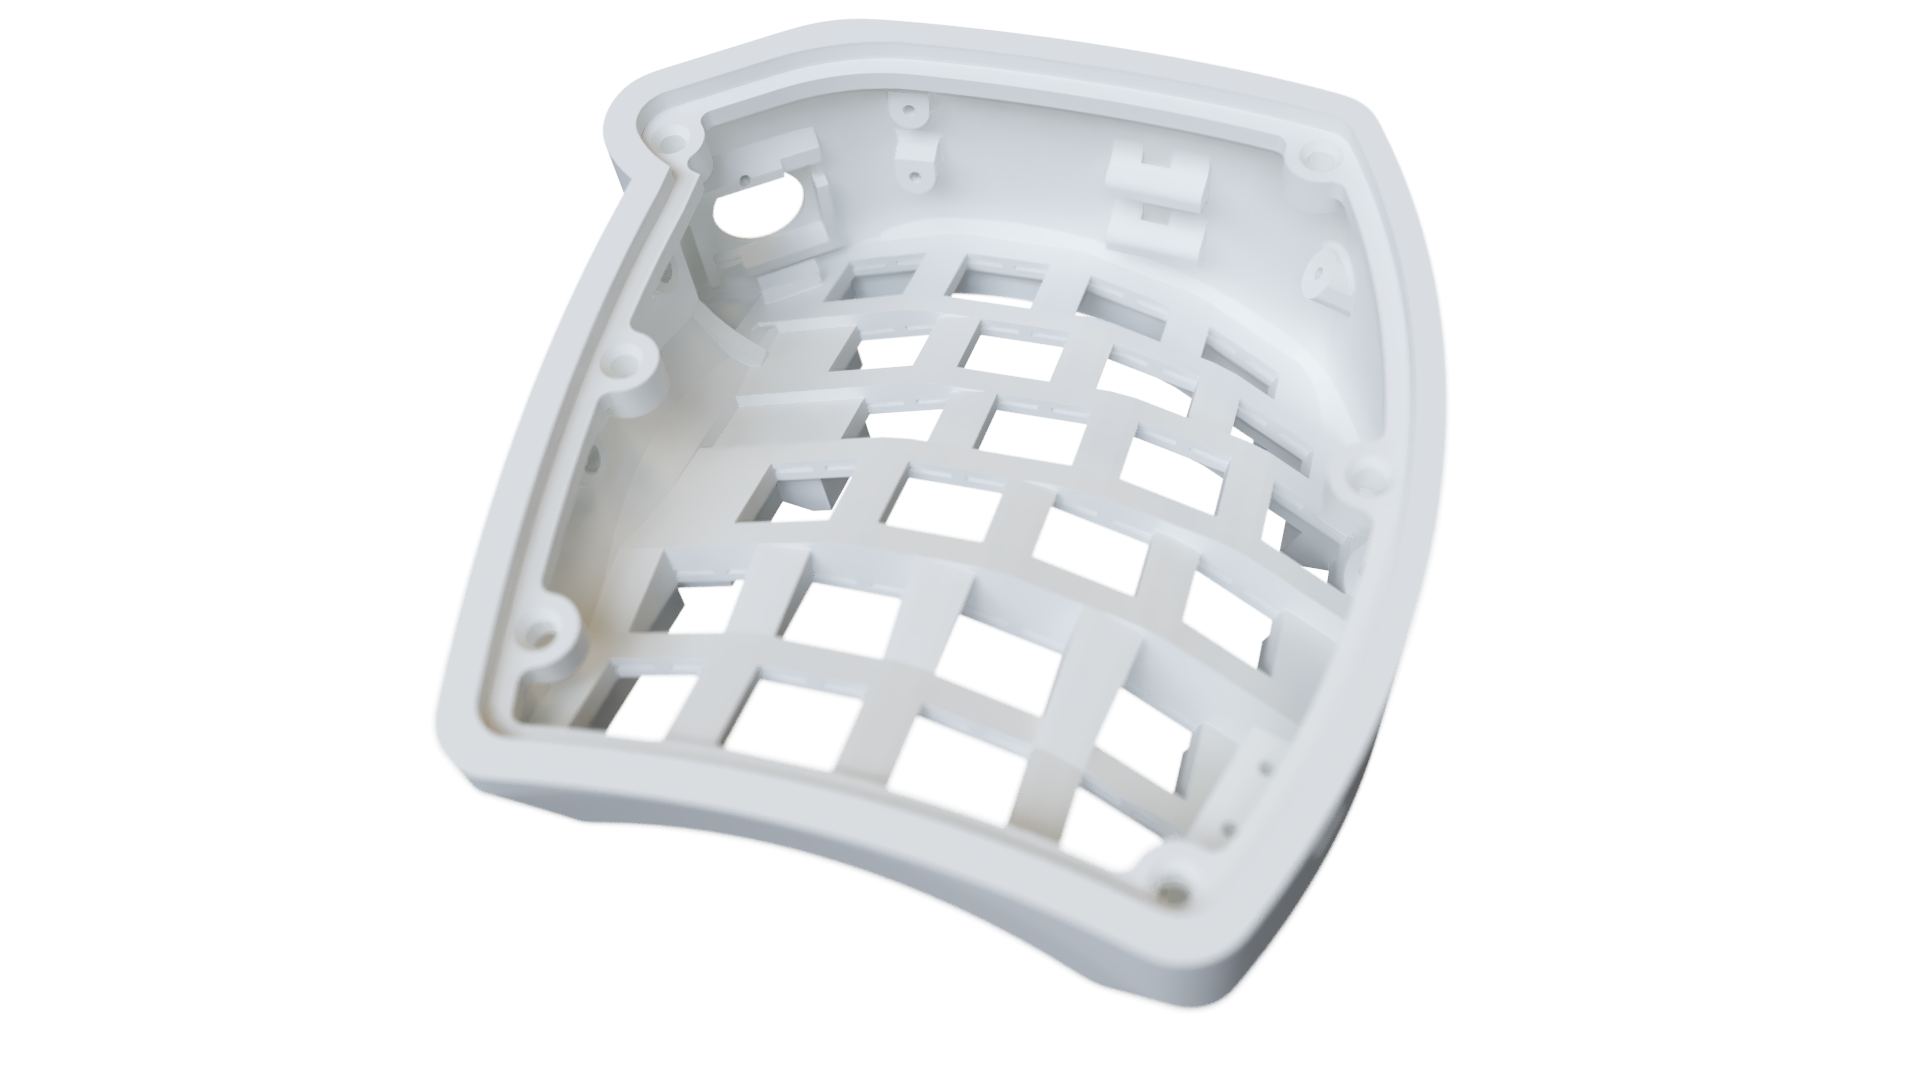
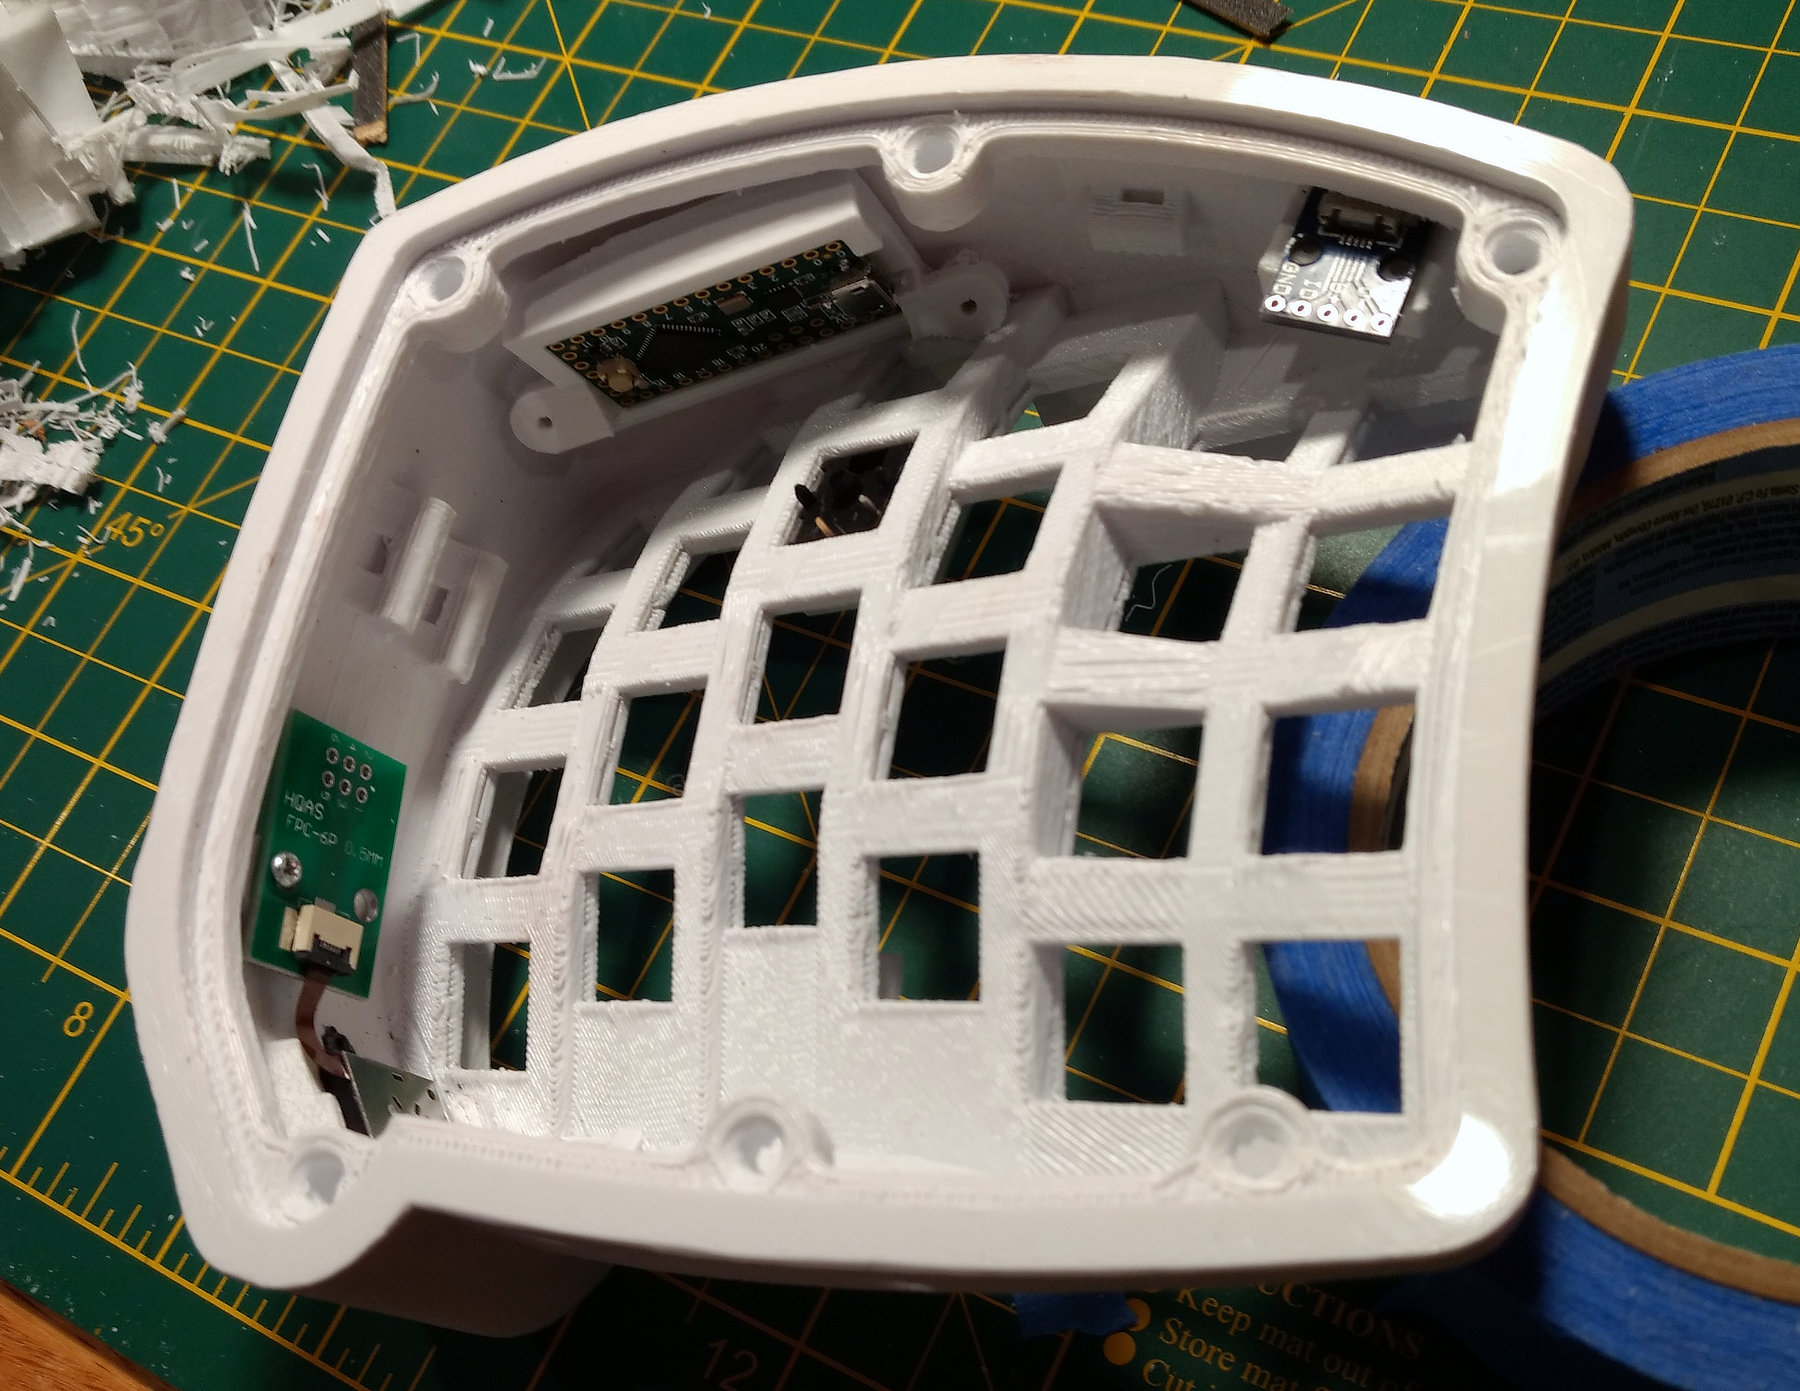
When the shell was done, I added supports for the electronic componenents that will live inside. For the joystick, I needed to make small cover plate that will screw into the side of the case, because I wouldn’t be able to reach the normal screw mounts for it. For the Teensy microcontroller, I just made a friction fit holder, and screw mounts for that. I added some ziptie spots, and larger 4mm holes to allow the wrist rest to fasten on.
I’m also using a micro USB breakout board for the main USB connector to avoid wear or damage to the microcontroller.
Render of case inside
I think this whole design phase took about a month total. I won’t hazard a guess at the number of hours spent on it, but… “many”.
Print
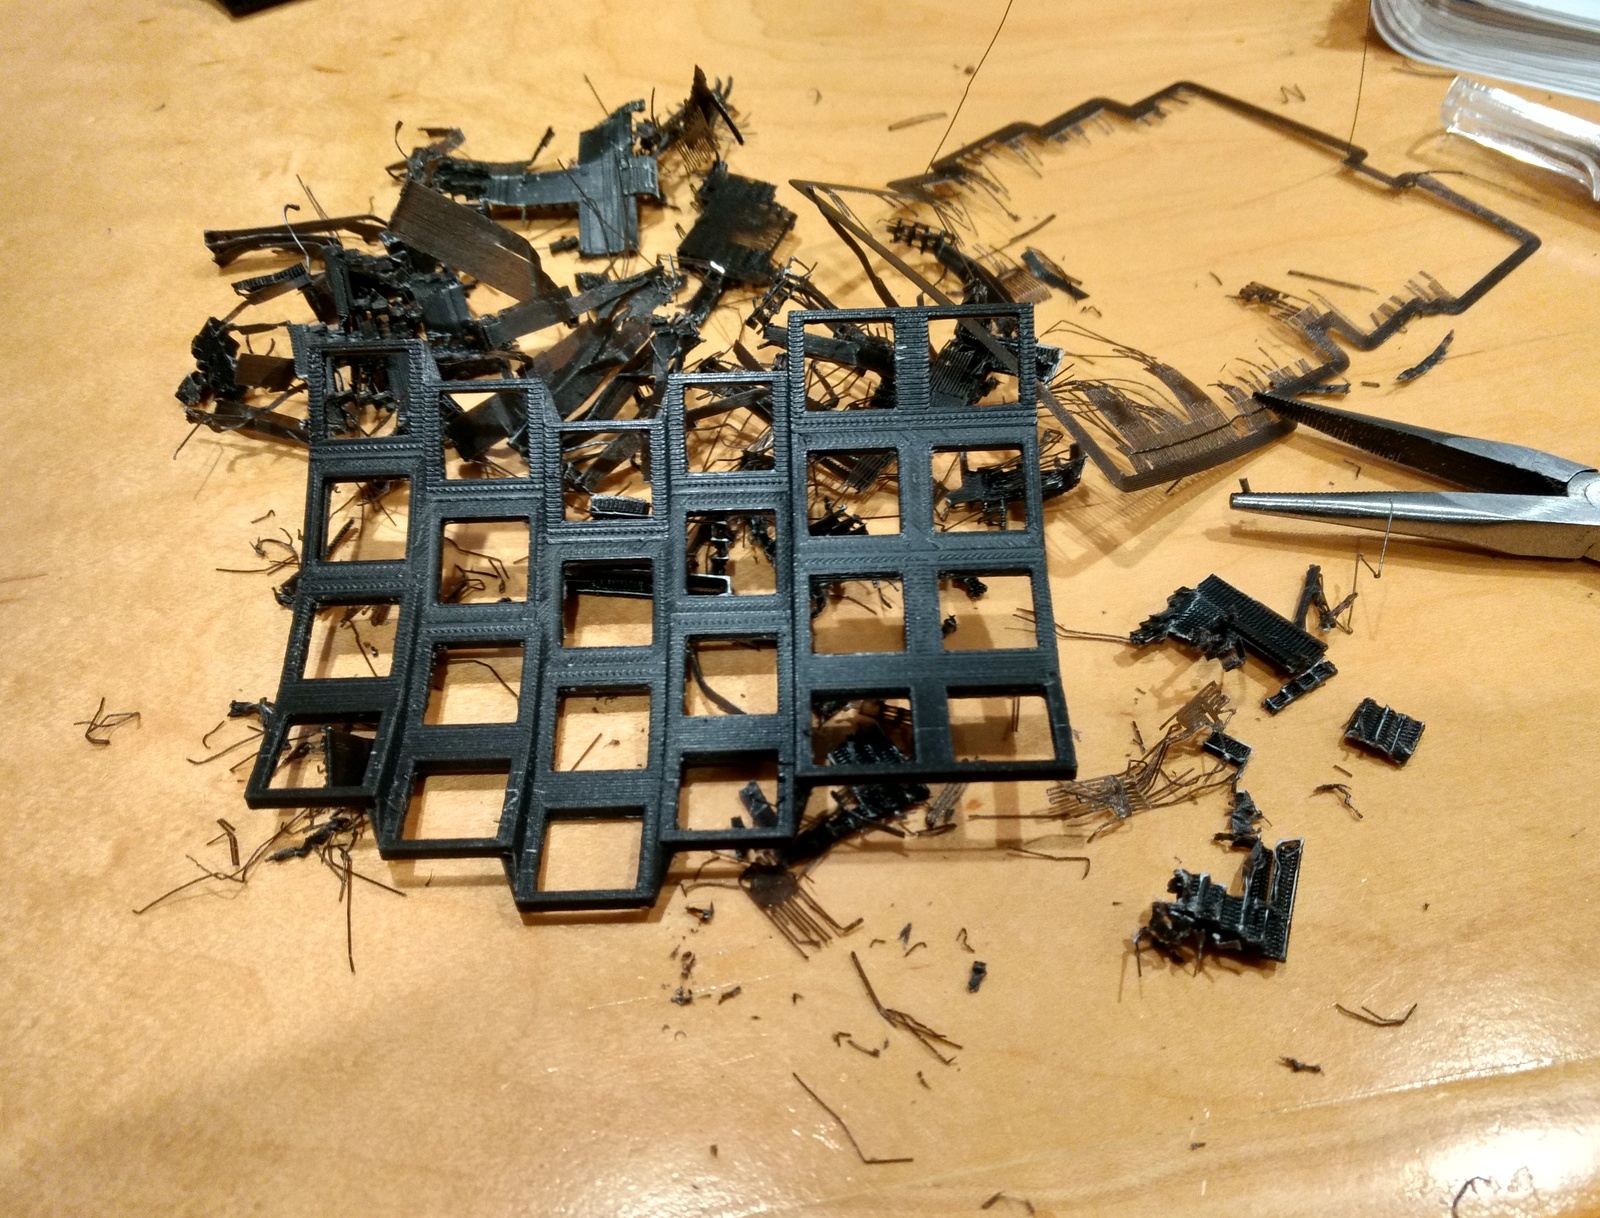
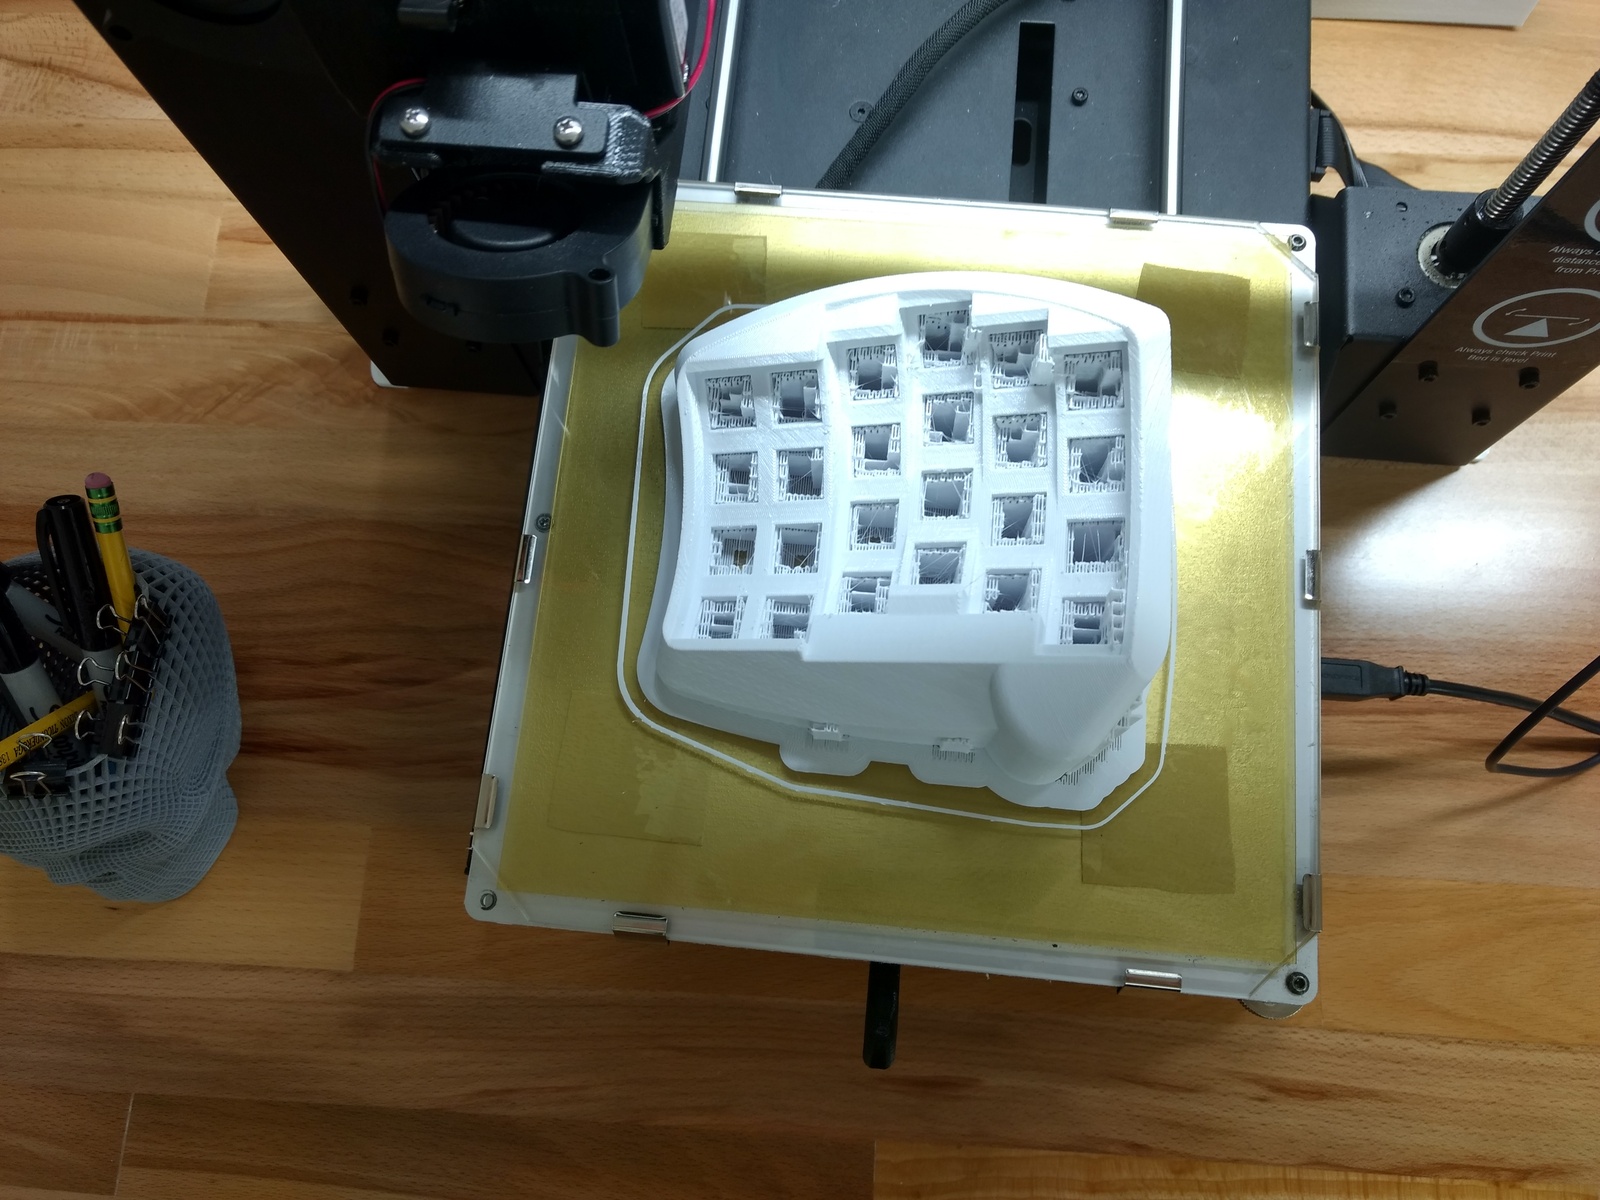
After so much time spent on design and testing, the final prints for this were relatively fast and uneventful.
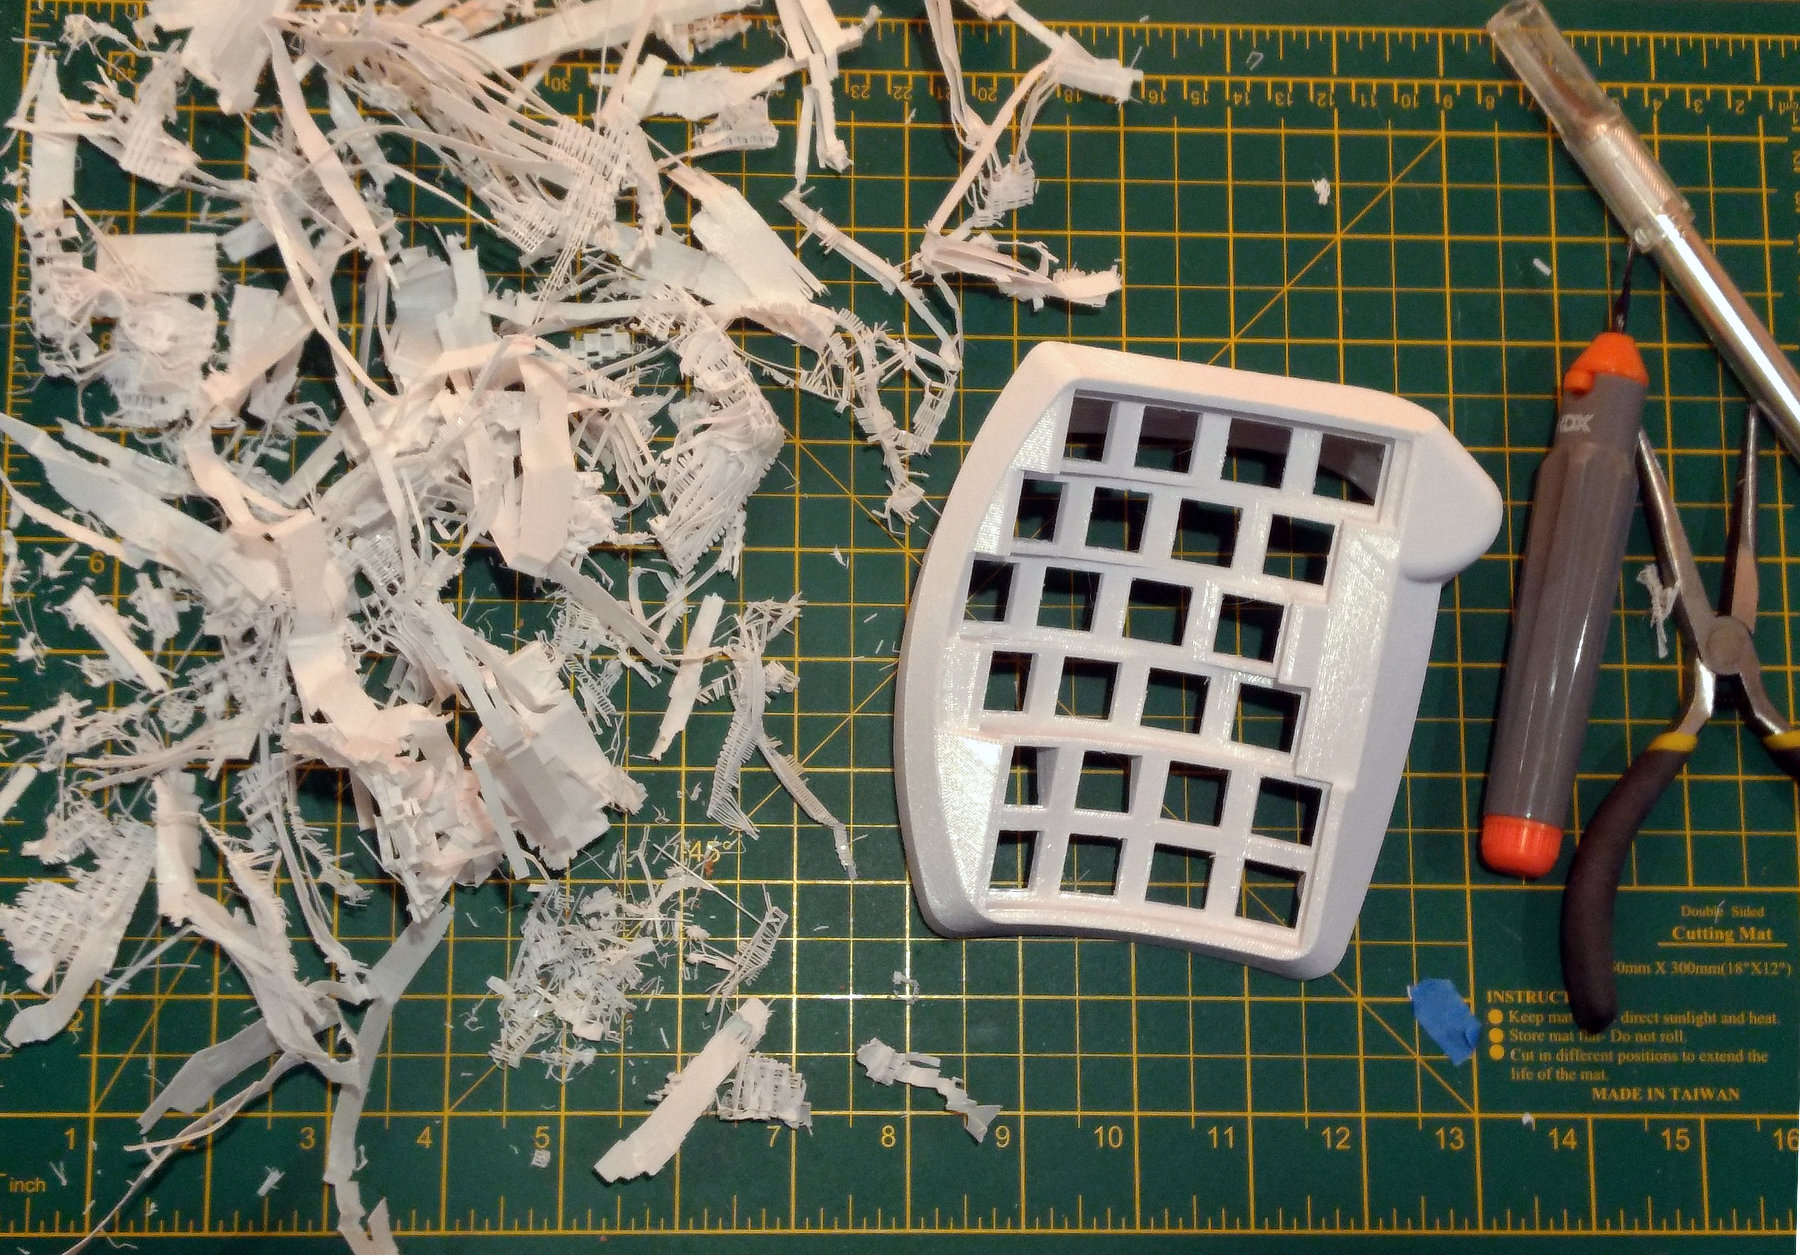
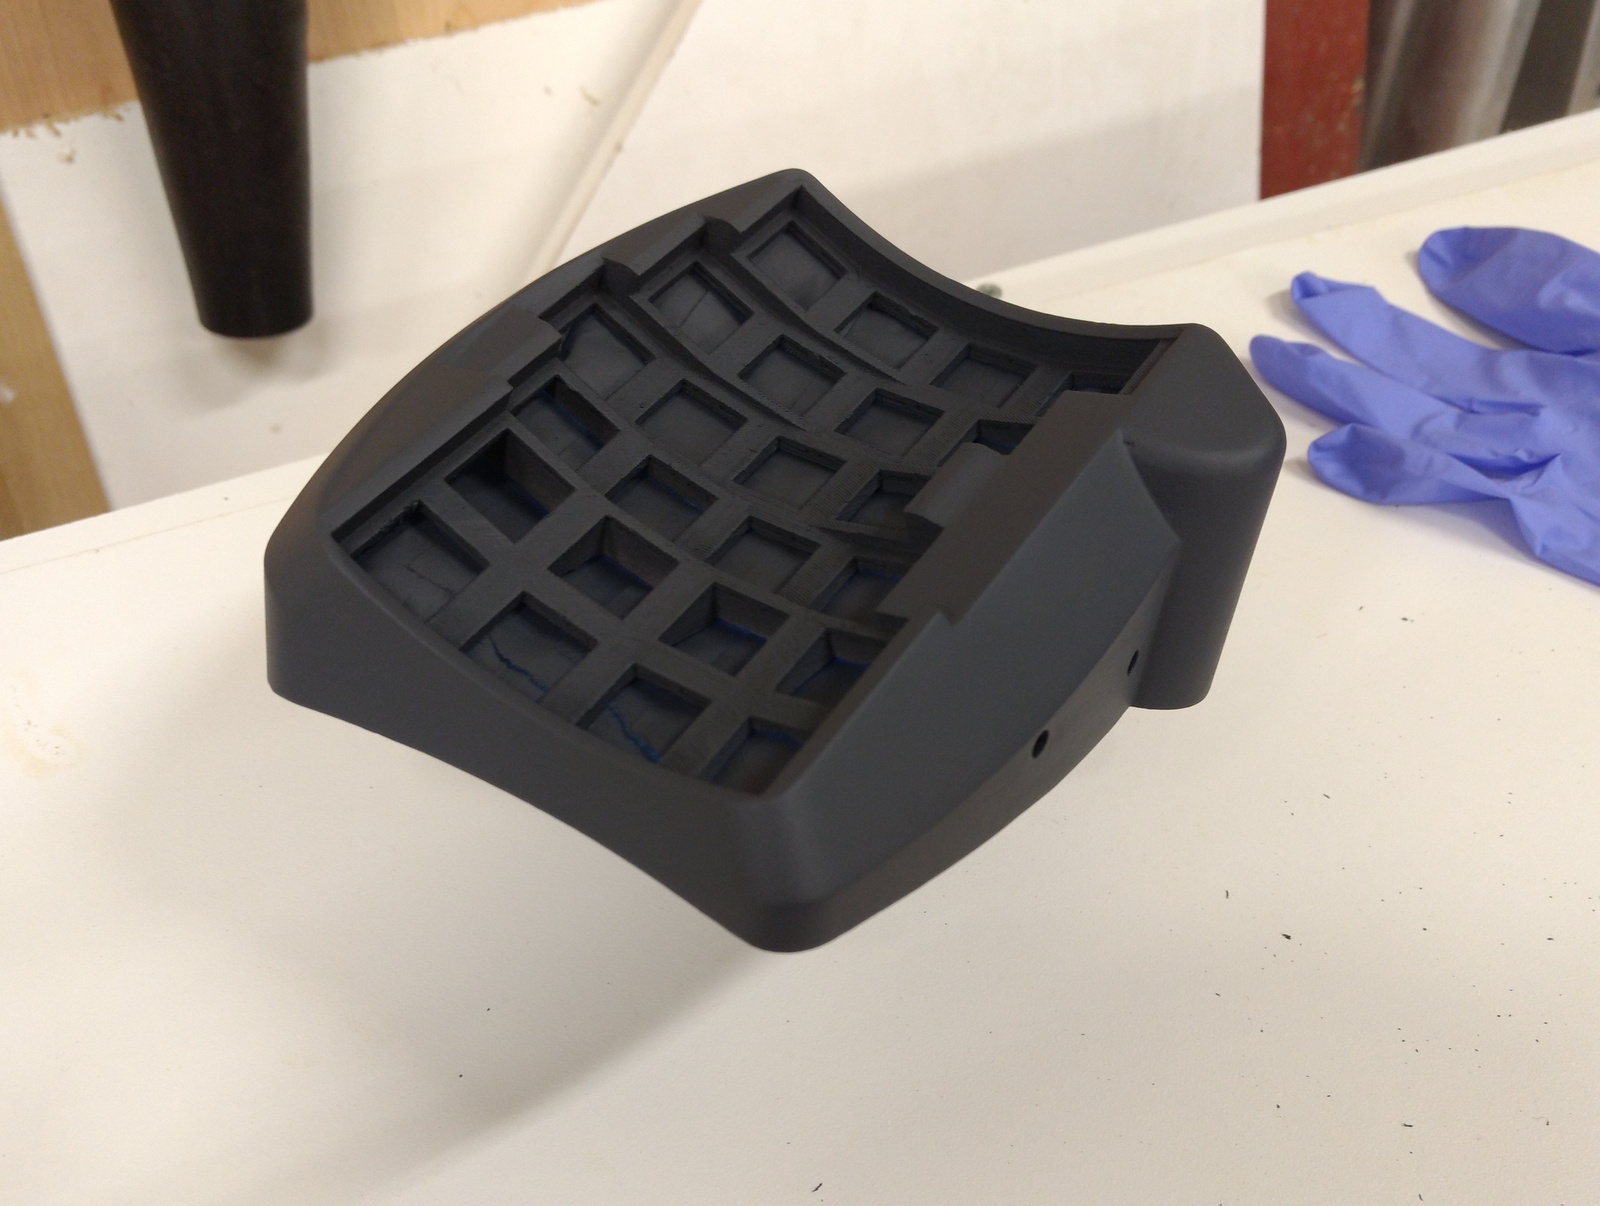
Printed at 0.2mm on a Maker Select Plus. Took about 15 hoursPostprocessing: Removing supports and cleanup. Sustained only minor injuriesUnderside of printed case with electronics mounted
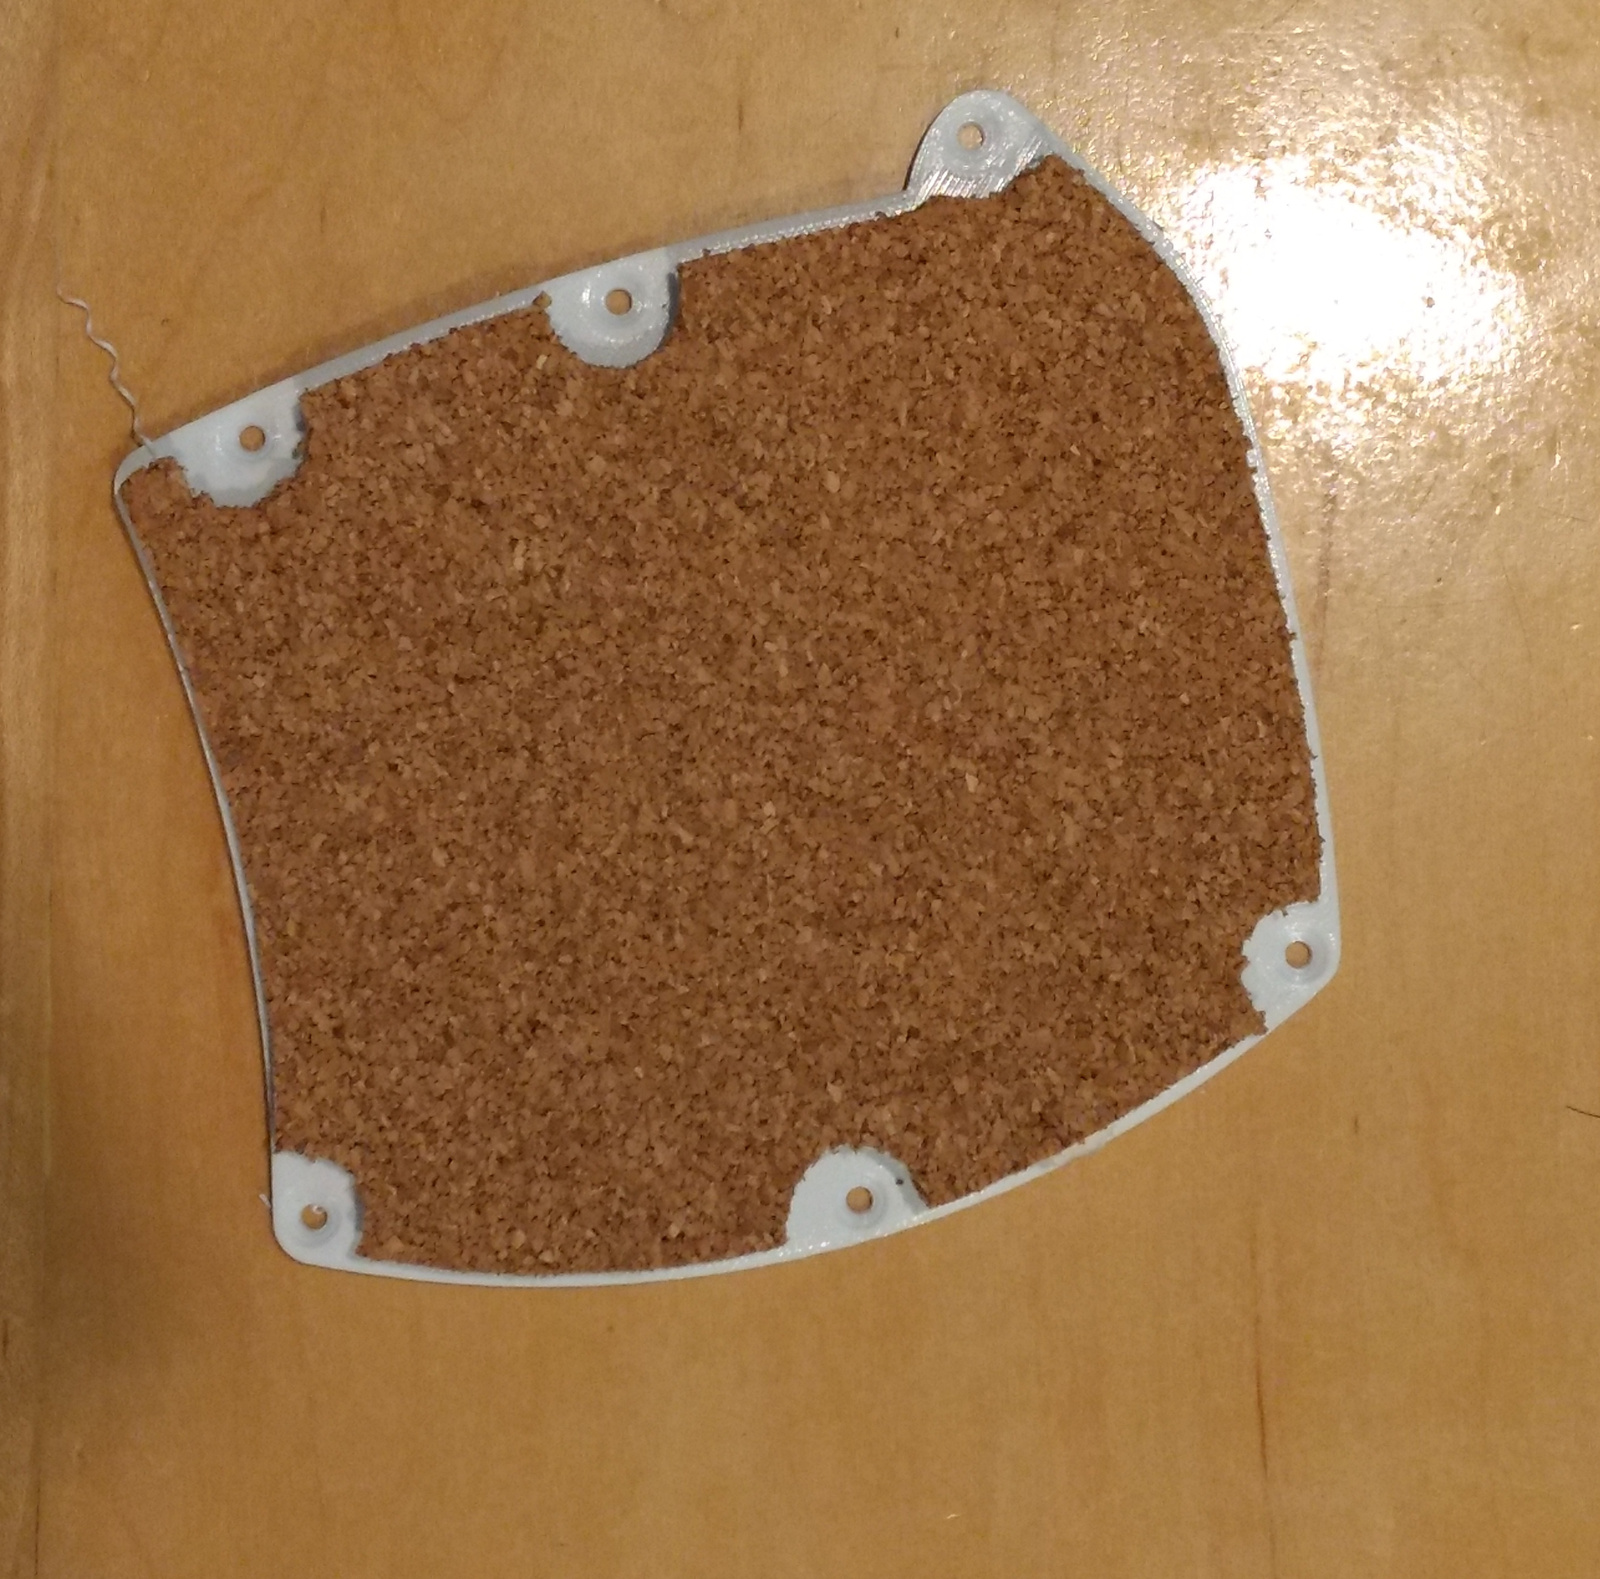
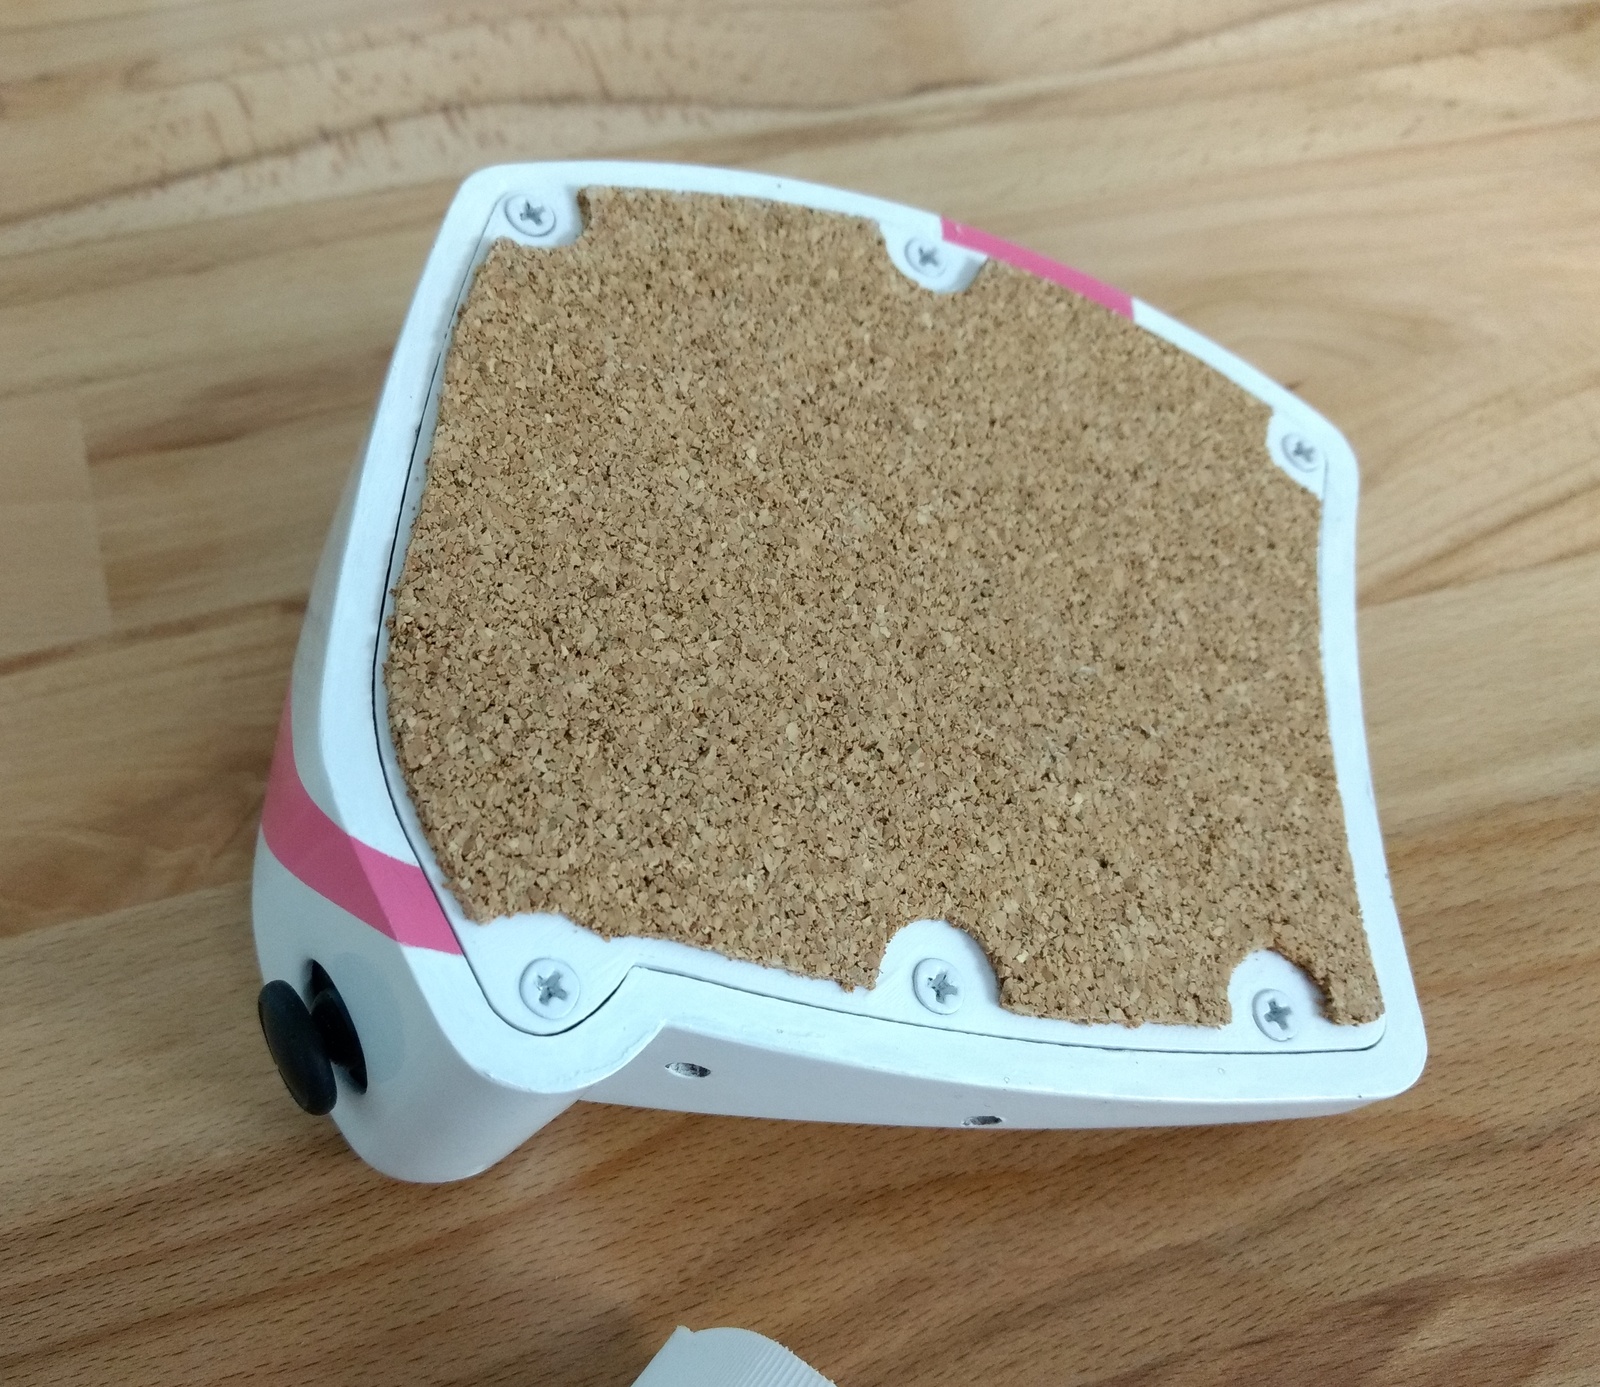
I printed the case lid (also in white) without painting, and attached some adhesive cork to the bottom. I’ll be using m3 threaded heat set inserts to fix the cover to the base.
Lid/cover with non-slip cork attached
Paint
I tried a few color schemes in the modeling environment, and ended up with something like this. Color options are a bit limited, because the key caps only come in black and an off white I didn’t like for this.
Paint mock up with masked stripe
To finish, I first sanded with 220 grit sandpaper to know down the layer lines and surface problems, and then sprayed with a filler primer.
After first coat of primer
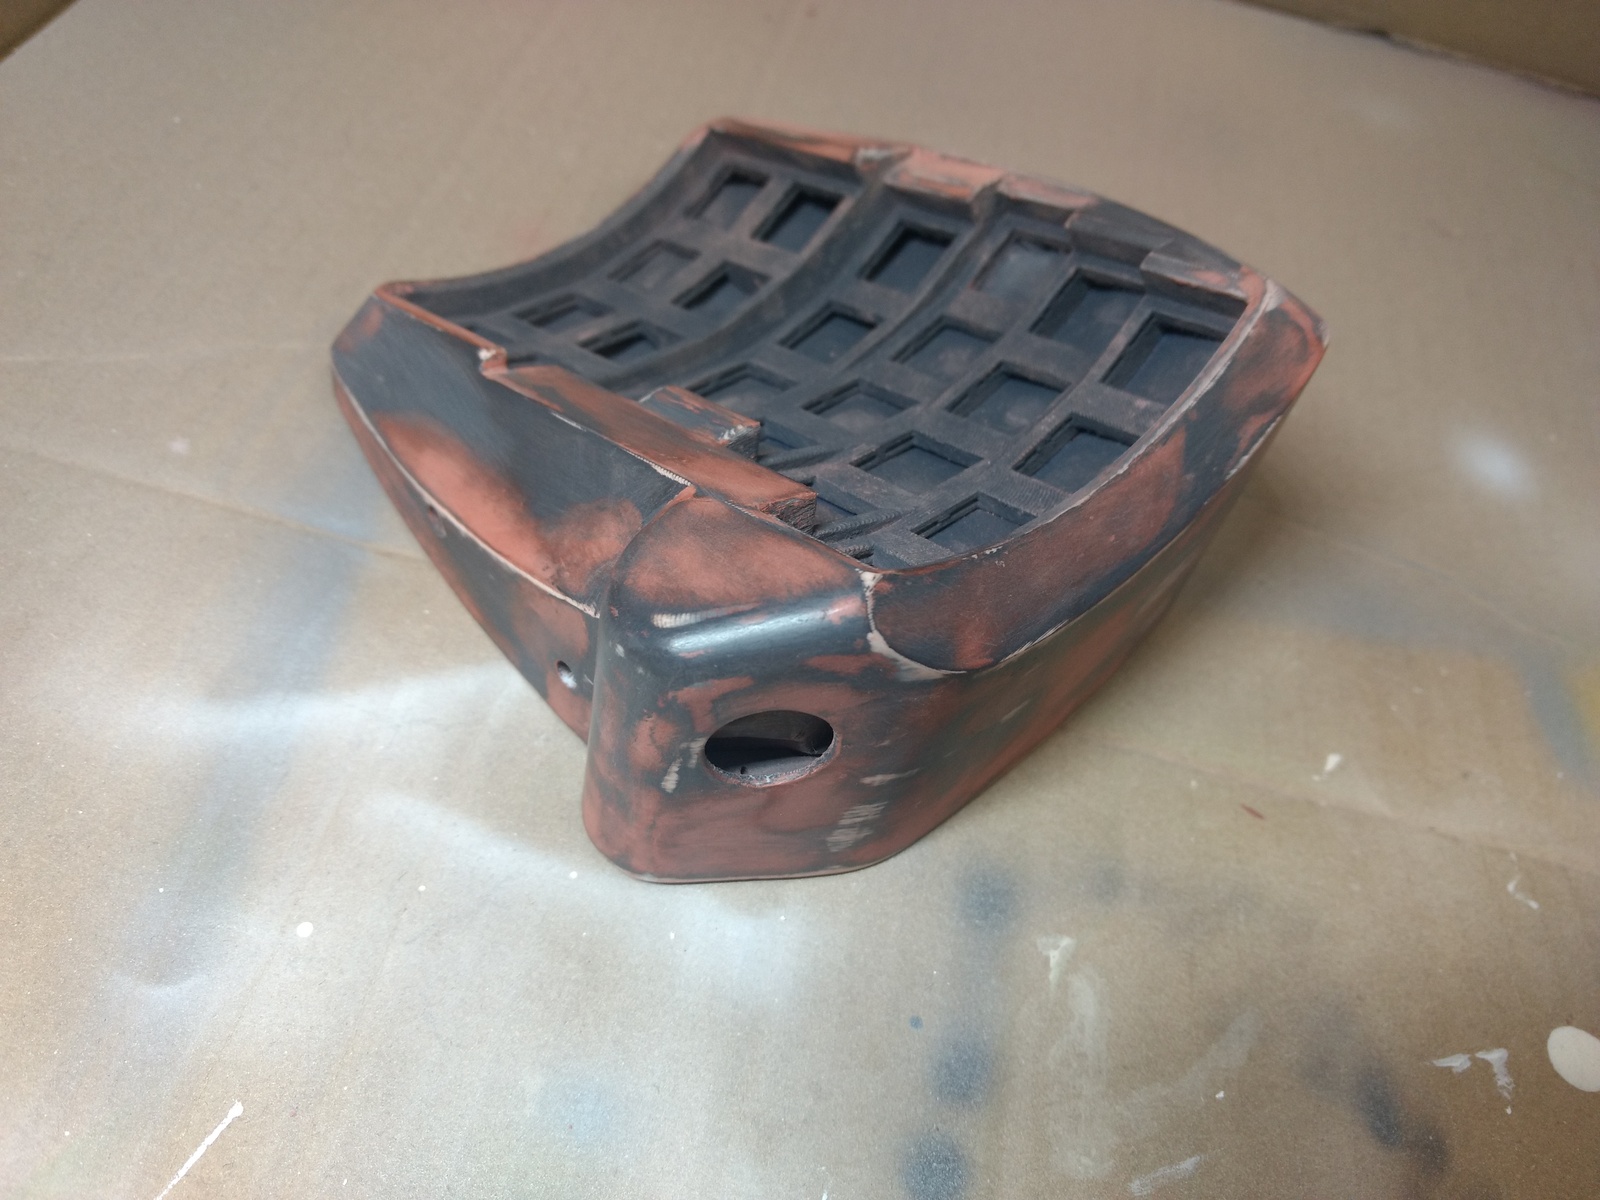
After priming, I used Bondo glazing putty, sanded (220 and 600 grit), primer, then putty and sanding again.
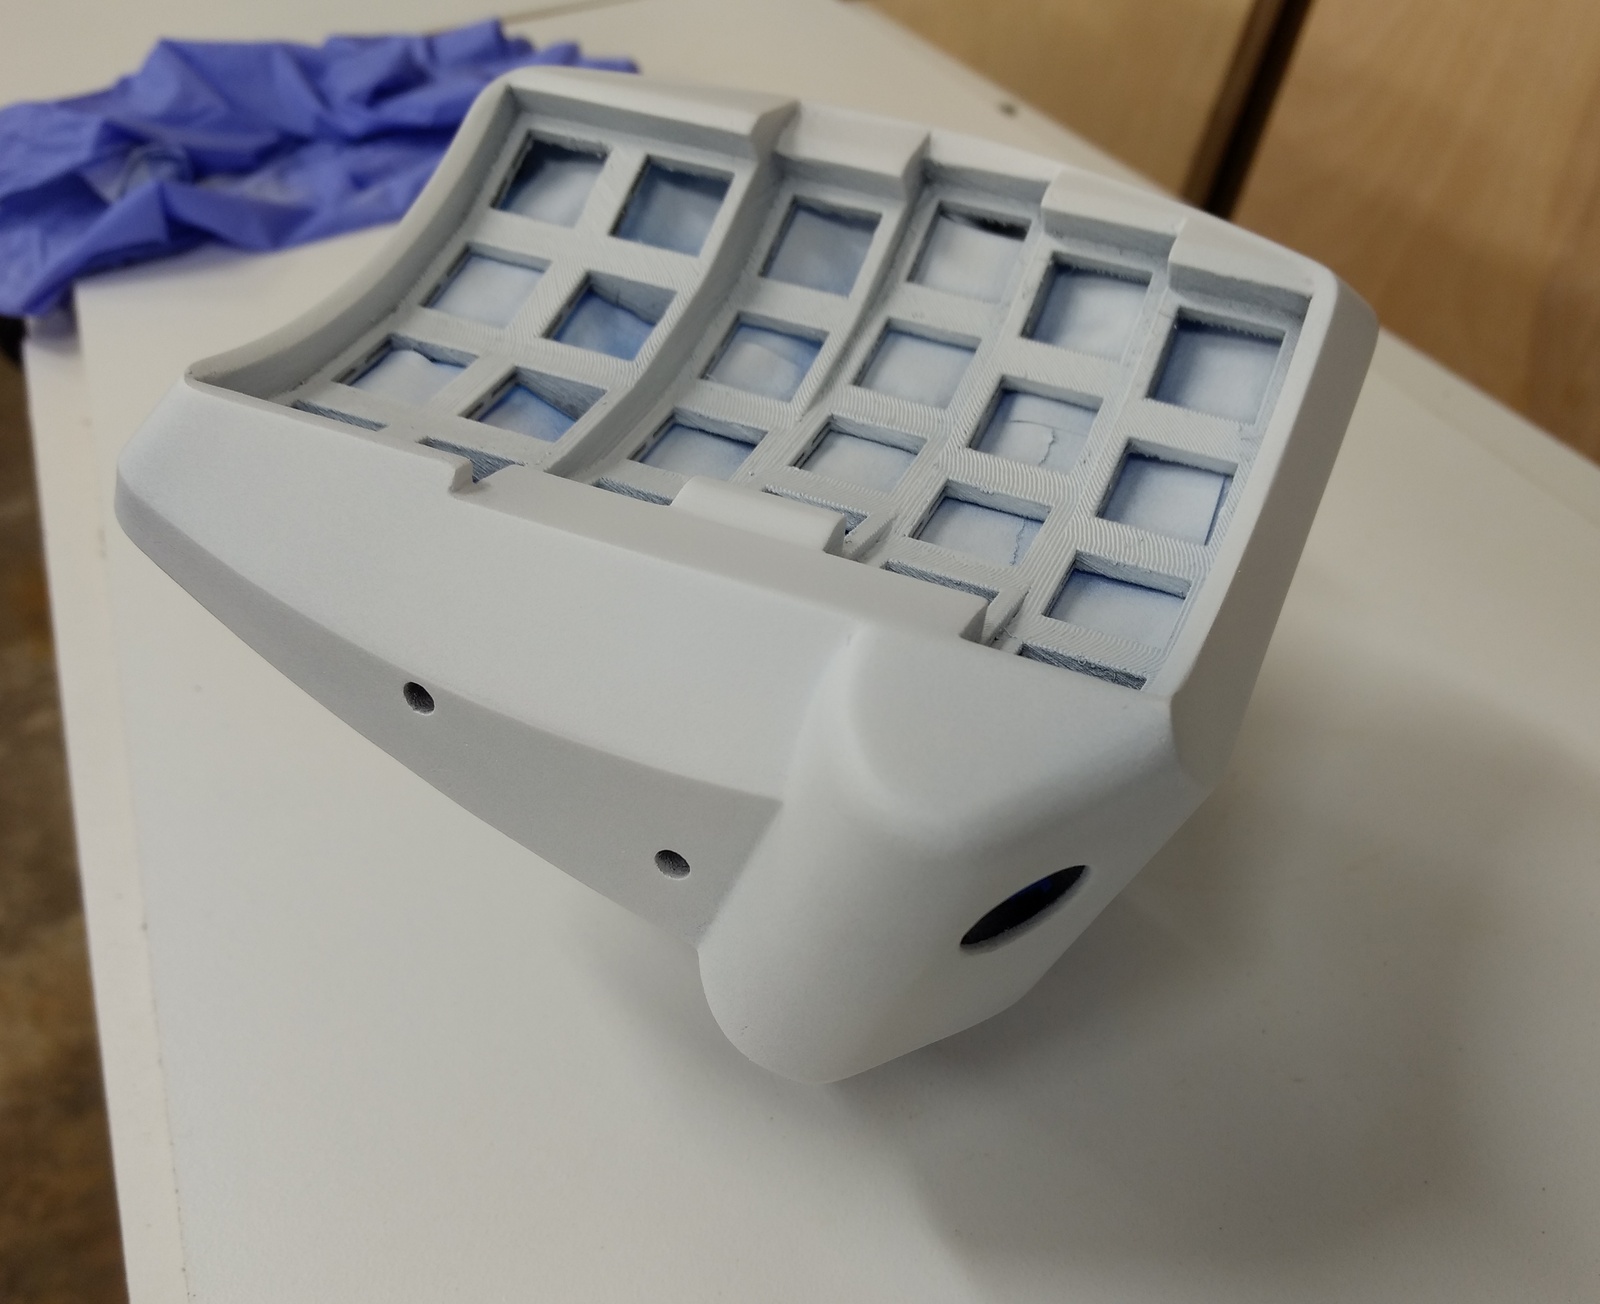
After two passes of primer and glazing putty, and lots of sandingPrimed white again
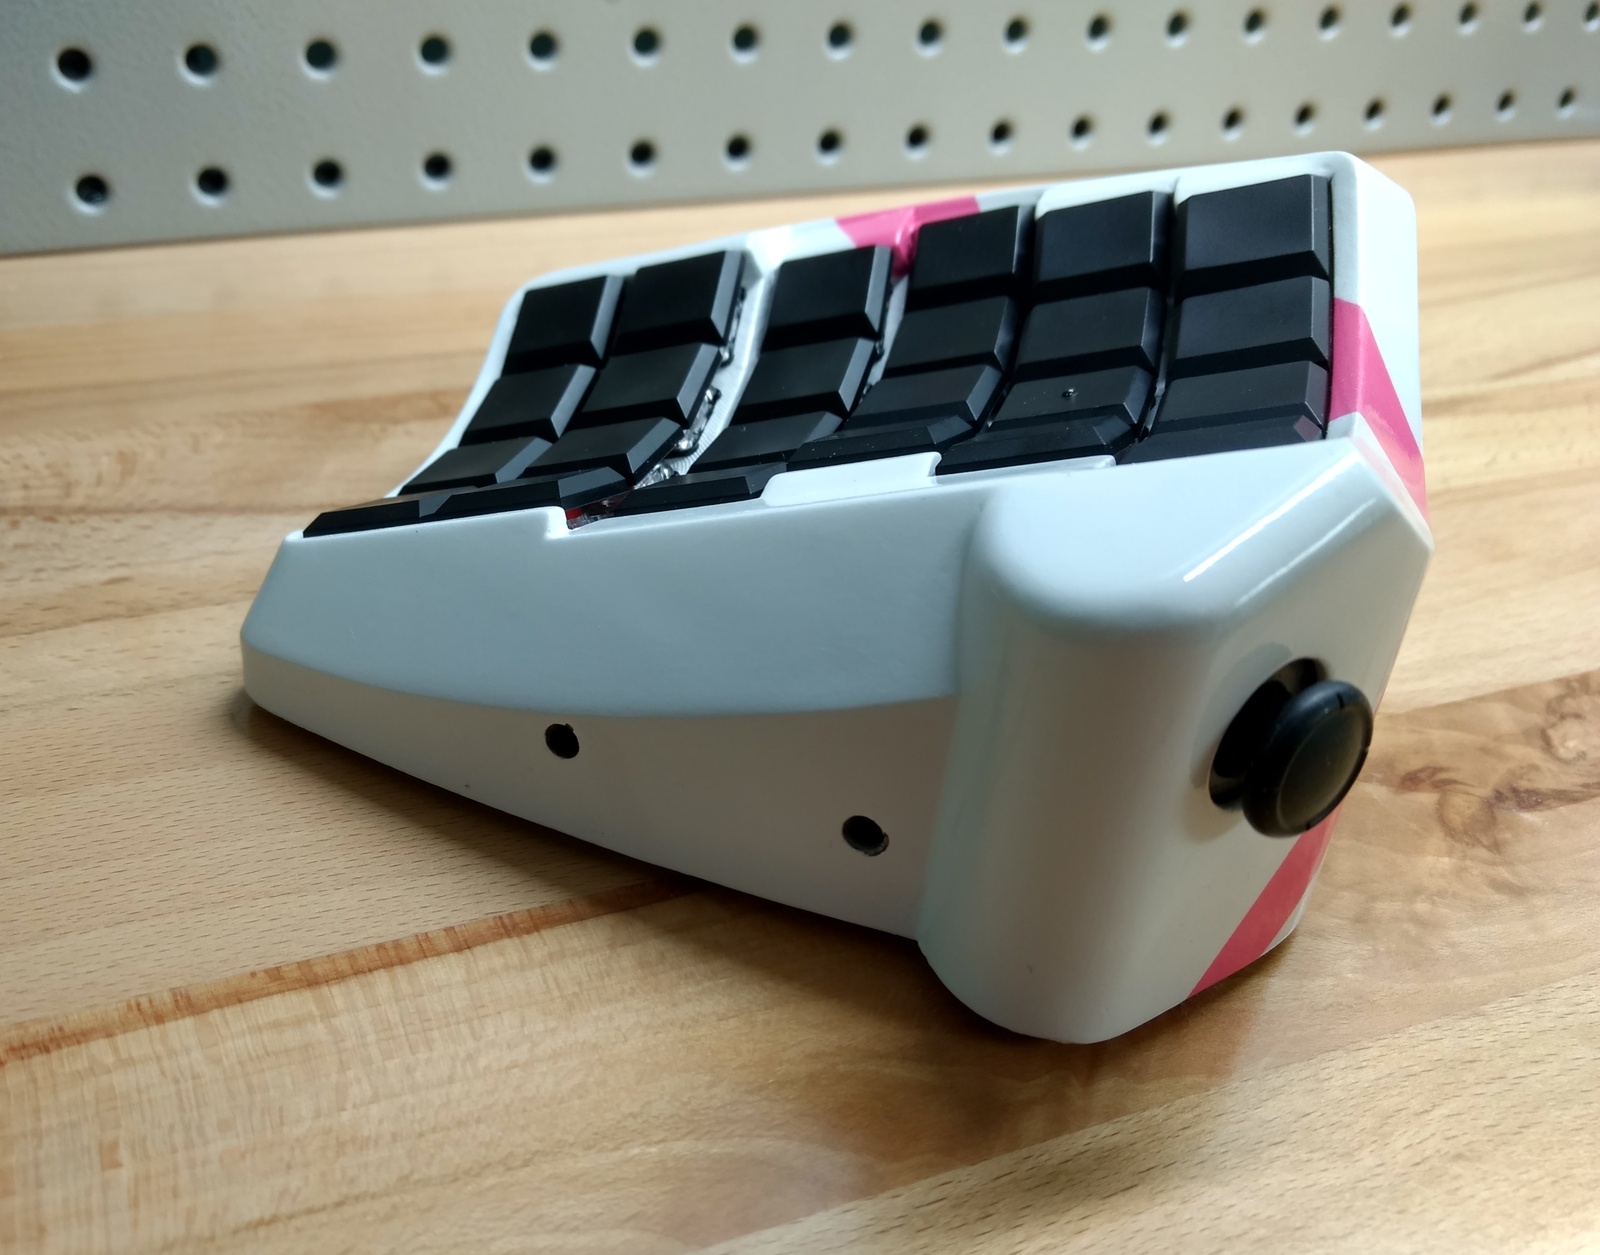
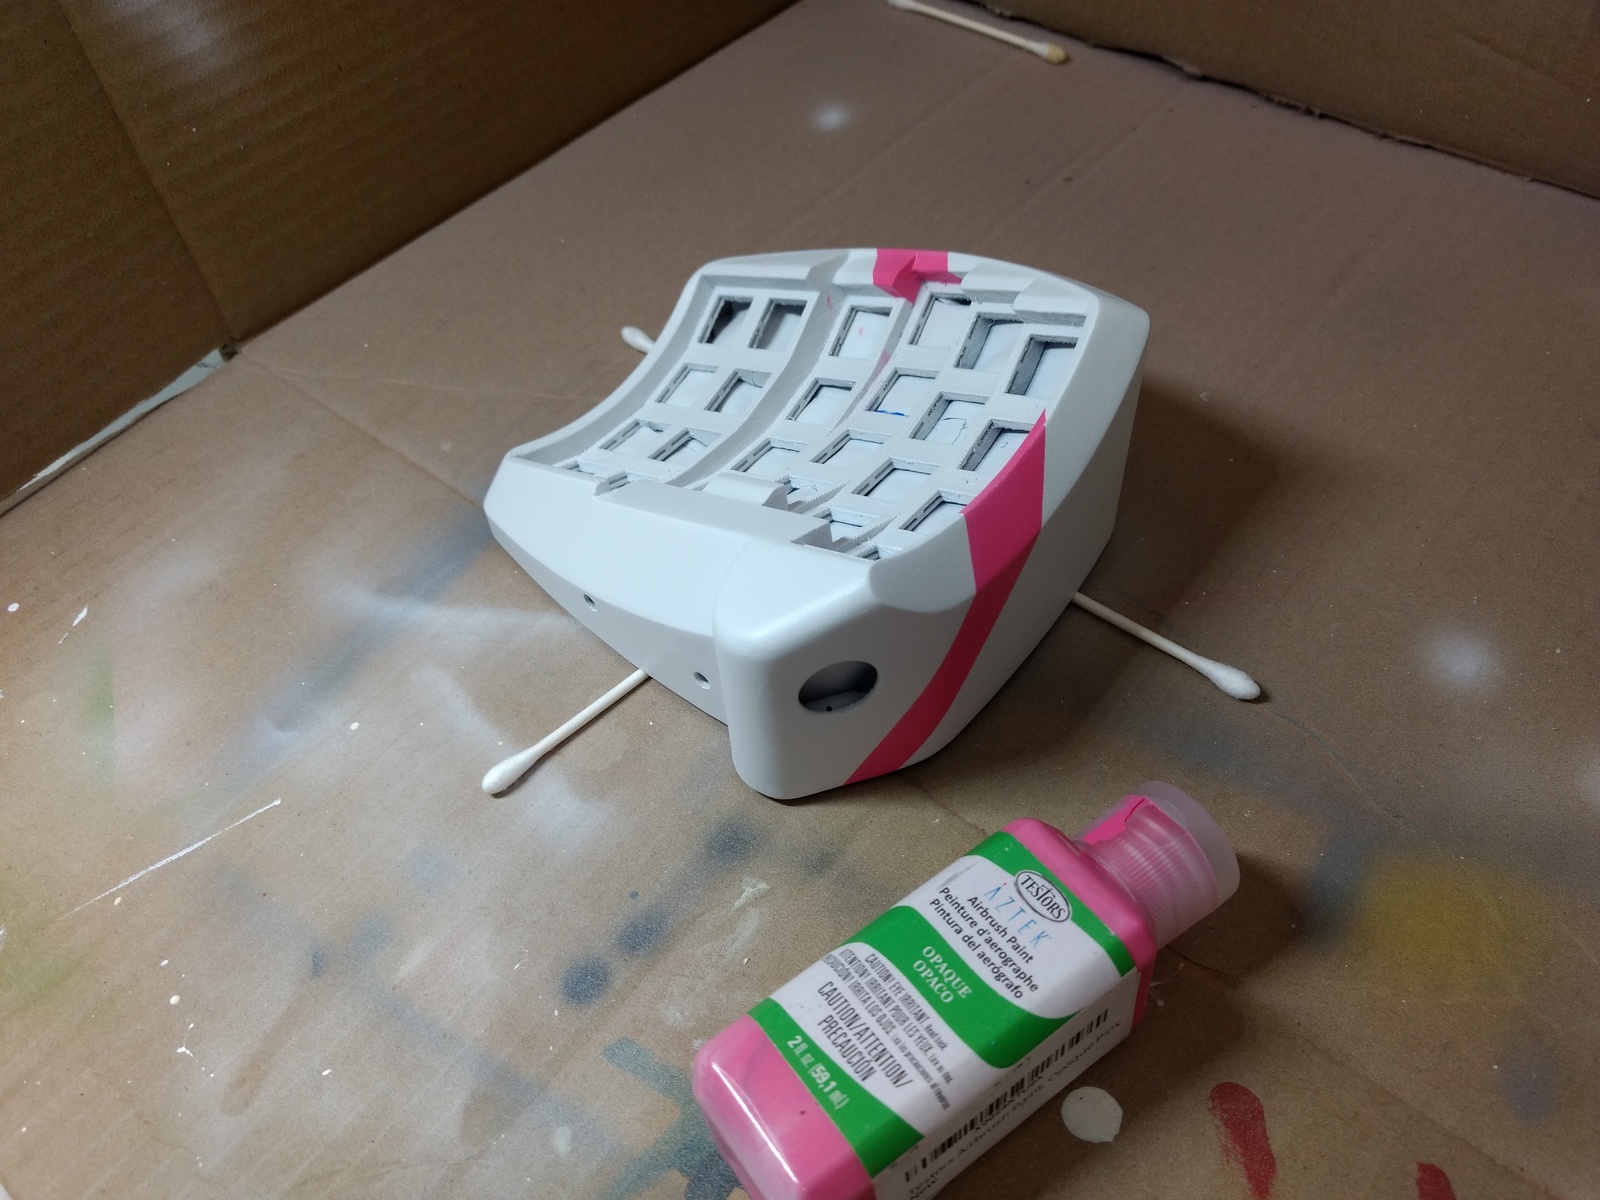
I masked off a stripe using thin vinyl tape, and airbrushed with Testor’s airbrush pink.
Case, with the last of the paint
After painting, I sprayed on 4 or 5 layers of gloss coat, then sanded a bunch of it back out with 1200 grit sandpaper to remove dust, fuzz, and bugs, then sprayed again.
Looks nice, but there’s a lot of orange peel, and speckling from oversprayed clear coat.
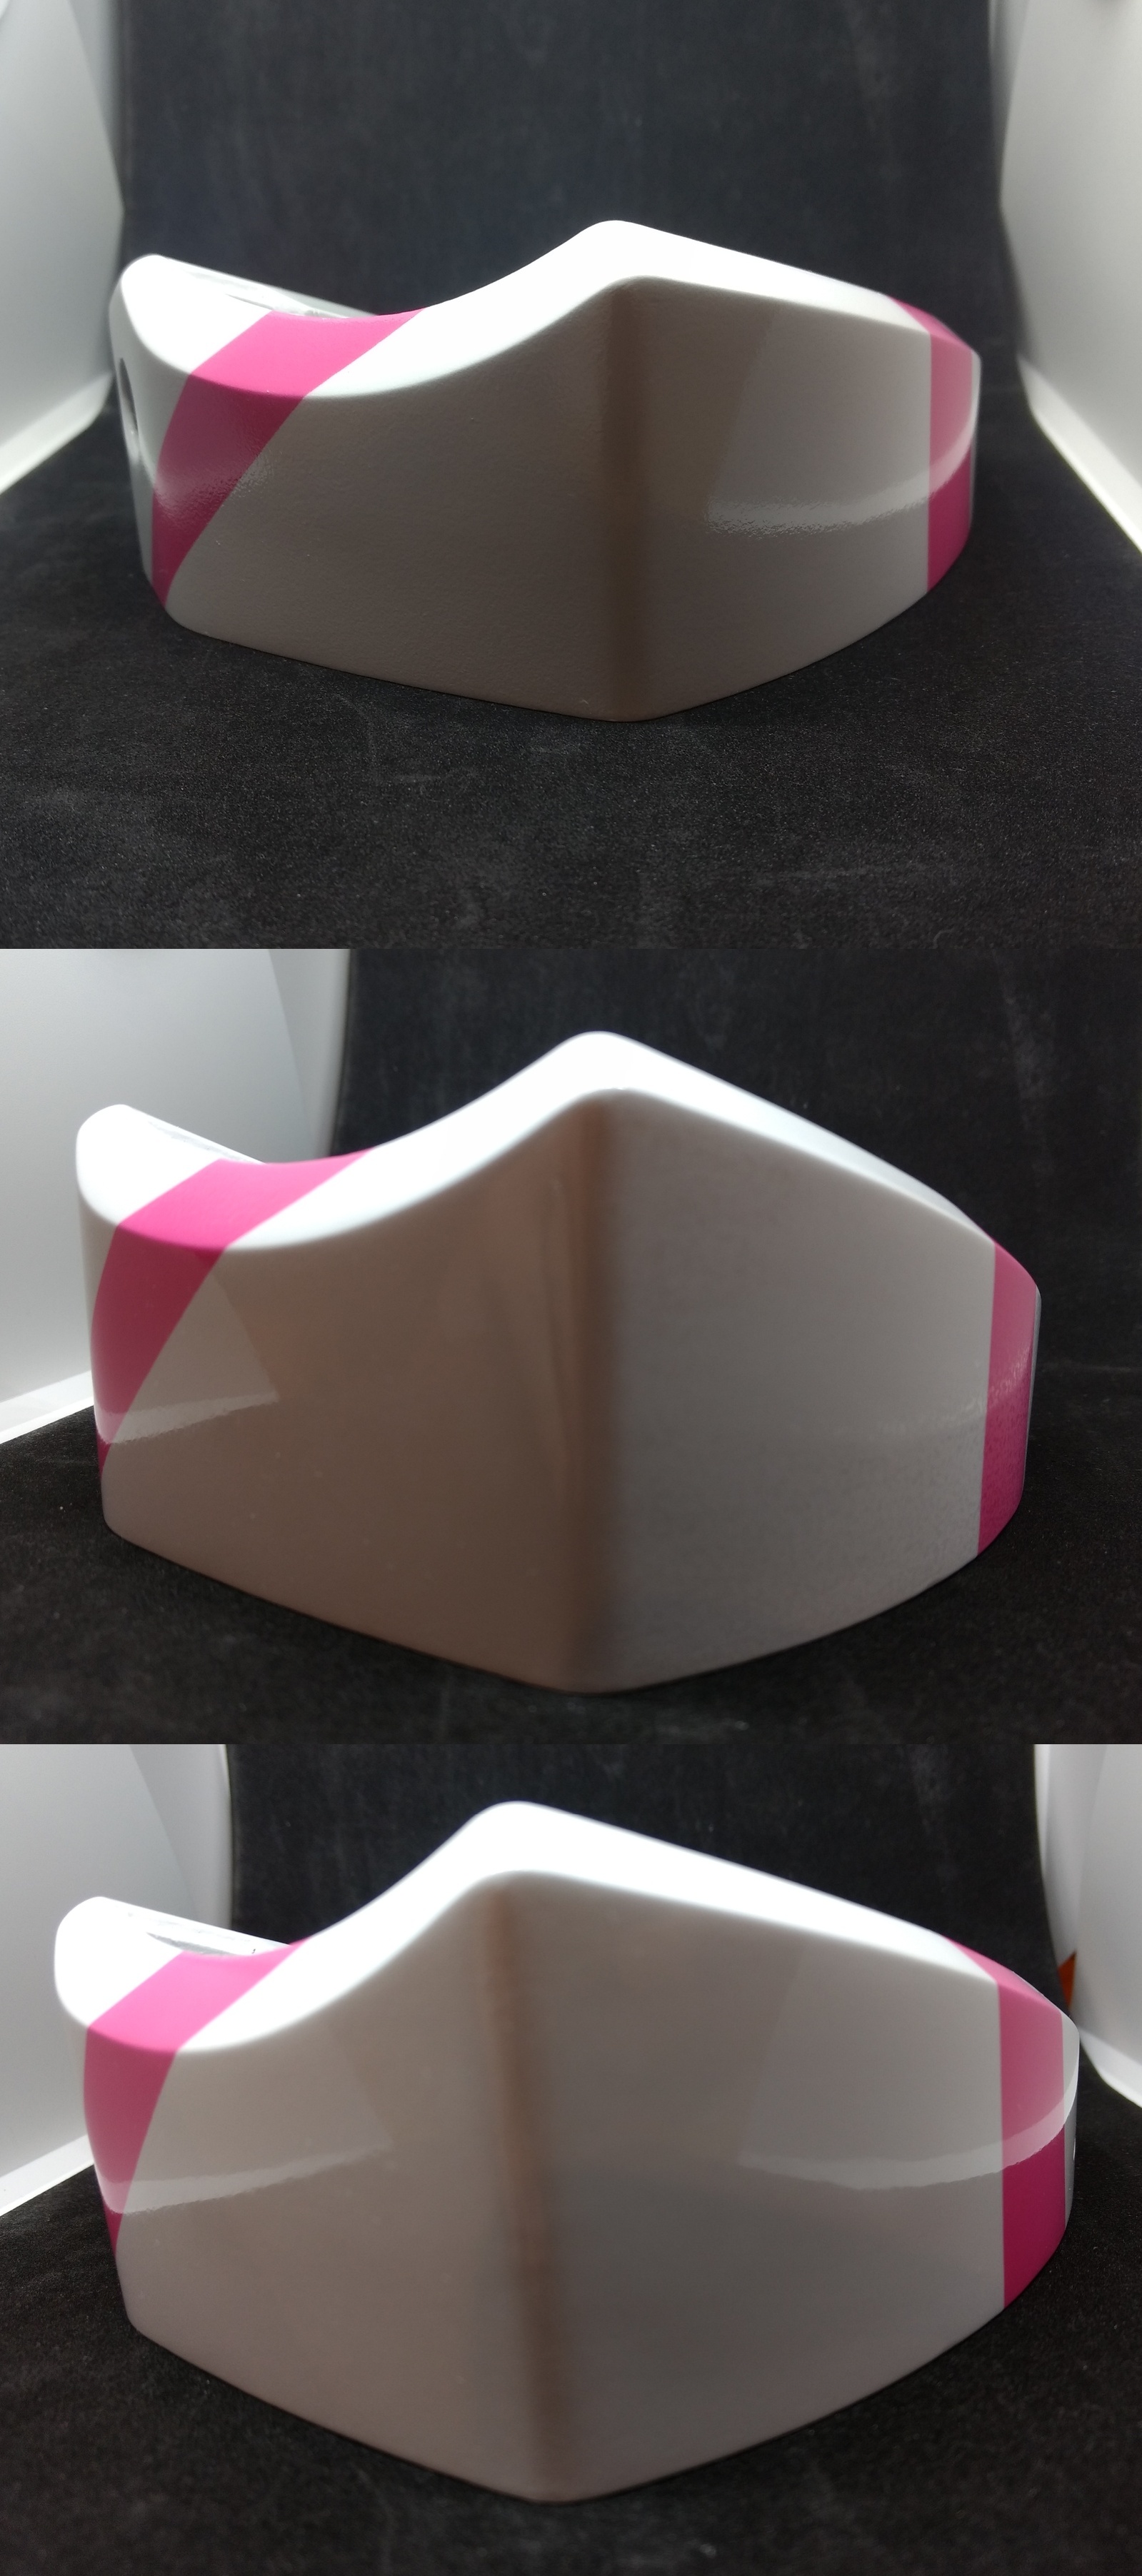
I did a very light scuff sand with 1200 grit in the worst areas, then buffed with rubbing compound followed by polishing compound.
Case: After clearcoat, after sanding, after polishing
Assembly
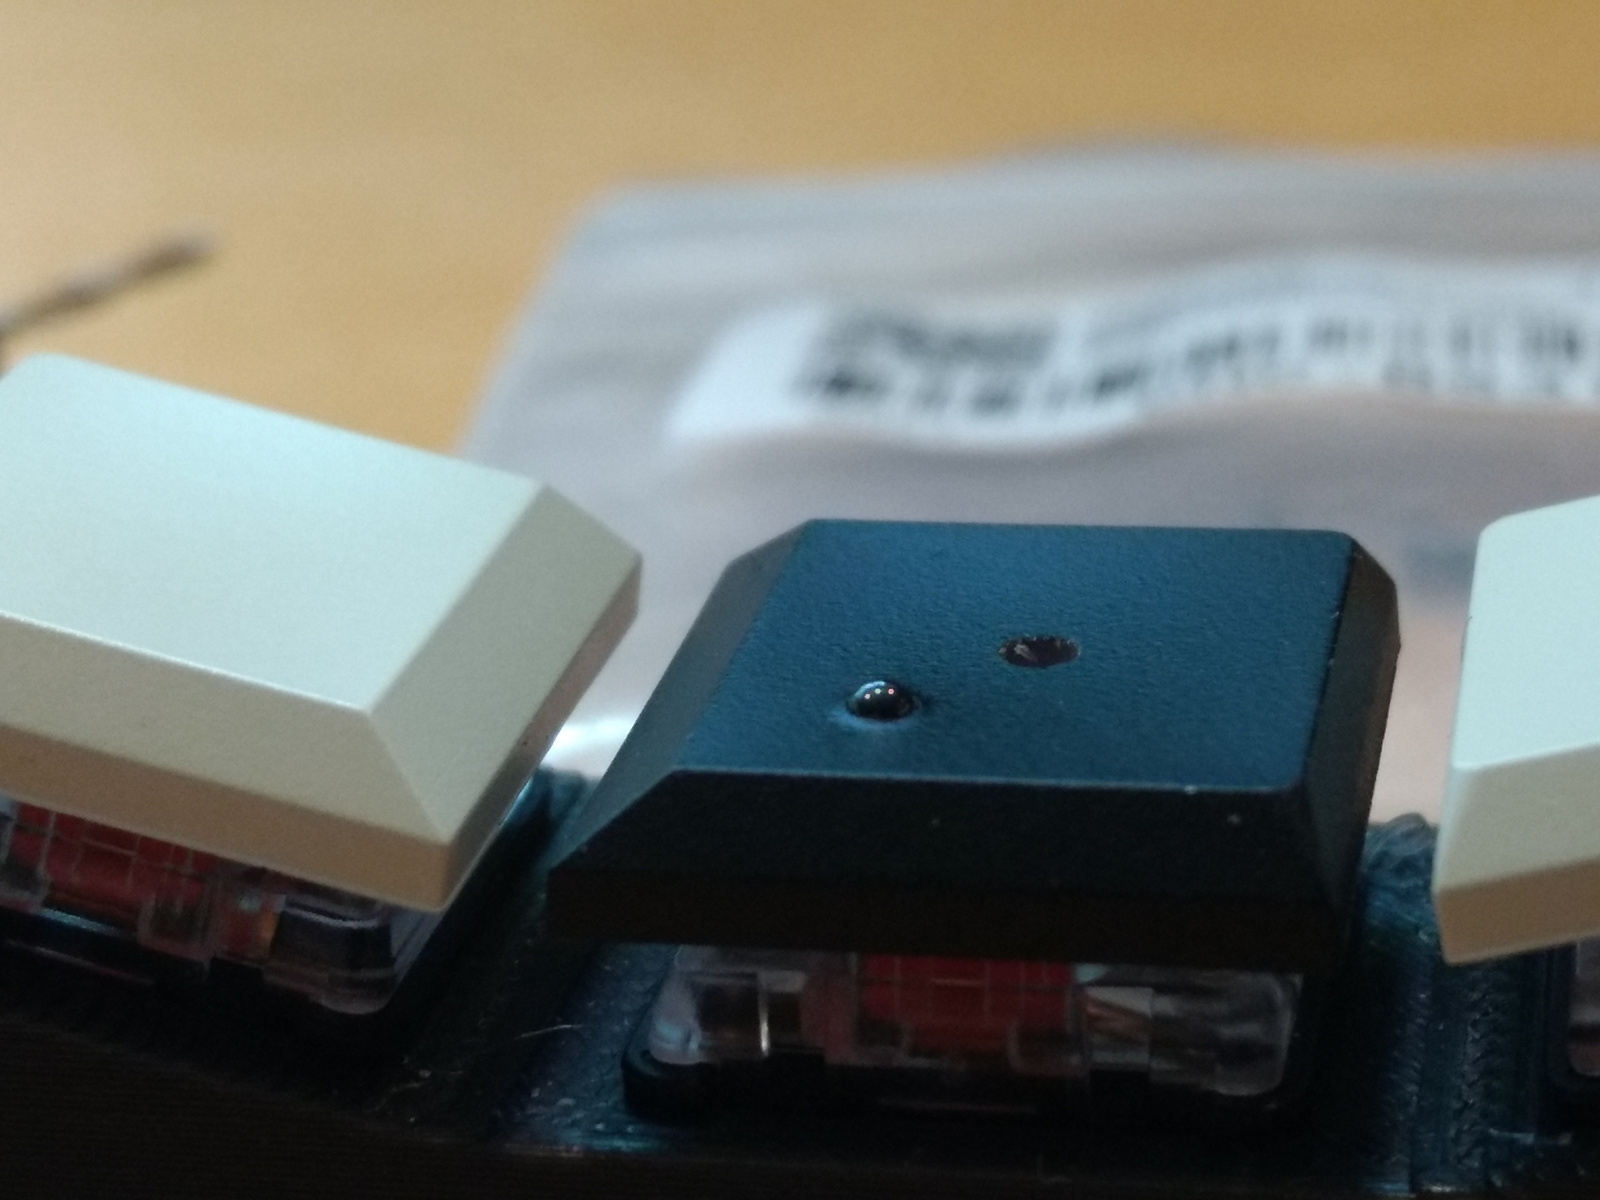
I added homing bumps by embedding 1.5mm ceramic bearings in the key caps. Shown in the picture is one hole, drilled slightly too large, and one a bit too small, with the bearing forced in (but no glue. Not sure whether the larger size would be better with glue, vs deforming the plastic somewhat to accomodate the bearing.
Key cap with embedded bearing
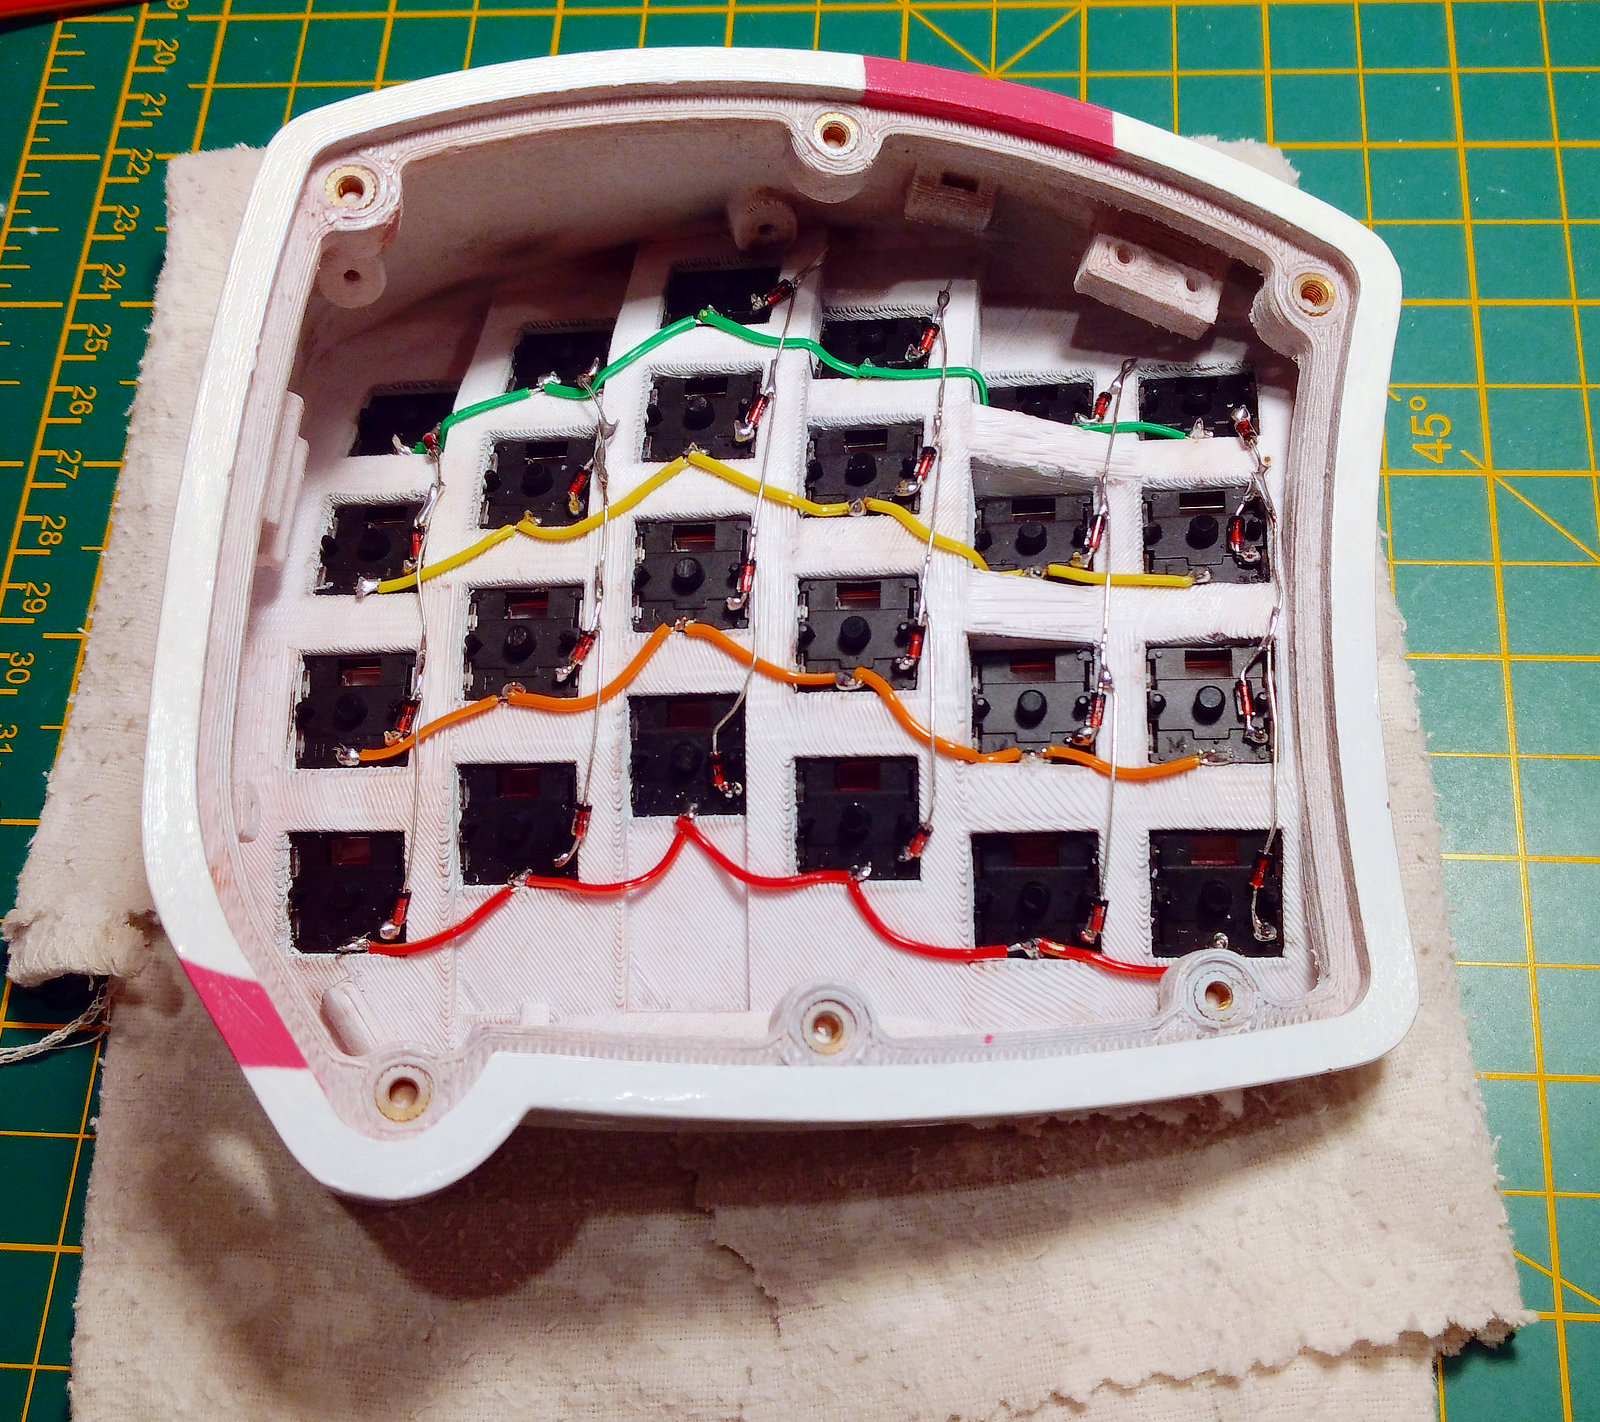
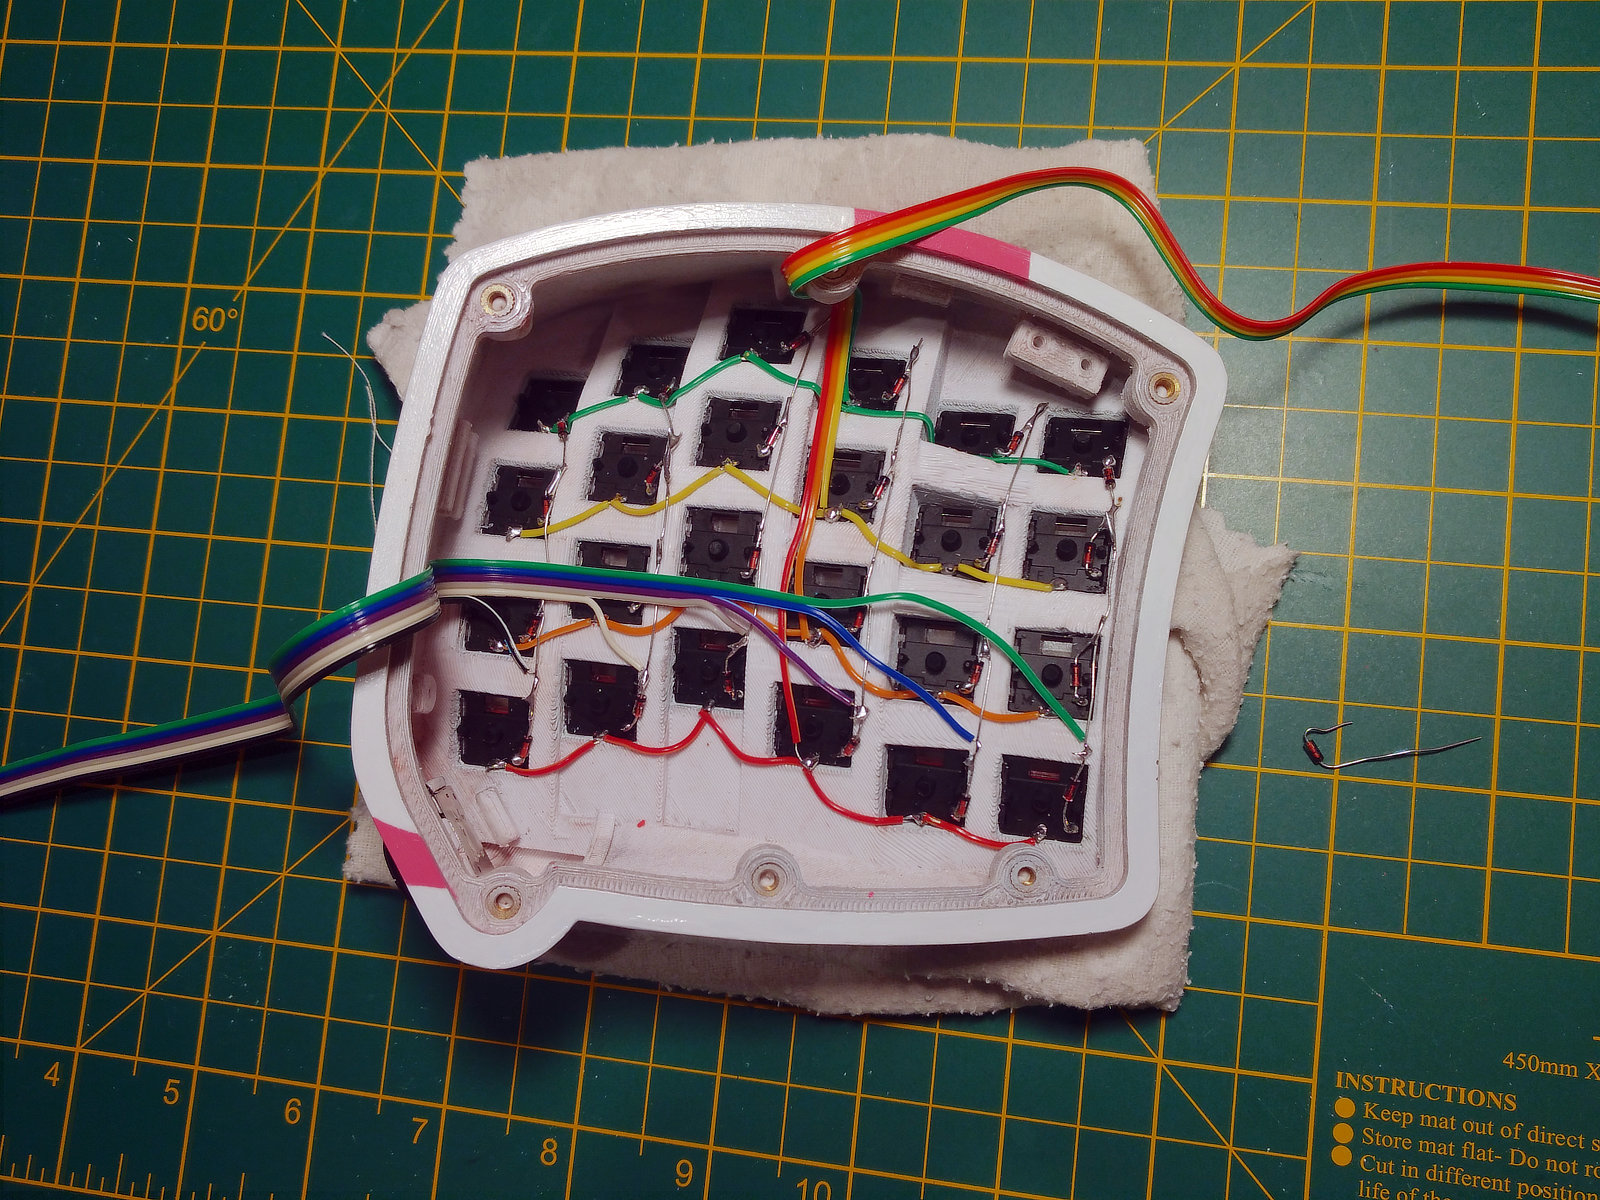
Once I’d run out of tasks to procrastinate with, I started on wiring, beginning with the key rows and columns.
I couldn’t find any thinner gauge wire locally, and the only solid core wire I had was 22awg, which was just too hard to bend around the column offsets in the case, and to fit into small spaces between the case walls and the switch pins. Instead, I used 28awg stranded wire from a roll of ribbon cable, stripped it in sections with self-adjusting wire strippers, and then made and tinned small loops in the stripped sections. Thinner, solid wire would have been faster and less cumbersome.
Key switches with columns and rows soldered upRows and columns connected to ribbon cableWired rows, columns, joystick, and usb breakout to microcontroller
I designed the wrist rest to use two m4 screws, with heat-set inserts in the rest. These ended up slightly misaligned when I inserted them,
so I can’t attach it yet. I’m planning to reprint the rest with a slot cut through the bottom to hold an m4 nut instead, which should be easier to align.
In practice, an attached rest, or a way to mount the keyboard firmly to the desk, is required. Even with the cork bottom, and adding extra weight,
the keypad shifts during use when pushing/pulling on the joystick, parallel to the desk.
I redesigned and reprinted the wrist rest so that it uses two captive m4 nuts, instead of heat-set inserts, and that seems to work fine.
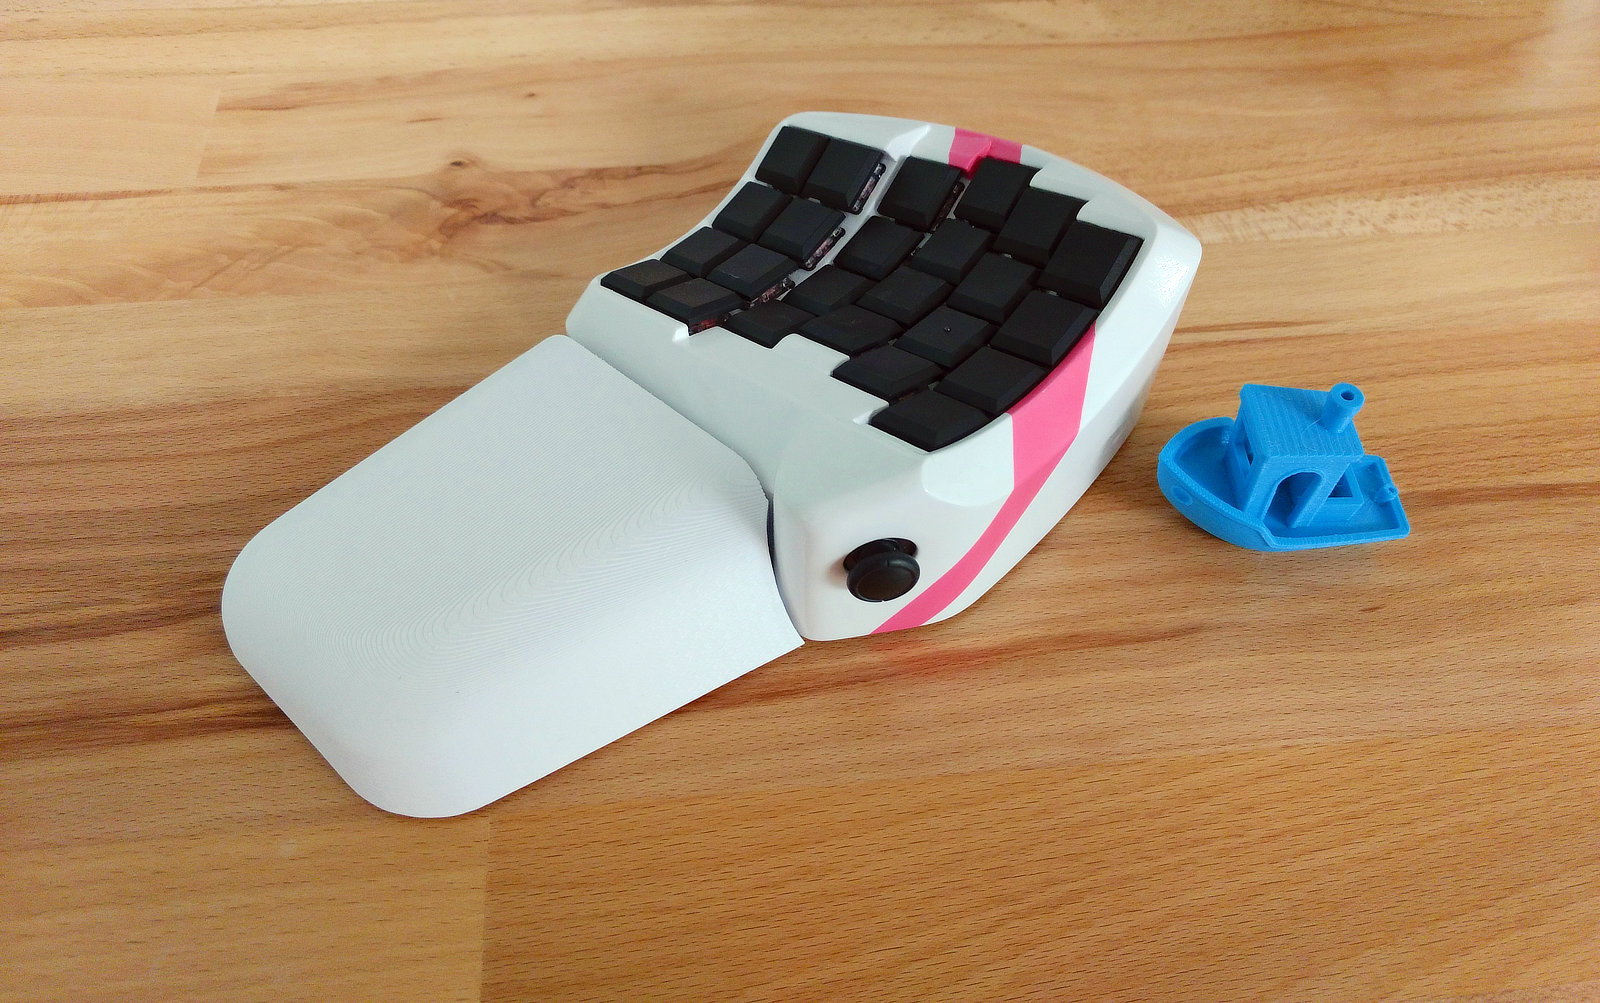
Done!
Completed case and temporary wrist restCase underside
Firmware
I had initially planned to use QMK as the keyboard firmware, using an as-yet unmerged pull request designed to add joystick support. However, newer ARM Teensy controllers (>=Teensy 3.2, Teensy LC) are not well supported by QMK. Though there are two example (single-key) keyboards which support ARM Teensys, only one is currently working. Additionally, the incoming patch does not yet support ARM controllers.
When and if that patch is merged, and ARM support is implemented, I’ll finish and release the QMK setup. In the mean time, I put together an Arduino sketch instead, starting from somebody else’s work here.
It has two modes, one with a standard QWERTY layout plus the joystick and a single joystick button, and the other where all of the keys are mapped to joystick buttons. This allows enough buttons to configure Steam’s controller configurator, allowing the controller to be used as an XInput device with broader game support.
I’ve been using Slic3r with my 3d printer, but wanted to be able to easily restore
old configuration values, compare changes and so forth.
Slic3r helpfully stores it’s configuration in INI files in the %appdata% directory,
so the below batch script launches slic3r, and periodically git commits the configuration directory.
While the batch is running, launching the batch again will start a new instance of Slic3r and then exit.
I had a system crash which caused Tabletop Simulator to write an incomplete/corrupted autosave file,
and lost about an hour of progress in a board game.
Here’s a powershell script to rotate multiple copies of TTS’s TS_AutoSave.json. I now just run this via scheduled tasks every few minutes (TTS autosaves every 5 minutes if autosave is enabled).
# Keep a series of backups of Tabletop Simulator's# autosave files in a subdirectory# The most recent five will keep the .json file extenion,# older ones will use .bak, so that Tabletop Simulator # will not try to process them.# Update with the path to your save directory$sourceDir="C:\Path\To\Documents\My Games\Tabletop Simulator\Saves"$destinationDir=$sourceDir+"\Autosave"# The total number of rotated backups to keep.# Tabletop simulator saves every 5 minutes, # so 15 files allows you to roll back to a save 75 minutes old$maxFiles=15$source=$sourceDir+"\TS_AutoSave.json"$destination=$destinationDir+"\00.json"if(!(Test-Path$destination)-or((Get-Item$source).LastWriteTime-gt(Get-Item$destination).LastWriteTime)){$files=Get-ChildItem-Path$destinationDir\*-include*.json,*.bakfor($counter=$files.count-1;$counter-ge0;$counter--){$filepath=$files[$counter].FullNameif($maxFiles-gt0-and$counter-gt($maxFiles-2)){Remove-Item-Path$filepath}else{$newName="$destinationDir\$(($counter+1).ToString('00')).json"if($counter-gt3){$newName+=".bak"}Rename-Item-Path$filepath-NewName$newName}}Copy-Item$source$destination}
If you’re running linux or linux-like, logrotate will do a better job, but the Windows implementations are incomplete.